Are you looking for a creative and cozy way to celebrate the winter season? This Winter Fun Block – Tutorial is the perfect way to combine your love for quilting with festive designs that capture the spirit of the colder months.
Whether you’re making a wall hanging, a table runner, or adding to a quilt, this tutorial will guide you through every step.
The Winter Fun Block – Tutorial is designed for quilters of all skill levels. It’s a delightful way to incorporate seasonal charm into your projects while learning or refining essential quilting techniques.
With simple instructions and practical tips, this tutorial ensures a stress-free and enjoyable crafting experience.
Get ready to embrace winter in style as we explore how to create a beautiful Winter Fun Block. Gather your supplies, warm up your creativity, and let’s dive into this fun quilting adventure.
1. Materials Needed for the Winter Fun Block
Before starting your Winter Fun Block – Tutorial, ensure you have the right materials on hand. Proper preparation makes the process smoother and more enjoyable.
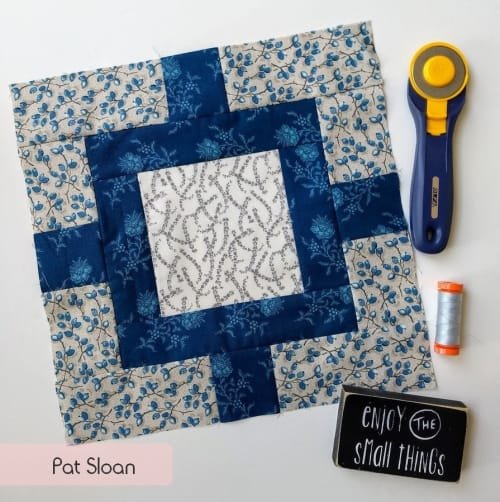
Start with fabric. Choose winter-themed prints or colors such as blues, whites, or festive patterns. Cotton fabric is a popular choice for quilting due to its durability and ease of use.
A rotary cutter and cutting mat are essential for precise cuts. These tools ensure your fabric pieces are uniform, which is crucial for a well-assembled block.
Gather a quilting ruler. This tool helps measure and cut fabric accurately, especially for straight lines and geometric shapes.
Use quality thread that matches or complements your fabric. Cotton thread is a reliable option for quilting projects.
You’ll also need a sewing machine with a quarter-inch foot. This ensures consistent seam allowances, which are vital for piecing quilt blocks.
Finally, have a hot iron and pressing board ready. Pressing your seams as you go keeps your block flat and professional-looking.
Once you’ve gathered all your materials, you’re ready to start creating your Winter Fun Block.
2. Step-by-Step Instructions for the Winter Fun Block
Follow these steps in the Winter Fun Block – Tutorial to create a stunning seasonal quilt block:
Start by cutting your fabric. For this tutorial, cut squares, rectangles, or triangles according to the specific design you want to achieve. This is the foundation of your block.
Lay out your fabric pieces in the desired pattern before sewing. Arranging them beforehand helps visualize the final design and ensures color balance.
Sew the pieces together using a quarter-inch seam allowance. Begin with smaller units, such as pairs of squares, before combining them into larger sections.
Press each seam after sewing. Use a hot iron to press seams open or to one side, depending on your preference. This step prevents bulk and keeps your block flat.
Continue assembling your block by sewing the sections together. Pay attention to alignment to ensure the edges and corners match perfectly.
Finish your block by giving it a final press. Trim any excess fabric or uneven edges to ensure the block is square and ready to be joined with other blocks.
These steps make the Winter Fun Block – Tutorial accessible even for beginners while offering room for creativity and personalization.
3. Tips for Success with the Winter Fun Block
Creating a quilt block can be both enjoyable and challenging. Here are some tips to make the most of your Winter Fun Block – Tutorial:
Take your time cutting fabric. Precision is key to ensuring the pieces fit together correctly, so double-check your measurements before making each cut.
Use pins or clips to hold pieces together while sewing. This prevents shifting and helps maintain alignment, especially for complex patterns.
Experiment with fabric placement before sewing. Try different arrangements until you find the one that feels just right.
Practice sewing a consistent quarter-inch seam. This is crucial for achieving accurate dimensions and avoiding gaps or overlaps.
Don’t skip pressing your seams. A well-pressed block is easier to sew and has a cleaner, more polished appearance.
Lastly, enjoy the process! Quilting is an art form, and the Winter Fun Block is a wonderful way to express your creativity.
By keeping these tips in mind, your winter quilting project is sure to be a success.
4. Creative Uses for Your Winter Fun Block
Once you’ve completed your Winter Fun Block, the possibilities are endless for how to use it:
Combine multiple blocks into a festive quilt. This creates a cozy and seasonal blanket that’s perfect for the winter months.
Use the block as a centerpiece for a table runner. Add borders and additional blocks to create a stunning decor piece.
Turn your block into a decorative pillow. A simple backing and stuffing transform it into a cozy accent for your home.
Create a wall hanging. Showcase your Winter Fun Block as art by adding a backing and hanging sleeve.
Incorporate the block into a tote bag. This practical project is both functional and stylish, showcasing your quilting skills.
Use it as a standalone project. Frame the block or use it as a small mat to brighten up any space.
With a bit of creativity, the Winter Fun Block becomes a versatile addition to your seasonal projects.
FAQ
Q1: What size should my Winter Fun Block be?
The size depends on your project. Common block sizes are 12×12 or 10×10 inches, but you can adjust the dimensions to suit your needs.
Q2: Can I hand-sew the Winter Fun Block instead of using a machine?
Yes, you can hand-sew the block using small, even stitches. However, it may take longer and require more precision.
Q3: Do I need to pre-wash my fabric?
Pre-washing fabric is recommended to prevent shrinkage and color bleeding. However, some quilters prefer working with unwashed fabric for its stiffness.
Q4: How do I ensure my block is square?
Use a quilting ruler to measure and trim your block. Check each corner to ensure it’s at a 90-degree angle.
Q5: What if my seams don’t match perfectly?
Don’t stress! Slight imperfections add character to your quilt. Practice makes perfect, so keep trying.
Q6: Can I mix different fabrics in one block?
Absolutely! Mixing textures and patterns adds interest and depth to your block. Just ensure the fabrics are similar in weight and quality.
Join our VIP broadcast list and gain access to exclusive patterns, all for free. As a VIP member, you’ll receive the best patterns daily, delivered directly to your device. ✨📱 It’s a unique opportunity to stay up-to-date with the latest trends and designs, curated just for you. Don’t miss out on enhancing your projects and discovering new inspirations with the best patterns every day! 🎨🔝
Conclusion
This Winter Fun Block – Tutorial is a delightful way to embrace the season and explore your quilting creativity. With the right materials, step-by-step guidance, and helpful tips, you can create a block that’s both beautiful and versatile.
We’d love to hear from you! Share your thoughts on this tutorial and let us know how you plan to use your Winter Fun Block. Your feedback and suggestions inspire us to keep creating valuable content for quilting enthusiasts like you. Happy quilting!

