Fabric Heart Coaster Pattern projects are a wonderful way to combine creativity, practicality, and beginner-friendly quilting techniques into one beautiful handmade item. Whether you are new to sewing or already enjoy making patchwork accessories, this colorful project offers an excellent opportunity to use fabric scraps while creating something decorative and functional.
The charming heart applique in the center makes each coaster feel unique, adding a handmade touch that fits perfectly in any kitchen, dining room, or gift basket. Throughout this guide, you will learn every step needed to create your own Fabric Heart Coaster Pattern with confidence. Creating a Fabric Heart Coaster Pattern is much more than sewing pieces of fabric together.
The design shown in the image combines vibrant fabrics with a simple patchwork layout, making it suitable for beginners while still looking professional. By carefully selecting coordinating fabrics and following each construction step, you can produce beautiful coasters that protect your surfaces while decorating your home.
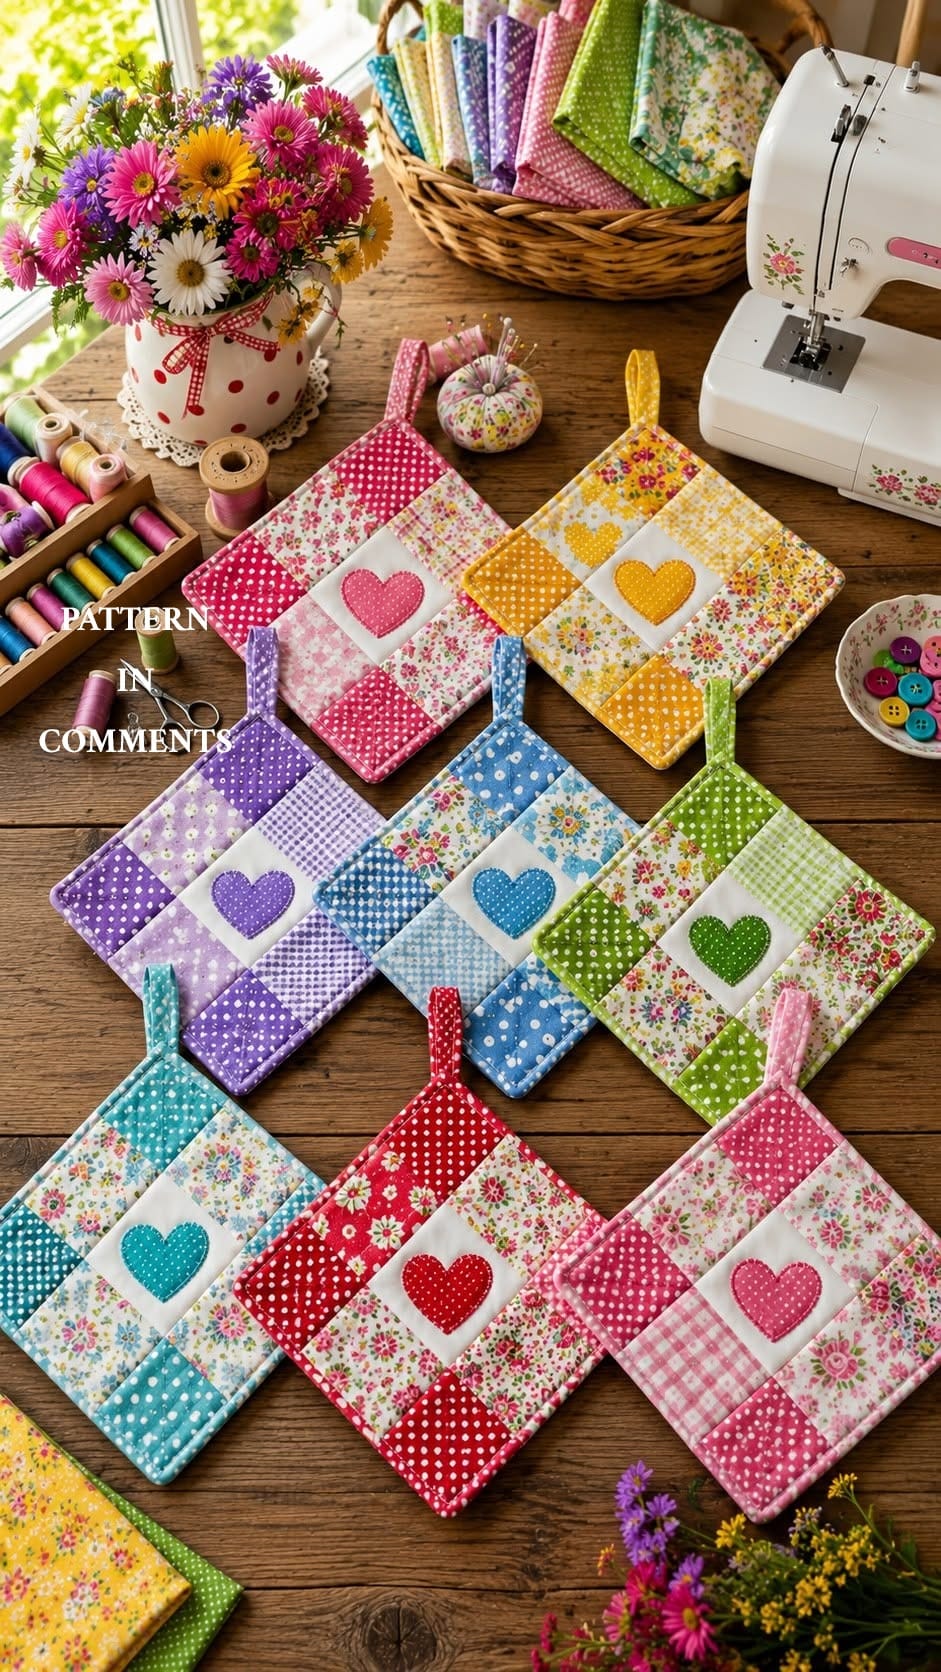
These quilted coasters can also be used as mug rugs, mini hot pads for warm cups, decorative kitchen accents, or thoughtful handmade gifts for birthdays, holidays, Mother’s Day, weddings, and housewarming celebrations. Because the project uses small fabric pieces, it is also an excellent scrap-busting sewing project that minimizes waste while maximizing creativity.
Choose the Right Materials for Your Fabric Heart Coaster Pattern
The first step is selecting fabrics that coordinate well together. Floral cotton prints, polka dots, gingham, and tiny geometric patterns all work beautifully. Looking at the sample project, notice how each coaster combines multiple complementary prints with a solid white square in the center that highlights the heart applique.
For each coaster, prepare several small fabric squares of equal size. Precision during cutting is important because evenly sized pieces create straight seams and help the finished coaster remain perfectly square. Using a rotary cutter, quilting ruler, and self-healing cutting mat makes this process much easier.
You will also need quilting cotton for the backing, batting or thermal batting for the inside layer, matching sewing thread, fabric scissors, pins or clips, and an iron. These basic quilting supplies are commonly available and suitable for beginners.
The heart applique can be made from any contrasting fabric. Bright solid colors create a bold centerpiece, while floral hearts provide a softer appearance. Using fusible web helps secure the heart before stitching, making the applique process easier and more accurate.
Bias binding gives the coaster its polished finish. You may purchase ready-made bias tape or create your own using coordinating fabric. Handmade binding allows you to perfectly match the colors used in the patchwork design.
Finally, prepare a small folded fabric strip that will become the hanging loop. Although optional, the hanging loop adds both decoration and functionality, allowing the finished coaster to hang neatly in the kitchen.
Step-by-Step Instructions to Assemble the Patchwork Design
Begin by arranging your fabric squares on a flat surface. Experiment with different layouts until you achieve a balanced combination of colors and prints. Alternating floral and dotted fabrics creates visual harmony similar to the sample shown in the image.
Once satisfied with the arrangement, sew the pieces together row by row using a consistent seam allowance. Press every seam after sewing to reduce bulk and improve accuracy. Well-pressed seams produce a cleaner and more professional appearance.
Next, join the completed rows to create the full patchwork block. Carefully align the seam intersections before stitching. Taking your time during this step ensures that the squares line up evenly across the finished coaster.
Prepare the center square separately by positioning the fabric heart in the middle. Fuse it using an iron if fusible web is available. Then stitch around the edge of the heart using either a satin stitch, zigzag stitch, or decorative blanket stitch to permanently secure it.
After completing the front panel, layer the patchwork top with batting and the backing fabric. Place the batting between both fabric layers, making sure all edges align evenly before pinning or clipping everything together.
Quilt the layers by sewing straight lines close to the seams or using simple diagonal quilting. Quilting secures the layers, prevents shifting during use, and adds texture that enhances the overall appearance of the Fabric Heart Coaster Pattern.
Adding the Binding and Finishing Touches
Trim the layered coaster so that all sides are perfectly even before attaching the binding. Clean edges make applying the binding much easier and improve the final appearance.
Insert the folded hanging loop at the top edge before sewing on the binding. Position the raw edges of the loop inside the binding so they become securely stitched in place during the finishing process.
Attach the bias binding around all four sides, carefully easing it around each corner. Mitered corners create a crisp, professional finish and give the coaster a polished handmade look.
Once the binding is sewn to the front, fold it over the raw edges toward the back. Secure it with clips before topstitching around the entire coaster. Stitch slowly to maintain even spacing along every edge.
Give the finished coaster a final press using a warm iron. Pressing helps flatten the seams, shapes the corners, and enhances the overall presentation of your completed project.
At this stage, your Fabric Heart Coaster Pattern is finished. The result is a colorful quilted coaster featuring a charming heart applique, soft quilting, durable construction, and a convenient hanging loop that combines beauty with everyday practicality.
Creative Ideas, Customization, and Care Tips
One of the greatest strengths of this Fabric Heart Coaster Pattern is its endless customization possibilities. You can create themed collections using Christmas fabrics, autumn prints, Valentine’s Day colors, spring florals, or patriotic designs.
Personalization makes these coasters even more meaningful. Embroider initials, family names, or small decorative motifs before assembling the layers to create unique gifts for friends and loved ones.
Experiment with different heart sizes and applique techniques. Raw-edge applique creates a rustic appearance, while satin stitching produces a cleaner and more refined finish suitable for elegant home décor.
These quilted coasters are excellent products for handmade craft fairs and small sewing businesses. Their compact size, attractive appearance, and practical function make them popular items among customers looking for thoughtful handmade gifts.
Cleaning is simple. Most cotton coasters can be machine washed on a gentle cycle and air dried. Pressing with a warm iron afterward restores their crisp appearance and helps maintain their shape over time.
By practicing this Fabric Heart Coaster Pattern, you will gradually improve your quilting accuracy, sewing consistency, fabric coordination, and binding skills while creating useful accessories that can be enjoyed every day.
FAQ
What fabric works best for a Fabric Heart Coaster Pattern?
High-quality quilting cotton is the best choice because it is durable, easy to sew, and available in countless prints and colors.
Can beginners make this project?
Yes. This project is beginner-friendly and teaches many essential quilting techniques such as patchwork, applique, quilting, and binding.
Do I need a sewing machine?
A sewing machine makes the project much faster, but it can also be sewn by hand with patience and careful stitching.
What batting should I use?
Cotton batting works well for decorative coasters, while insulated batting is recommended if you plan to use them with hot mugs or dishes.
Can I use fabric scraps?
Absolutely. This project is ideal for using leftover quilting cotton and reducing fabric waste.
How long does it take to make one coaster?
An experienced sewer can complete one coaster in about 30 to 45 minutes, while beginners may take approximately one to two hours depending on their experience.
Can I sell finished coasters?
Yes. Handmade quilted coasters are popular craft fair products and thoughtful gifts, provided you create them yourself and respect any applicable pattern licensing if using a commercial pattern.
Conclusion
The Fabric Heart Coaster Pattern is an enjoyable sewing project that combines creativity, functionality, and beautiful patchwork design. Throughout this guide, you learned how to select coordinating fabrics, prepare the patchwork pieces, create the heart applique, assemble the quilted layers, attach the binding, and add the final finishing touches. This project is suitable for beginners while offering plenty of opportunities for experienced quilters to experiment with color combinations and decorative stitching.
Whether you are making these charming coasters for your own home, as heartfelt handmade gifts, or to sell at craft fairs, each finished piece reflects your creativity and attention to detail. With practice, you can develop your own variations and build complete collections for every season or occasion. If you found this guide helpful, please leave your honest opinion and share your suggestions. Your feedback helps improve future tutorials and inspires even more creative sewing projects.