The Crochet Peacock Rug Pattern is one of the most captivating and artistic projects in the world of crochet. Known for its vibrant colors, intricate feather detailing, and bold circular design, this pattern allows crafters to transform simple yarn into a breathtaking home décor piece.
Choosing to work on a Crochet Peacock Rug Pattern means embracing color, texture, and elegance. Peacocks symbolize beauty, confidence, and renewal, and incorporating their iconic feather display into a rug design brings life and personality to any room.
In this comprehensive guide, we will explore everything you need to know about the Crochet Peacock Rug Pattern, including materials, stitch techniques, color selection, construction tips, and finishing touches. By the end of this article, you will feel confident and motivated to start your own project and create a rug that is both functional and visually stunning.
Understanding the Structure of a Crochet Peacock Rug Pattern
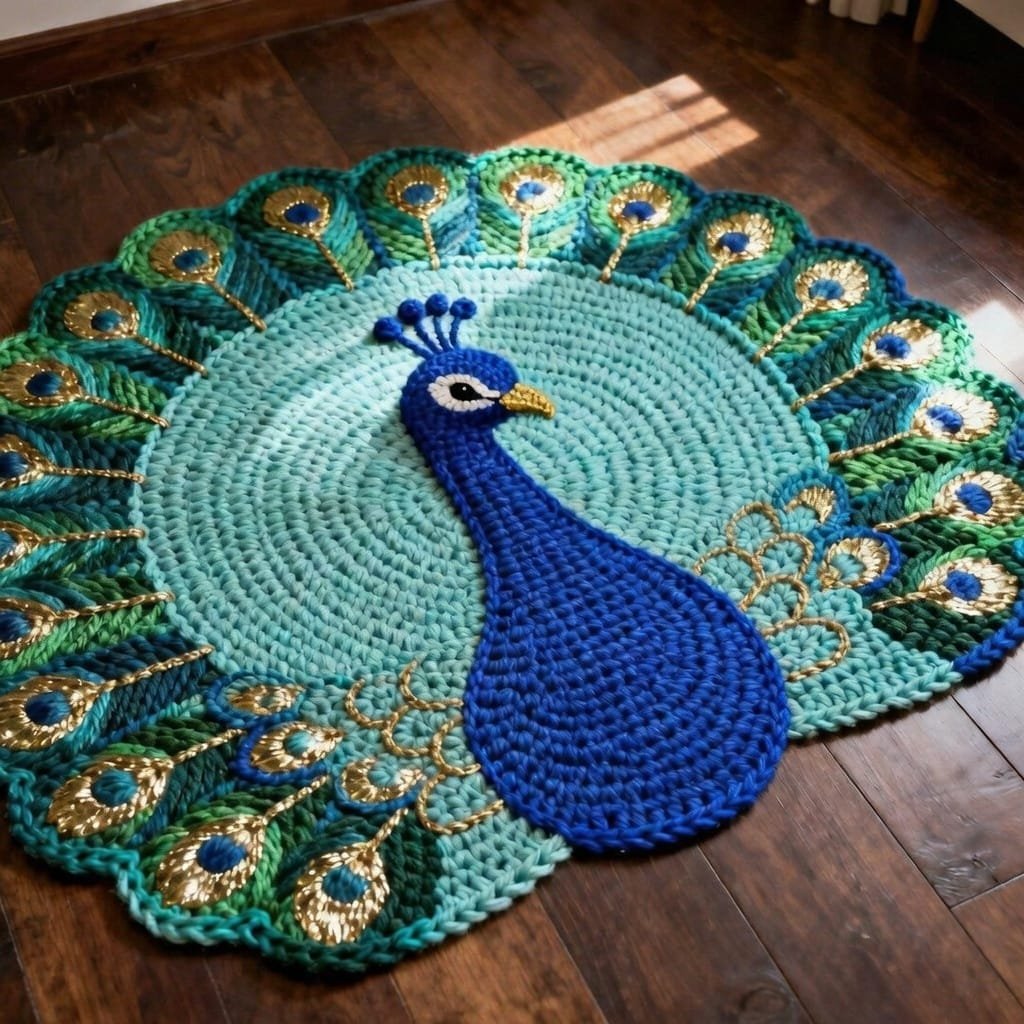
The Crochet Peacock Rug Pattern is typically built around a circular or semi-circular base that represents the peacock’s body and feathers. Most designs begin at the center and expand outward, creating layered rows that gradually form the dramatic fan of feathers. This radial construction ensures symmetry and balance in the final piece.
The base of the rug usually starts with a magic ring or adjustable loop. From there, stitches such as double crochet, half double crochet, and slip stitches are used to build the foundation. Increasing stitches evenly in each round is essential to maintain a flat surface and prevent curling.
One of the defining features of the Crochet Peacock Rug Pattern is the feather motif. These feathers are often created using shell stitches, fan stitches, or layered clusters to achieve a textured, dimensional effect. The careful placement of these stitches mimics the natural curve and elegance of a peacock’s tail.
Color transitions play a crucial role in defining each feather. Typically, shades of blue, teal, green, gold, and sometimes purple are used to recreate the rich tones of a real peacock. Strategic color changes help highlight the “eye” of each feather and add depth to the design.
Many versions of the Crochet Peacock Rug Pattern incorporate raised stitches such as front post double crochet. These stitches add texture and outline specific sections, enhancing the visual definition of each feather layer.
Understanding the pattern chart or written instructions carefully before starting is essential. Since this is a more advanced design, reviewing each section step-by-step ensures smoother progress and reduces the chance of mistakes.
Choosing the Right Materials for Your Peacock Rug
Selecting the right yarn is critical when working on a Crochet Peacock Rug Pattern. Because rugs experience foot traffic, durability is just as important as beauty. Cotton yarn or cotton-blend yarn is often preferred due to its strength and easy maintenance.
Bulky or worsted-weight yarn works well for this type of project because it provides structure and thickness. A heavier yarn also helps the rug maintain its shape over time. Using multiple strands together can create additional sturdiness if desired.
The choice of crochet hook depends on the yarn weight. A slightly smaller hook than recommended can create tighter stitches, which is ideal for rugs. Tight stitches ensure the rug remains dense and less prone to stretching.
Color selection is one of the most exciting parts of the Crochet Peacock Rug Pattern. Classic peacock tones include deep blue for the body, emerald green for feathers, and gold accents for decorative details. However, modern interpretations may experiment with pastel shades or monochromatic palettes.
Non-slip backing is another important consideration. Adding a rug pad underneath or sewing a non-slip fabric to the back improves safety and functionality, especially on smooth floors.
Lastly, blocking materials can be useful for shaping the rug once completed. Light steam blocking helps even out stitches and ensures the feather sections lie flat and symmetrical.
Step-by-Step Construction Tips for a Perfect Finish
When starting your Crochet Peacock Rug Pattern, it is important to count stitches carefully in each round. Even increases maintain the circular shape and prevent rippling or cupping.
Marking the beginning of each round with a stitch marker simplifies tracking progress. This small step can save time and prevent confusion, especially in large projects.
Working in consistent tension is essential. Uneven tension may cause sections of the rug to distort. Practicing a steady rhythm while crocheting will help achieve professional-looking results.
When creating the feather layers, pay close attention to spacing. Each feather must be evenly distributed to maintain visual balance. Using stitch markers between feather repeats can help maintain alignment.
Changing colors neatly enhances the overall appearance of the Crochet Peacock Rug Pattern. Carrying yarn carefully or fastening off at strategic points reduces visible knots and loose ends.
Finally, weaving in ends securely ensures durability. Since rugs endure frequent use, reinforcing ends prevents unraveling and extends the lifespan of your handmade piece.
Styling and Decorating with a Crochet Peacock Rug Pattern
A finished Crochet Peacock Rug Pattern can transform any room instantly. Placing it in the center of a living room creates a bold focal point that complements neutral furniture.
In a bedroom, a peacock rug placed at the foot of the bed adds warmth and artistic flair. The rich colors can elevate even the simplest décor style.
Creative spaces such as craft rooms or studios benefit from the inspiring aesthetic of a peacock design. The vibrant feathers encourage creativity and self-expression.
Pairing the rug with complementary accessories like throw pillows in similar shades enhances visual harmony. Matching blues and greens tie the space together beautifully.
Lighting also plays a role in showcasing your rug. Natural light highlights texture, while warm indoor lighting enhances the richness of jewel tones.
No matter where it is placed, the Crochet Peacock Rug Pattern becomes more than just a rug—it becomes a conversation piece that reflects dedication and craftsmanship.
Frequently Asked Questions (FAQ)
What skill level is required for a Crochet Peacock Rug Pattern?
Most Crochet Peacock Rug Pattern designs are considered intermediate to advanced due to color changes and textured stitches. However, confident beginners can complete it with patience and careful practice.
How long does it take to complete a Crochet Peacock Rug Pattern?
Completion time depends on size and experience. On average, it may take several days to a few weeks to finish a detailed design.
What is the best yarn for a durable crochet rug?
Cotton or cotton-blend yarn is highly recommended for durability and easy cleaning when making a Crochet Peacock Rug Pattern.
Can I customize the colors?
Absolutely. While traditional peacock colors are popular, you can personalize your rug with any color palette that matches your home décor.
How do I clean a crochet peacock rug?
Hand washing with mild detergent and laying flat to dry is typically recommended. Always check the yarn label for specific care instructions.
Does the rug require a non-slip backing?
While not mandatory, adding non-slip backing increases safety and keeps the rug securely in place.
Conclusion
The Crochet Peacock Rug Pattern is a stunning blend of artistry, technique, and home décor functionality. Throughout this guide, we explored its structure, essential materials, construction tips, and styling ideas. From choosing durable yarn to mastering feather motifs and selecting vibrant colors, every step contributes to creating a truly remarkable handmade rug.
This project not only enhances your crochet skills but also results in a bold statement piece that transforms any space. If you found this guide helpful, feel free to share your honest opinion and leave suggestions. Your feedback inspires more creative content and helps build a supportive crafting community.

