A Fabric Iron Cover Pattern is a practical sewing project that helps protect your iron’s soleplate from dust, scratches, and accidental contact with other items during storage. It is especially useful for sewing rooms, quilting spaces, and craft areas where irons are used frequently.
Making your own iron cover allows you to choose the fabric, adjust the dimensions, and create a design that matches your sewing space. You can use colorful cotton prints, quilted fabric, and carefully selected protective materials to make a cover that is both attractive and functional.
Before starting, it is important to understand that a fabric cover is intended for a completely cooled-down iron. It must never be placed over a hot or warm appliance, and ordinary fabric should not be treated as protection against heat or fire.
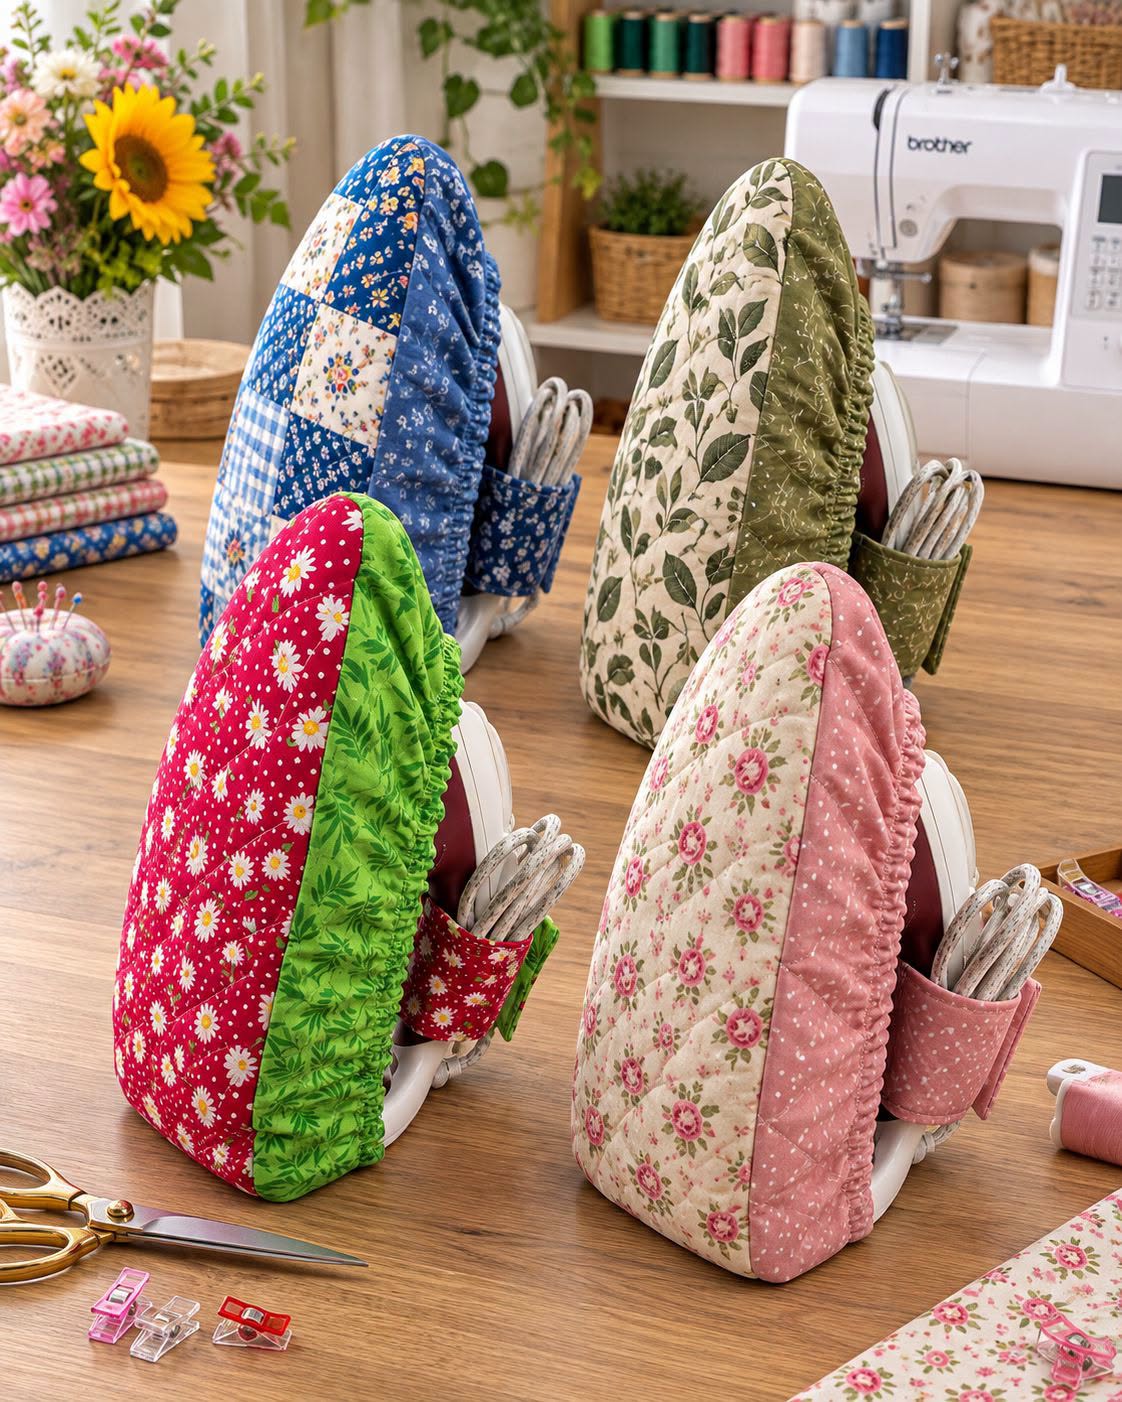
Choosing the Best Fabrics and Materials for an Iron Cover
The first step is selecting materials that are suitable for storage and easy to sew. 100% cotton fabric is a popular choice for the outer layer because it is durable, widely available, and comes in many colors and patterns. Quilting cotton works particularly well because it is easy to cut, press, and stitch accurately.
For the inner layer, choose a smooth fabric that will not easily leave lint on the iron’s soleplate. Cotton lining can be suitable, provided the iron is completely cool and dry before storage. Avoid materials that shed fibers, melt easily, or have loose decorative elements that could scratch the appliance.
A lightweight cotton batting can give the cover a padded appearance, but it does not make the cover heat-resistant. Do not use ordinary batting, foam, or synthetic insulation as a substitute for a manufacturer-approved heat shield. The cover should only be used after the iron has cooled completely.
You will also need matching thread, fabric scissors or a rotary cutter, pins or sewing clips, a measuring tape, and a sewing machine. Depending on the design, you may use elastic, a fabric tie, or a hook-and-loop closure to keep the cover in place. Select closures that will not scratch the iron or interfere with safe storage.
Measuring and Preparing the Fabric Iron Cover Pattern
Accurate measurements are essential because irons come in different shapes and sizes. Start by measuring the length and widest point of the iron’s soleplate, then measure its height and the shape of the handle area if your cover will wrap around the entire appliance.
Add enough extra fabric for seam allowances and comfortable placement. A cover that is too tight may be difficult to remove, while one that is too loose can slide around during storage. It is helpful to create a paper template first so you can check the proportions before cutting your fabric.
For a simple design, you can create two matching pieces shaped like the outline of the iron. One piece forms the outer fabric and the other creates the lining. If you want a padded appearance, add a layer of lightweight cotton batting between them, remembering that padding is not intended to insulate a warm iron.
Transfer the template onto the fabric using tailor’s chalk or a washable fabric marker. Cut the pieces carefully and keep the edges aligned. If your iron has an unusual shape, make a quick test version using inexpensive fabric before cutting your final materials. This can help you identify areas that need more room.
Sewing, Assembly, and Decorative Details
Place the outer fabric and lining together with their right sides facing each other. If you are including batting, position it according to your chosen construction method. Pin or clip around the edges, leaving a small opening for turning the cover right side out.
Sew around the shape using a consistent seam allowance. Reinforce the areas that may experience more pulling, especially near the opening or closure. Trim excess fabric at curved sections without cutting through the stitching, then turn the cover right side out and gently shape the edges.
Close the opening with a neat topstitch or an invisible hand stitch. If your pattern includes an elastic edge, make a narrow casing and insert the elastic carefully. The elastic should hold the cover in place without stretching the fabric excessively or making removal difficult.
You can personalize the finished piece with quilted lines, decorative topstitching, or a small fabric patch. Floral prints, geometric designs, and classic quilting patterns can all create an attractive result. Keep decorations away from areas that could scratch the iron, and avoid buttons, beads, or other hard pieces that might damage the appliance.
Practical Tips for Safety, Durability, and Everyday Storage
A well-made cover should be easy to remove, simple to clean, and appropriately sized for the iron. Before using it, make sure every seam is secure and that no loose threads or sharp accessories remain inside. The cover should never interfere with the iron’s cord, water tank, steam openings, or other components.
Always allow the iron to cool completely before putting the cover on. Unplug the appliance, empty the water reservoir if recommended by the manufacturer, and follow the manufacturer’s instructions for cooling and storage. Never cover an iron while it is plugged in, heating, or still warm.
For better durability, choose tightly woven fabric and reinforce stress points with additional stitching. Wash the cover according to the care instructions for its fabric, and inspect it occasionally for worn seams, loose elastic, or damaged lining. Replace it if the material becomes frayed or develops residue.
Store the covered iron in a dry, well-ventilated location away from moisture and direct heat. Do not assume that a handmade cover provides protection against accidental activation, burns, or fire. Its purpose is to keep a cool iron clean and protected during storage, not to replace safe handling practices.
Frequently Asked Questions
What is the best fabric for an iron cover?
Quilting cotton or another tightly woven cotton fabric is a practical choice for the outer layer. A smooth cotton lining can help protect the soleplate from dust and scratches when the iron is completely cool.
Can I use batting inside the iron cover?
Yes, lightweight cotton batting can provide a padded finish. However, ordinary batting is not heat-resistant protection. Never use the cover on a warm iron.
How do I measure an iron for a custom cover?
Measure the length, widest point, and overall shape of the iron. Create a paper template and test its fit before cutting the final fabric pieces. Include seam allowances and enough room for easy removal.
Can I make an iron cover without a sewing machine?
Yes. You can sew the pieces by hand using small, secure stitches. A sewing machine makes the process faster, but careful hand sewing can produce a durable result.
Should the cover fit tightly?
It should fit securely without being difficult to remove. An overly tight cover can strain the seams, while a loose cover may slide out of position during storage.
Can I use a fabric iron cover while ironing?
No. A storage cover must only be used when the iron is completely cool and unplugged. Remove it before connecting or heating the appliance.
How can I make my iron cover more decorative?
Try colorful quilting cotton, coordinated lining, decorative stitching, or simple patchwork. Choose soft decorations that will not scratch the iron or interfere with its safe storage.
Conclusion
A Fabric Iron Cover Pattern is a useful addition to a sewing room and a rewarding project for anyone who enjoys practical handmade accessories. With accurate measurements, suitable cotton fabric, neat stitching, and a secure closure, you can create a cover that keeps a cool iron protected from dust and scratches.
Choose a design that matches your workspace, experiment with fabric combinations, and take time to finish the seams carefully. Have you made an iron cover before? Share your favorite fabrics, sewing techniques, and ideas for making this project even more useful.