If you’re looking for a captivating quilt design that combines modern elegance with traditional techniques, the Stella Block Quilt – Tutorial is the perfect project. This quilt block stands out with its clean lines, geometric patterns, and versatile design, making it a great choice for both beginners and experienced quilters.
Whether you want to create a cozy throw or a full-sized bed quilt, the Stella Block Quilt will provide you with a satisfying creative challenge. Throughout this tutorial, we will explore the materials needed, the cutting process, piecing the blocks, and assembling your quilt.
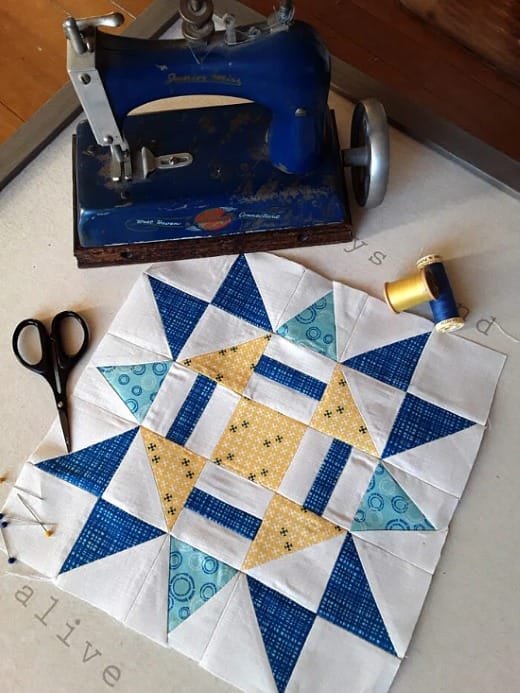
The Stella Block Quilt – Tutorial is designed to guide you step-by-step, ensuring you can confidently create this beautiful pattern. The Stella block itself features symmetrical shapes and can be made with a variety of fabrics, allowing for endless customization.
From selecting the right fabrics to perfecting your cutting techniques, this tutorial will help you achieve professional results, even if you’re new to quilting. By the end of this guide, you’ll have all the knowledge you need to create your very own Stella Block Quilt.
Before we dive into the quilting process, let’s take a moment to consider why the Stella Block Quilt is so popular. Its modern appeal lies in its balance of simplicity and sophistication.
The combination of sharp angles and soft curves makes it a unique pattern that will look stunning in any fabric choice. Plus, the modular design allows you to experiment with colors and layouts to make the quilt truly your own.
1. Materials Needed for the Stella Block Quilt
To start this Stella Block Quilt – Tutorial, it’s important to gather all the necessary materials. Having everything ready before you begin will help streamline the process and ensure a smooth quilting experience.
- Fabric Selection: The Stella Block Quilt works well with a variety of fabrics. You’ll need fabric for the blocks themselves, the background, and the backing. Solid colors or prints with minimal patterns work best to highlight the geometric shapes of the Stella blocks.
- Batting: Choose a high-quality batting that offers the level of warmth and thickness you prefer. Cotton batting is a popular choice for its softness and durability, while polyester batting is lightweight and warm.
- Backing Fabric: The backing is the fabric that will go on the underside of your quilt. You can choose a solid color to complement the quilt top or a bold print for a more dynamic finish.
- Thread: Opt for a cotton thread that matches or complements your fabric choices. Strong, durable thread ensures that your quilt holds up over time and through multiple washes.
- Rotary Cutter and Cutting Mat: Accurate cutting is key to quilting success. A rotary cutter and self-healing cutting mat will help you achieve precise cuts with minimal effort.
- Sewing Machine: While hand quilting is an option, most quilters prefer using a sewing machine for piecing and quilting. Make sure your machine is equipped with a quilting foot for easy sewing of multiple layers.
With all your materials in place, you’re ready to begin constructing your Stella Block Quilt.
2. Cutting and Preparing the Quilt Blocks
Cutting your fabric accurately is essential to the success of your Stella Block Quilt. In this section of the Stella Block Quilt – Tutorial, we’ll go over the cutting process step by step to ensure that each piece is perfectly shaped and sized for the blocks.
- Measuring Your Fabric: Start by laying out your fabric on your cutting mat. Measure carefully using your quilting ruler to ensure accuracy. Precision in cutting will make assembling the blocks much easier later on.
- Cutting the Fabric: Use your rotary cutter to cut the fabric into the required pieces for your Stella Block Quilt. Follow the pattern measurements for the individual block pieces, making sure to cut all pieces before moving on.
- Labeling the Pieces: As you cut, label each piece to keep track of its placement in the quilt design. This will save you time and confusion when it comes to assembling the blocks.
- Creating Block Templates: If your quilt pattern involves complex shapes, consider making templates from sturdy cardboard or plastic. This will ensure consistency across all of your blocks.
- Stacking Fabric Pieces: Once you have all your pieces cut, stack them neatly by color and size. This will make it easier to grab what you need as you start piecing the blocks.
- Checking for Accuracy: Before you move on to sewing, double-check that all pieces are cut to the correct size. If you find any discrepancies, now is the time to make adjustments.
With all your pieces accurately cut and prepared, you’re ready to move on to assembling the blocks.
3. Assembling the Stella Quilt Blocks
The heart of this Stella Block Quilt – Tutorial is piecing together the individual blocks. The assembly process can be both fun and rewarding as you see your design come to life.
- Arranging the Pieces: Lay out all the pieces for one quilt block on a flat surface. Arrange them in the correct order according to the pattern. This step allows you to visualize how the block will look once it’s sewn together.
- Sewing the Pieces Together: Begin by sewing smaller sections of the block together using a quarter-inch seam allowance. Quilters typically use this measurement to ensure consistency across all blocks.
- Pressing the Seams: After sewing each section, press the seams with an iron to ensure they lie flat. Pressing your seams as you go will help your blocks fit together more smoothly when you join them.
- Joining the Sections: Once all smaller sections are sewn, it’s time to join them into a full block. Be sure to align the edges and seams carefully to avoid any misalignment.
- Repeating the Process: Repeat the assembly process for each block in the quilt. Depending on the size of your quilt, you may need to make dozens of blocks, so take your time and enjoy the process.
- Double-Checking for Consistency: As you complete each block, check for consistency in size and shape. This will help prevent problems when you begin joining the blocks to form the quilt top.
Once you’ve assembled all your quilt blocks, you’re ready to piece them together into the final quilt top.
4. Joining the Blocks and Finishing the Quilt
With all the blocks assembled, the final steps in this Stella Block Quilt – Tutorial involve joining the blocks and adding the finishing touches to complete your quilt.
- Arranging the Quilt Layout: Lay out all of your completed blocks on a large, flat surface. Arrange them in a way that balances color and pattern, ensuring that the design flows harmoniously.
- Sewing the Blocks Together: Start by sewing the blocks together in rows. Use a quarter-inch seam allowance, and be sure to press the seams as you go. Once the rows are completed, sew them together to form the quilt top.
- Adding the Borders: If your quilt design includes borders, now is the time to add them. Borders can help frame the quilt and provide a clean, finished look.
- Basting the Quilt: Once the quilt top is complete, layer it with the batting and backing fabric. Baste the layers together using safety pins or basting spray to keep them in place while you quilt.
- Quilting the Layers: Quilt the layers together using your sewing machine or by hand. You can choose a simple straight-line quilting pattern or get creative with free-motion quilting.
- Binding the Quilt: To finish your Stella Block Quilt, create binding strips and sew them around the edges of the quilt. This final step gives your quilt a polished and professional appearance.
Congratulations! You’ve now completed your Stella Block Quilt and can enjoy the fruits of your labor.
FAQ
1. What is a Stella Block Quilt?
The Stella Block Quilt is a modern quilt design featuring geometric shapes and symmetrical patterns. It is a versatile quilt that can be customized with various fabrics and layouts.
2. Is the Stella Block Quilt suitable for beginners?
Yes, the Stella Block Quilt – Tutorial is suitable for both beginners and experienced quilters. The design is straightforward, and the tutorial provides detailed, step-by-step instructions.
3. How much fabric do I need for a Stella Block Quilt?
The amount of fabric required depends on the size of your quilt. Typically, you will need fabric for the quilt top, backing, and binding, as well as batting for the quilt layers.
4. What tools do I need to make a Stella Block Quilt?
Essential tools include a rotary cutter, cutting mat, quilting ruler, sewing machine, iron, and thread. These tools will help you achieve precise cuts and seams.
5. How long does it take to make a Stella Block Quilt?
The time required to complete the quilt depends on your quilting experience and the size of the project. It can take anywhere from a few days to several weeks.
6. How do I care for my Stella Block Quilt?
To care for your quilt, wash it in cold water on a gentle cycle and tumble dry on low heat. Be sure to avoid harsh detergents, which can damage the fabric over time.
Join our VIP broadcast list and gain access to exclusive patterns, all for free. As a VIP member, you’ll receive the best patterns daily, delivered directly to your device. ✨📱 It’s a unique opportunity to stay up-to-date with the latest trends and designs, curated just for you. Don’t miss out on enhancing your projects and discovering new inspirations with the best patterns every day! 🎨🔝
Conclusion
In this Stella Block Quilt – Tutorial, we covered everything from gathering your materials to cutting, assembling, and finishing your quilt. By following these steps, you can create a beautiful quilt that reflects your personal style. Quilting is not just about making something functional; it’s about creating something that brings joy and warmth.
PATTERN HERE
We hope this tutorial has inspired you to take on the Stella Block Quilt project. Please leave a comment with your thoughts or suggestions and share your experience with this pattern. Happy quilting!

