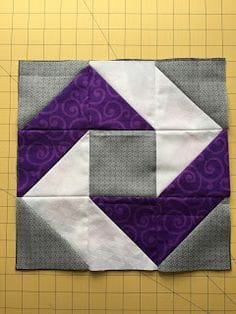
The Stash Bee block – TUTORIAL is a fun and creative way to explore quilting while building connections with fellow quilters.
This project is perfect for using up fabric scraps and experimenting with new techniques. Whether you’re a seasoned quilter or just starting out, this tutorial will guide you through creating a beautiful block that can be used in various projects.
Participating in a stash bee involves sharing and receiving fabric blocks with other quilting enthusiasts.
The Stash Bee block – TUTORIAL is a step-by-step guide that ensures everyone in the group creates cohesive and stunning blocks.
This collaborative effort not only improves your quilting skills but also fosters a sense of community.
In this article, we’ll cover the essential materials, techniques, and tips to help you master the Stash Bee block – TUTORIAL.
By the end, you’ll feel confident in creating blocks that showcase your style while blending beautifully with others’ contributions.
1. Materials You’ll Need for the Stash Bee Block
Gathering the right materials is the first step in mastering the Stash Bee block – TUTORIAL. The following list includes everything you need to get started.
- Fabric Scraps
The beauty of stash bee blocks lies in their versatility. Use colorful scraps from your stash to create unique designs. - Rotary Cutter and Mat
Precision cutting is essential for clean and accurate blocks. A rotary cutter and mat make the job easier. - Ruler
A quilting ruler helps ensure straight edges and accurate measurements for your fabric pieces. - Sewing Machine
While hand-sewing is an option, a sewing machine speeds up the process and ensures consistent stitches. - Thread
Choose high-quality thread in a neutral color or one that complements your fabric selections. - Iron and Ironing Board
Pressing seams as you sew is crucial for achieving flat, professional-looking blocks.
2. Cutting and Preparing Your Fabric
Once you’ve gathered your materials, the next step in the Stash Bee block – TUTORIAL is preparing your fabric. Proper preparation ensures smooth sewing and accurate results.
- Sort Your Scraps
Organize your fabric scraps by color, pattern, or size to simplify the selection process. - Press Fabric
Iron all fabric pieces to remove wrinkles and ensure they lay flat during cutting. - Measure Accurately
Use your quilting ruler to measure and cut pieces according to the block dimensions specified in your stash bee guidelines. - Trim Edges
Ensure all fabric edges are clean and straight for seamless piecing. - Group Pieces
Group fabric pieces based on the block design to streamline the assembly process. - Lay Out Design
Arrange your fabric pieces on a flat surface to visualize the final block before sewing.
3. Sewing Your Stash Bee Block
Now that your fabric is prepared, it’s time to assemble the block. Follow these steps to complete the Stash Bee block – TUTORIAL.
- Start with Small Sections
Sew small sections of the block together, such as individual rows or groups of squares. - Pin Before Sewing
Pin fabric pieces together to ensure they stay aligned while sewing. - Check Seam Allowance
Maintain a consistent 1/4-inch seam allowance, as this is standard in quilting. - Press Seams Open or to the Side
Pressing seams as you sew prevents bulk and helps the block lay flat. - Join Larger Sections
Once smaller sections are sewn, join them to create the complete block. - Inspect the Block
Check for alignment and correct any mistakes before moving on to the next step.
4. Finishing Touches and Sending Your Block
After sewing, there are a few final steps to complete your block and prepare it for sharing. The Stash Bee block – TUTORIAL emphasizes neatness and precision in this stage.
- Trim the Block
Ensure the block is the correct size by trimming any excess fabric around the edges. - Check Alignment
Double-check that all seams align properly for a polished look. - Press the Entire Block
Give the block a final press to ensure it lays flat and looks professional. - Attach a Note
Include a small note with your block if required by the stash bee group, such as your name or any special instructions. - Package Securely
Place the block in a protective sleeve or envelope to keep it clean and safe during shipping. - Mail to the Recipient
Send your completed block to the assigned group member, knowing you’ve contributed to a collaborative quilting masterpiece.
FAQ
1. What is a stash bee block?
A stash bee block is a fabric block made as part of a collaborative quilting group. Members create and exchange blocks based on specific guidelines.
2. Do I need special fabrics for this tutorial?
No, the beauty of the stash bee block is that you can use fabric scraps from your collection.
3. Can I hand-sew the block instead of using a machine?
Yes, while hand-sewing is possible, a sewing machine ensures faster and more precise results.
4. What should I do if my block isn’t perfectly square?
Trim the edges carefully to ensure the block meets the required dimensions.
5. How do I match my block to the group’s theme?
Follow the guidelines provided by the group leader for colors, patterns, or specific designs.
6. Can beginners participate in a stash bee?
Absolutely! Stash bees are a great way for beginners to practice their skills and learn from others.
Join our VIP broadcast list and gain access to exclusive patterns, all for free. As a VIP member, you’ll receive the best patterns daily, delivered directly to your device. ✨📱 It’s a unique opportunity to stay up-to-date with the latest trends and designs, curated just for you. Don’t miss out on enhancing your projects and discovering new inspirations with the best patterns every day! 🎨🔝
Conclusion
The Stash Bee block – TUTORIAL offers an exciting and rewarding quilting experience. By following this guide, you’ll create beautiful blocks that reflect your style while contributing to a larger collaborative project.
We hope this tutorial inspires you to embrace the joy of quilting and connect with fellow enthusiasts. Share your thoughts, suggestions, or experiences in the comments below—we’d love to hear from you!

