If you’re looking to create a simple yet visually striking quilt block, the Snowball Quilt Blocks of Any Size – Free Tutorial is the perfect guide for you. The snowball block is a versatile design that can be easily scaled to any size, making it suitable for a wide range of quilting projects.
Whether you are new to quilting or an experienced quilter, this tutorial will walk you through the steps needed to create Snowball Quilt Blocks of Any Size with ease.
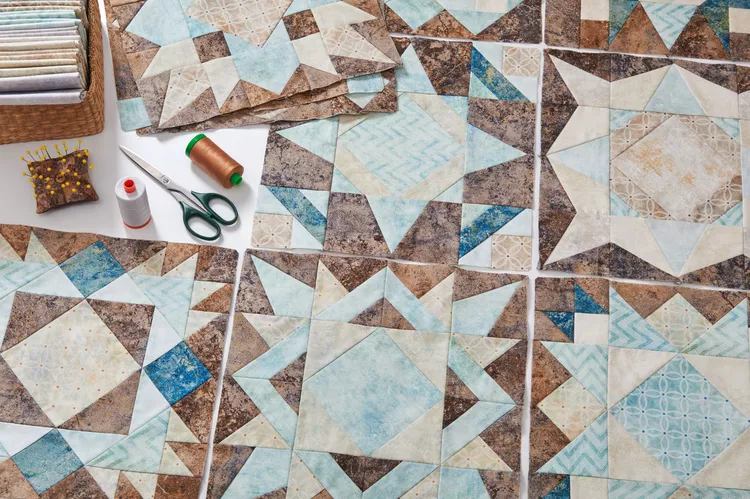
The beauty of Snowball Quilt Blocks lies in their simplicity. They consist of a square center with small corner triangles, creating the illusion of a round shape when multiple blocks are combined.
These blocks are perfect for adding a pop of color or framing other intricate quilt blocks. You can use them as a filler block, a border, or even build an entire quilt around them. The versatility of this block is endless!
In this Free Tutorial, we’ll cover everything you need to know to make your own Snowball Quilt Blocks of Any Size. We’ll discuss fabric selection, block assembly, and how to adjust the size of your blocks for different projects.
By the end of this tutorial, you’ll have all the skills necessary to incorporate snowball blocks into your next quilt. Let’s get started!
1. Fabric Selection for Snowball Quilt Blocks
One of the first steps in the Snowball Quilt Blocks of Any Size – Free Tutorial is selecting the right fabrics for your blocks. Since the snowball block is fairly simple in design, your fabric choices can really make a statement.
Consider using contrasting fabrics for the center square and the corner triangles to highlight the snowball shape. For example, if your center square is a solid color, choose a patterned fabric for the corner triangles, or vice versa. This contrast will help the block stand out in your quilt design.
Another option is to use different fabrics for each block to create a scrappy quilt. The Snowball Quilt Block is ideal for using up fabric scraps since it doesn’t require large pieces of fabric. Mix and match different prints and colors to give your quilt a playful, eclectic look.
Before cutting your fabric, make sure to pre-wash and press it. Pre-washing helps to prevent any shrinkage or color bleeding later on. Pressing your fabric before cutting ensures smooth, even cuts, which is essential for creating precise quilt blocks.
Once your fabric is prepped, you’ll need to cut squares for the center of the snowball block and smaller squares for the corner triangles. The size of your squares will vary depending on how large or small you want your blocks to be.
Remember, the beauty of the Snowball Quilt Blocks is that they can be made in any size, so feel free to experiment with different dimensions to suit your project.
2. Assembling the Snowball Quilt Block
Now that you have your fabric selected and cut, it’s time to start assembling your Snowball Quilt Blocks of Any Size. This part of the Free Tutorial will walk you through the process of piecing the block together.
Begin by laying out your center square and four smaller squares that will form the corner triangles. The smaller squares should be placed on each corner of the center square, with the right sides of the fabric facing each other.
Using a pencil or fabric marking tool, draw a diagonal line from corner to corner on the back of each small square. This line will serve as your sewing guide for creating the corner triangles.
Sew along the diagonal line on each of the four small squares. Make sure to sew carefully and consistently along the line, as this will ensure that your corner triangles are symmetrical and evenly spaced.
After sewing the lines, use your rotary cutter to trim away the excess fabric from each corner, leaving a ¼-inch seam allowance. This will reduce bulk in the seams and help the block lay flat.
Once the excess fabric is trimmed, press the corner triangles open. You’ll now have a square block with small triangles in each corner, creating the signature snowball shape.
If desired, you can save the excess fabric triangles for use in another project. Many quilters like to use these leftover pieces in scrappy quilts or other small blocks.
3. Adjusting the Size of Snowball Quilt Blocks
One of the best features of Snowball Quilt Blocks of Any Size is the ability to adjust the size to fit any project. This section of the Free Tutorial will show you how to customize your snowball blocks to suit your needs.
To change the size of your Snowball Quilt Blocks, simply adjust the size of the center square and the corner triangles. For example, if you want to make a larger block, start with a larger center square and proportionally larger corner squares. Conversely, if you want a smaller block, reduce the size of both the center and corner squares.
Keep in mind that the size of the corner triangles will affect how round or angular the snowball appears. Larger corner triangles will create a more pronounced curve, while smaller triangles will result in a more subtle snowball effect.
When scaling the block size, remember to maintain a consistent seam allowance. The standard ¼-inch seam allowance should be used regardless of the block size, as this will ensure that your quilt blocks fit together neatly when sewn into a quilt top.
If you’re making a quilt with blocks of various sizes, you can mix and match snowball blocks of different dimensions to create a dynamic and interesting design. Experiment with combining different-sized blocks to add depth and movement to your quilt.
No matter the size, the process for assembling the Snowball Quilt Block remains the same, making this block an easy and versatile option for any quilter.
4. Using Snowball Quilt Blocks in Quilts
Now that you’ve mastered the Snowball Quilt Blocks of Any Size, it’s time to incorporate them into your quilt projects. This final section of the Free Tutorial will explore different ways to use snowball blocks in your quilts.
One of the most common uses for Snowball Quilt Blocks is as a filler block in larger quilts. The simple design of the snowball block makes it a great option for breaking up more intricate quilt blocks. The snowball blocks provide a visual rest, allowing more detailed blocks to stand out.
Another way to use snowball blocks is to combine them with other classic quilt blocks, such as the nine-patch or the log cabin. The contrast between the angular lines of the snowball block and the other blocks can create a striking effect.
For a bold and modern look, try making an entire quilt out of snowball blocks. By using a variety of fabrics and colors, you can create a quilt with depth and texture, even though the block design is simple.
If you’re looking for a more traditional look, consider using snowball blocks in a two-color quilt. A classic color combination like blue and white or red and white can create a timeless quilt that will be cherished for years to come.
You can also use Snowball Quilt Blocks to create borders or sashing for your quilt. The curved lines of the snowball block can soften the edges of a quilt and add a touch of elegance to the design.
No matter how you choose to use them, Snowball Quilt Blocks of Any Size are a versatile and essential addition to any quilter’s repertoire.
FAQ
1. What size should I make my Snowball Quilt Blocks?
The size of your Snowball Quilt Blocks depends on your project. You can adjust the size by cutting larger or smaller center squares and corner triangles. Experiment with different sizes to find the one that works best for your quilt.
2. Can beginners make Snowball Quilt Blocks?
Yes, the Snowball Quilt Block is a great choice for beginners. The design is simple, and the steps are easy to follow. Plus, the block can be made in any size, allowing for flexibility.
3. What fabrics work best for Snowball Quilt Blocks?
Contrasting fabrics work well for Snowball Quilt Blocks. Choose a solid fabric for the center square and a patterned or contrasting fabric for the corner triangles to highlight the snowball shape.
4. How can I use leftover fabric scraps from making Snowball Quilt Blocks?
The small triangles that are trimmed from the corners of your Snowball Quilt Blocks can be saved and used in other projects, such as scrappy quilts or smaller quilt blocks.
5. How do I make sure my Snowball Quilt Blocks are square?
To ensure your Snowball Quilt Blocks are square, make sure to sew along the diagonal lines carefully and use a consistent ¼-inch seam allowance. Press your seams open after sewing to help the block lay flat.
6. Can I combine Snowball Quilt Blocks with other quilt block designs?
Yes, Snowball Quilt Blocks pair well with many other quilt block designs, such as nine-patch blocks, log cabin blocks, or flying geese blocks. Mixing different blocks can create a unique and interesting quilt.
Join our VIP broadcast list and gain access to exclusive patterns, all for free. As a VIP member, you’ll receive the best patterns daily, delivered directly to your device. ✨📱 It’s a unique opportunity to stay up-to-date with the latest trends and designs, curated just for you. Don’t miss out on enhancing your projects and discovering new inspirations with the best patterns every day! 🎨🔝
Conclusion
In this Snowball Quilt Blocks of Any Size – Free Tutorial, we’ve walked through the process of creating these simple yet versatile quilt blocks. From fabric selection to block assembly and customization, you’ve learned how to make Snowball Quilt Blocks that can be tailored to any project size. Whether you’re a beginner or an experienced quilter, these blocks offer endless possibilities for creativity.
PATTERN HERE
We hope you found this tutorial helpful and that you’re excited to start making your own snowball blocks. We would love to hear your thoughts, feedback, and any suggestions you have. Please leave a comment below with your opinions, and happy quilting!

