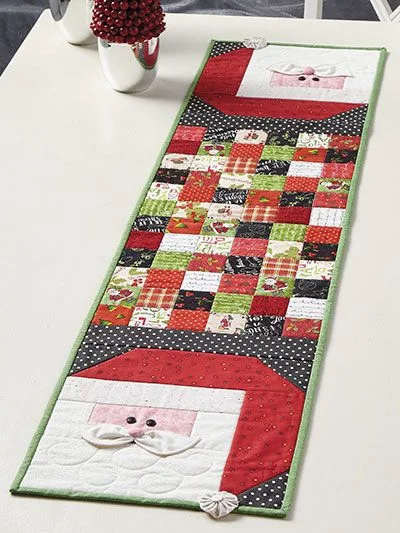
The Santa Claus Mat – TUTORIAL is the perfect holiday project to bring festive cheer to your home. This fun and creative craft allows you to create a unique and personalized mat that features the iconic Santa Claus theme.
Whether it’s for your front porch, kitchen, or as a thoughtful gift, this tutorial provides step-by-step guidance to make the process enjoyable and straightforward.
A Santa Claus Mat isn’t just decorative; it’s a functional piece that can protect your floors while enhancing the holiday atmosphere.
With the help of this tutorial, you’ll learn how to craft a mat that blends practicality with holiday magic. From material selection to design execution, this guide ensures your mat becomes a standout piece in your seasonal decor.
This project is ideal for beginners and experienced crafters alike. Using basic supplies and following simple techniques, you can customize the design to match your style and creativity. Let’s dive into this festive tutorial and bring the joy of Santa Claus into your home!
1. Materials Needed for the Santa Claus Mat
Before starting your Santa Claus Mat, gather the necessary materials. Preparation is key to ensuring a smooth crafting process and achieving a professional-looking result.
First, select your base mat. A coir doormat is a popular choice due to its durability and natural texture, but you can also use rubber or fabric mats, depending on your preference.
Next, choose your paints or dyes. Acrylic paints or fabric paints work best for this project, especially if you plan to place the mat outdoors. Opt for classic holiday colors such as red, white, green, and black to capture the Santa Claus theme.
Stencils are essential for creating clean and precise designs. Look for Santa Claus-themed stencils or create your own using sturdy cardboard or plastic sheets. Don’t forget brushes or sponges for applying paint evenly.
Additional materials include painter’s tape to secure stencils, a palette for mixing paints, and a protective covering for your work area. Having all these items on hand will make your tutorial experience more enjoyable.
2. Preparing Your Mat for Design
Proper preparation ensures that your Santa Claus Mat turns out beautifully and stands the test of time. Follow these steps to get your mat ready for the design process.
Begin by cleaning your mat. Remove dust and debris using a vacuum or a soft-bristle brush. If the mat is washable, clean it with mild soap and water, then let it dry completely. A clean surface helps paint adhere better and results in a more polished finish.
Decide on your design layout. Sketch your ideas on paper before transferring them to the mat. This step allows you to visualize the final product and make adjustments as needed.
Position your stencils on the mat and secure them with painter’s tape. Ensure they are flat and firmly attached to prevent paint from bleeding underneath. Take your time to arrange the stencils symmetrically for a balanced and professional look.
If you’re free-handing parts of the design, lightly mark the mat with chalk or a washable fabric marker. These guidelines will help you maintain accuracy as you paint.
Place a protective covering under your mat to avoid paint spills or stains on your work surface. Now you’re ready to bring the Santa Claus Mat design to life!
3. Painting and Assembling the Santa Claus Mat
With your mat prepped, it’s time to start painting and assembling the Santa Claus Mat. This step is where your creativity shines, so enjoy the process!
Start by applying a base coat to the mat, if desired. This can create a uniform background for your design. Use a sponge or roller for even coverage and let it dry thoroughly before proceeding.
Using your stencils, apply the paint in thin layers. Dab the paint gently with a sponge or stencil brush to avoid smudging. For areas with intricate details, use smaller brushes for precision. Let each color dry before applying the next to prevent mixing.
For freehand designs, take your time and work in sections. Outline the shapes first, then fill them in with paint. This technique ensures cleaner lines and a more polished look.
Once the painting is complete, add embellishments to your Santa Claus Mat. Consider using glitter, fabric appliqués, or even small pom-poms for Santa’s hat. These details add texture and make the mat more festive.
Allow the mat to dry completely in a well-ventilated area. Depending on the type of paint used, this may take several hours or overnight.
Seal the design with a clear protective spray to enhance durability, especially if the mat will be placed outdoors. This step ensures your work stays vibrant throughout the holiday season.
4. Using and Caring for Your Santa Claus Mat
After completing your Santa Claus Mat, it’s time to showcase it and learn how to care for it properly.
Place the mat in a high-traffic area to maximize its visibility. Popular locations include the front door, kitchen, or even under the Christmas tree as a decorative accent.
Pair the mat with other festive decor. For example, add a matching wreath, garland, or string lights to create a cohesive holiday display.
Regularly clean the mat to maintain its appearance. Gently shake off dirt or vacuum the surface to remove debris. Avoid harsh scrubbing, as it may damage the design.
Store the mat properly after the holidays. Keep it in a dry, cool place to preserve its colors and materials. Wrapping it in a plastic cover can protect it from dust and moisture.
If you notice any wear or fading, touch up the design with leftover paint. This quick fix will extend the life of your Santa Claus Mat for future holiday seasons.
Finally, consider making additional mats as gifts or for other parts of your home. With the skills learned from this tutorial, you can create personalized mats for every occasion.
FAQ about Santa Claus Mat – TUTORIAL
Q1: Can I use fabric markers instead of paint for the design?
Yes, fabric markers can work for simpler designs. However, paints provide more vibrant colors and better coverage, especially for outdoor mats.
Q2: How long does it take to complete the Santa Claus Mat?
The time varies based on the complexity of the design and drying times. On average, it takes 2-4 hours, excluding drying.
Q3: Can children help with this project?
Absolutely! This tutorial is family-friendly. Kids can assist with stenciling or painting under adult supervision.
Q4: What type of mat is best for outdoor use?
Coir mats are ideal for outdoor use due to their durability and natural texture. Ensure the paint is weatherproof for added longevity.
Q5: How do I prevent paint from bleeding under the stencils?
Secure the stencils firmly with painter’s tape and use minimal paint on your brush or sponge to avoid overloading.
Q6: Can I reuse stencils for multiple mats?
Yes, stencils can be reused. Clean them gently after each use to maintain their condition.
Join our VIP broadcast list and gain access to exclusive patterns, all for free. As a VIP member, you’ll receive the best patterns daily, delivered directly to your device. ✨📱 It’s a unique opportunity to stay up-to-date with the latest trends and designs, curated just for you. Don’t miss out on enhancing your projects and discovering new inspirations with the best patterns every day! 🎨🔝
Conclusion
In this Santa Claus Mat – TUTORIAL, we explored how to create a festive and functional mat that embodies the holiday spirit. From gathering materials to adding finishing touches, every step ensures your project is enjoyable and rewarding.
We hope this guide inspires you to craft your own Santa Claus Mat and spread holiday cheer in your home. Share your thoughts, experiences, and suggestions in the comments. Your feedback helps us improve and provide more creative tutorials for you. Happy crafting and happy holidays!

