The Quilt Every Little Bit Tutorial is a wonderful guide for quilters who love using scraps creatively and turning even the smallest fabric pieces into something beautiful and meaningful.
This project celebrates the joy of maximizing every bit of fabric, transforming leftovers into a cohesive and charming quilt.
Instead of letting scraps sit forgotten in a basket, this tutorial shows how each piece—no matter how tiny—can contribute to a vibrant and artistic design. Quilters of all levels appreciate this process because it is economical, sustainable, and incredibly satisfying.
One of the biggest advantages of the Quilt Every Little Bit Tutorial is that it encourages complete scrap usage while still offering structure and clarity.
Many quilters accumulate an ever-growing stash of leftover strips, squares, triangles, and oddly shaped pieces from previous projects. This tutorial teaches you how to organize those scraps, pair them effectively, and sew them into stunning blocks that look intentional rather than random. The process is fun, intuitive, and filled with the joy of rediscovering fabrics from past quilts. Each section becomes a memory of previous creative journeys.
Following the Quilt Every Little Bit Tutorial allows quilters to create a unique and expressive quilt without needing to buy new materials. The beauty of scrap quilting lies in unpredictability—unexpected color combinations, contrasting textures, and different scales of patterns come together in a lively mosaic. This makes each quilt one of a kind. The tutorial guides you through every step, helping you build a harmonious composition while embracing the charm of imperfection. Whether displayed on a couch, bed, wall, or gifted to someone special, this type of quilt carries a warmth that only handmade patchwork can provide.
Why the Every Little Bit Quilt Is Special
The Quilt Every Little Bit Tutorial stands out because it transforms leftover fabric into artistic expression. Instead of discarding small scraps, quilters learn how to repurpose them beautifully. This sustainable approach makes the quilt eco-friendly and budget-friendly.
Each finished quilt becomes a fabric timeline of previous projects. Every colorful scrap carries a memory, giving the quilt a narrative quality. This adds emotional value and makes the finished piece deeply personal.
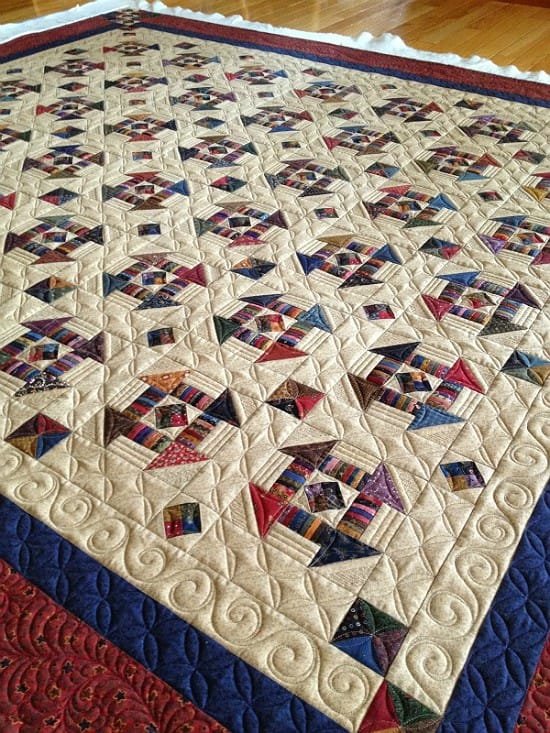
Another reason this quilt is special is that it welcomes all fabrics—bright, muted, patterned, solid, vintage, or modern. Diversity of scraps leads to a dynamic, eye-catching design full of visual interest.
It is also an excellent project for building sewing confidence. Because scraps vary in size and shape, the quilt teaches problem-solving and improvisation skills, making it ideal for beginners and experienced quilters alike.
The quilt also offers delightful unpredictability. Every section forms differently, turning the sewing process into a fun discovery rather than a rigid pattern.
Finally, the finished quilt radiates creativity. There is something joyful about knowing that every small piece contributed to the final masterpiece, honoring the spirit of using “every little bit.”
Materials and Fabric Preparation
To begin the Quilt Every Little Bit Tutorial, gather a collection of fabric scraps in various colors, textures, and patterns. Scraps can include strips, squares, trimmings, triangle leftovers, and irregular shapes. Anything can be used as long as it is large enough to sew.
Sorting your scraps into color groups helps create a more harmonious quilt. Organizing them by warm, cool, neutral, or mixed tones brings balance to the overall composition and makes sewing faster.
Pressing your scraps before starting is essential. Ironed scraps are easier to cut and match, ensuring cleaner seams and better block alignment. This step improves the quality and professional appearance of the finished quilt.
A rotary cutter, cutting mat, and quilting ruler will help you trim your scraps into usable sizes. Not every piece needs to be identical, but having straight edges makes the sewing process smoother.
Prepare your sewing machine with a neutral or light-colored thread. This allows your seams to blend into the colorful patchwork without standing out too much.
Finally, choose a background or filler fabric only if desired. Some quilters prefer an entirely scrappy look, while others enjoy adding a consistent fabric to unify the quilt’s design.
How to Sew the Every Little Bit Quilt Blocks
To follow the Quilt Every Little Bit Tutorial, start by choosing small scraps and joining them into pairs. Sew them with a quarter-inch seam allowance and press them open to reduce bulk. These small units form the foundation of your blocks.
Once you have several pairs, join them into larger sections. This step is flexible, allowing you to decide the size and shape of each block. The more relaxed the approach, the more creative the results.
As your sections grow, trim the edges to keep each piece square or rectangular. This trimming creates structure while still maintaining the free-form spirit of scrap quilting.
When your blocks reach a consistent size—commonly 6”, 8”, or 10”—you can begin assembling them into rows. Matching colors is not necessary; the charm lies in their randomness.
Sew your rows together and press the seams. This brings all the small pieces together into a beautiful mosaic effect. Even mismatched scraps blend wonderfully in the finished quilt.
After assembling the top, add batting and backing, then quilt as desired. Straight-line quilting, free-motion quilting, or simple stitching all work beautifully for this style.
Design Tips for a Beautiful Scrappy Quilt
A helpful design tip in the Quilt Every Little Bit Tutorial is to vary your color placement. Grouping too many identical shades in one area may create overly heavy sections. Balance them across the quilt.
Use high-contrast scraps to add excitement. Bright against dark or pattern against solid creates a rhythmic, lively look.
Introduce occasional “calm” fabrics like neutrals or low-volume prints. These fabrics act as visual rest points within the busy patchwork.
Try experimenting with different block sizes. Mixing small and large blocks adds dimension and interest to the quilt layout.
If your scraps include many bold prints, consider adding a thin sashing or subtle border. This gives the eye a resting place and frames the artwork beautifully.
Lastly, embrace imperfection. The charm of a scrappy quilt lies in its spontaneous personality and unique combinations that no planned quilt could replicate.
FAQ About the Every Little Bit Quilt
1. Do my fabric scraps need to be the same size?
No, scraps can vary. The tutorial embraces mismatched shapes and sizes.
2. Can beginners make this quilt?
Yes, this is an excellent beginner project because of its forgiving and flexible structure.
3. What is the best color palette for this quilt?
Any palette works. Mixed colors create a lively look, while themed colors offer unity.
4. Do I need a pattern?
You only need basic sewing knowledge; the tutorial relies on improvisation.
5. What quilting method works best?
Straight-line or free-motion quilting both complement scrappy designs beautifully.
Conclusion
The Quilt Every Little Bit Tutorial celebrates creativity, sustainability, and the joy of transforming scraps into something stunning and meaningful. Each tiny fabric piece finds new purpose as part of a vibrant, expressive quilt.
Whether you are a beginner or an experienced quilter, this project offers endless possibilities and the satisfaction of using every last bit of fabric. I hope you enjoyed this tutorial and feel inspired to make your own scrappy masterpiece.

