The Quilt by Debra Barlow Hardy – TUTORIAL is an inspiring guide for quilting enthusiasts who want to create stunning and artistic pieces.
This tutorial captures Debra Barlow Hardy’s unique quilting style, blending traditional techniques with modern aesthetics.
Her work is celebrated for its intricate designs, vibrant colors, and storytelling elements, making her quilts truly one-of-a-kind.
Whether you’re a seasoned quilter or just beginning your journey, this tutorial will guide you through the process step-by-step.
From selecting the right materials to piecing and quilting, you’ll learn everything you need to recreate or adapt Debra’s signature style.
The emphasis on detail, creativity, and precision makes this a rewarding project for anyone passionate about quilting.
By following the Quilt by Debra Barlow Hardy – TUTORIAL, you’ll gain insights into the artistry and techniques that set her work apart. Let’s dive into the details and explore how to bring this captivating quilt design to life.
1. Materials and Tools for the Quilt by Debra Barlow Hardy
Before starting the Quilt by Debra Barlow Hardy – TUTORIAL, gather all necessary materials and tools to ensure a seamless process. Preparation is key to a successful quilting project.
Choose high-quality fabric. Debra’s quilts often feature bold colors and patterns, so opt for premium cotton or a fabric that holds its shape well.
Select coordinating threads. The thread should complement your fabric and provide durability for stitching.
Invest in a reliable sewing machine. A machine with quilting capabilities will simplify the process, especially for intricate designs.
Prepare a rotary cutter and cutting mat. These tools ensure precise cuts for clean and accurate pieces.
Use quilting rulers. Rulers help maintain consistency and accuracy when measuring and cutting.
Have safety pins and basting spray. These tools secure layers during the quilting process, preventing shifting or puckering.
2. Step-by-Step Guide to Creating the Quilt
The Quilt by Debra Barlow Hardy – TUTORIAL is broken down into simple, manageable steps. Follow these instructions to create a beautiful quilt inspired by her work.
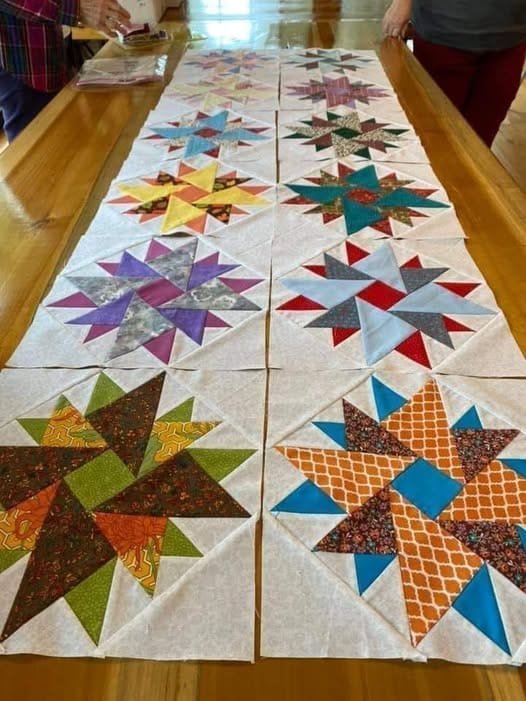
Start with fabric selection. Choose a mix of solids and prints that reflect the vibrant and expressive style typical of Debra’s quilts.
Prepare your pieces. Using the rotary cutter and ruler, cut your fabric into the desired shapes, such as squares, triangles, or strips.
Arrange your design. Lay out your fabric pieces on a flat surface, experimenting with different arrangements to achieve the desired pattern.
Sew the blocks together. Using your sewing machine, stitch the pieces to form quilt blocks, ensuring consistent seam allowances.
Assemble the quilt top. Join the blocks together to create the complete quilt top, pressing seams flat as you go.
Layer and baste the quilt. Stack the quilt top, batting, and backing fabric, then secure them with safety pins or basting spray.
3. Quilting Techniques to Elevate Your Design
To truly capture the essence of the Quilt by Debra Barlow Hardy – TUTORIAL, incorporate advanced quilting techniques that add texture and depth to your project.
Experiment with free-motion quilting. This technique allows you to create intricate patterns and designs that mimic Debra’s artistic style.
Use straight-line quilting. Clean, geometric lines can enhance the structure and balance of your quilt design.
Incorporate hand quilting. For a personal touch, add hand-stitched details that highlight specific areas of your quilt.
Try applique techniques. Add layered fabric shapes for extra dimension and visual interest.
Focus on color transitions. Gradual shifts in color create a dynamic and cohesive appearance.
Add embellishments. Incorporate beads, embroidery, or other decorative elements to make your quilt stand out.
4. Finishing Touches and Care Tips
Once your quilt is assembled and quilted, the final steps ensure a polished and professional finish.
Trim the edges. Use your rotary cutter and ruler to even out the edges, preparing the quilt for binding.
Attach the binding. Sew binding strips around the edges of the quilt to give it a clean and finished look.
Hand-sew the binding. For a seamless appearance, use a hand-stitched binding technique to secure the edges.
Label your quilt. Add a personalized label with your name, date, and a special message to commemorate your work.
Wash and block the quilt. Gently wash and block the quilt to relax the fibers and set the stitches.
Store properly. To preserve your quilt, store it in a cool, dry place away from direct sunlight.
FAQ
1. What makes the Quilt by Debra Barlow Hardy unique?
Debra’s quilts stand out for their intricate designs, vibrant colors, and the storytelling elements woven into each piece.
2. Can beginners follow this tutorial?
Yes, this tutorial is designed to guide quilters of all skill levels, offering detailed instructions and tips.
3. What type of fabric is best for this quilt?
High-quality cotton fabric is ideal, as it is durable and holds its shape well during the quilting process.
4. How long does it take to complete the quilt?
The time required depends on your skill level and the complexity of the design. Most projects take several weeks to complete.
5. Can I customize the design?
Absolutely! Feel free to adapt the pattern, colors, and techniques to make the quilt your own.
6. How should I care for the finished quilt?
Hand wash or machine wash on a gentle cycle with mild detergent. Air dry or tumble dry on low heat.
Join our VIP broadcast list and gain access to exclusive patterns, all for free. As a VIP member, you’ll receive the best patterns daily, delivered directly to your device. ✨📱 It’s a unique opportunity to stay up-to-date with the latest trends and designs, curated just for you. Don’t miss out on enhancing your projects and discovering new inspirations with the best patterns every day! 🎨🔝
Conclusion
The Quilt by Debra Barlow Hardy – TUTORIAL is a wonderful resource for quilters looking to create a masterpiece inspired by her artistic vision. By following this guide, you’ll gain the skills and confidence to craft a beautiful quilt that reflects your personal style.
We’d love to hear about your quilting journey! Share your thoughts, experiences, and suggestions in the comments below. Your feedback helps us create more valuable tutorials for quilting enthusiasts like you. Happy quilting!

