If you’re new to quilting or looking for a refresher, this quilt block tutorial – pattern will guide you through creating stunning quilt blocks, one of the most essential components of a quilt. By following this guide, you’ll master the techniques to craft beautiful and uniform quilt blocks, adding a personal touch to your quilt designs.
A quilt block is a fundamental building block in quilting, often made from various fabrics pieced together to form a larger design. Whether you’re a beginner or experienced, learning how to create quilt block patterns will help you create quilts that are visually appealing and meaningful.
In this tutorial, we’ll walk you through the steps to create a variety of quilt block patterns, covering everything from choosing your fabrics to stitching your blocks together. With practice, you’ll be able to make any quilt block pattern with ease and confidence.
1. What is a Quilt Block?
A quilt block is essentially a smaller piece of a larger quilt. It’s a square or rectangular fabric design, often repeated in a larger grid to make up the entire quilt. Quilt blocks come in all shapes and sizes and can be as simple or as complex as you like.
- Quilt block patterns often include geometric designs such as squares, triangles, or diamonds.
- These blocks are sewn together to create a larger design, with each block contributing to the overall look of the quilt.
- The beauty of a quilt block is its versatility. You can choose different colors and fabrics to make it unique.
- Many quilters enjoy combining several quilt block patterns to form a more intricate quilt.
- Beginners often start with simple quilt block patterns, gradually moving to more complex designs as they gain confidence.
- The key to success in making quilt blocks is consistency in cutting and stitching.
2. Choosing Fabrics for Your Quilt Block
When creating your quilt block patterns, the fabrics you choose will significantly impact the final product. Each fabric has its texture, weight, and color, which can enhance the quilt’s overall aesthetic.
- Start by selecting high-quality cotton fabrics that are easy to work with and durable.
- Choose colors that complement each other, or create a contrast for a more striking design.
- Many quilt block patterns call for a combination of solid and patterned fabrics to add depth to the design.
- Don’t forget to consider the fabric’s weight. Heavier fabrics can add texture, but lighter fabrics are easier to handle for beginners.
- Pre-wash your fabrics to avoid any shrinkage after you’ve sewn the blocks together.
- Organize your fabrics before cutting them into the required shapes and sizes for the quilt block patterns.
3. Cutting and Sewing Your Quilt Blocks
Once you’ve chosen your fabrics, it’s time to cut and sew your quilt blocks. Precision is key to creating beautiful, uniform quilt blocks that fit together seamlessly.
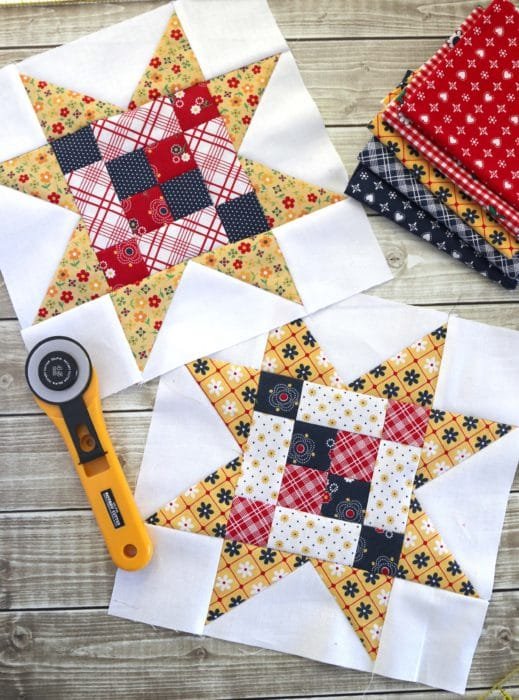
- Use a rotary cutter and mat for precise fabric cutting.
- Follow the measurements in your quilt block pattern closely to ensure accuracy.
- Make sure your seams are consistent – typically, a 1/4-inch seam allowance is standard in quilting.
- Pin your fabrics together before sewing to prevent any shifting.
- Press your seams as you sew, as this helps keep your quilt block flat and neat.
- After sewing, double-check your measurements to ensure your blocks are all the same size.
4. Putting Your Quilt Blocks Together
Now that your quilt blocks are cut, sewn, and pressed, it’s time to assemble them into a quilt top. This stage is where your quilt truly starts to come together.
- Lay out your quilt blocks in the order you want them to appear in the final quilt.
- Ensure that the seams of adjacent quilt blocks line up correctly for a polished look.
- Sew your quilt blocks together in rows, then sew the rows together to form the quilt top.
- Take your time during this step; ensuring accuracy will lead to a more professional-looking quilt.
- Once the quilt top is assembled, it’s time to add batting and backing to complete the quilt.
- Finally, quilt the layers together, either by hand or machine, and finish with binding around the edges.
FAQ: Common Questions About Quilt Block Patterns
1. What is the easiest quilt block pattern for beginners?
The most common and easiest pattern for beginners is the nine-patch block, which consists of three rows of three squares. It’s a simple design that teaches the basics of quilting.
2. How big should my quilt blocks be?
Quilt blocks can vary in size, but a standard size is 12 inches square. However, you can make them larger or smaller depending on your quilt’s design and purpose.
3. Can I use different fabrics for each block?
Yes! Mixing different fabrics in your quilt blocks can create a unique and interesting design. Just make sure the fabrics complement each other.
4. How do I ensure my quilt blocks are the same size?
The key to consistent quilt block sizing is precision when cutting and sewing. Use a rotary cutter and ruler, and ensure that your seam allowance is accurate.
5. Do I need a pattern to make quilt blocks?
While you don’t always need a specific pattern, following a quilt block pattern can help guide your design and ensure that all your blocks fit together neatly.
6. What tools do I need to make quilt blocks?
Essential tools include a rotary cutter, mat, ruler, fabric scissors, pins, and an iron. You’ll also need a sewing machine or needle and thread if you’re quilting by hand.
Join our VIP broadcast list and gain access to exclusive patterns, all for free. As a VIP member, you’ll receive the best patterns daily, delivered directly to your device. ✨📱 It’s a unique opportunity to stay up-to-date with the latest trends and designs, curated just for you. Don’t miss out on enhancing your projects and discovering new inspirations with the best patterns every day! 🎨🔝
Conclusion: Mastering Quilt Block Patterns
By following this quilt block tutorial – pattern, you’ve learned the fundamental steps to creating beautiful quilt blocks, from selecting fabrics to cutting, sewing, and assembling your quilt. Whether you’re new to quilting or experienced, understanding these techniques will help you create stunning quilts that reflect your personal style.
We hope you found this tutorial helpful! We’d love to hear your opinions and suggestions for future quilting tutorials—please leave a comment and share your quilting experiences!

