If you’ve been searching for an efficient and fun way to assemble your quilt blocks, this Quilt As You Go Tutorial and Sashing QAYG Blocks guide is for you. This method, known as Quilt As You Go (QAYG), allows you to quilt individual blocks and piece them together, simplifying the entire quilting process.
Whether you’re new to quilting or an experienced quilter looking for a streamlined technique, this approach can help you manage larger projects more easily. The Quilt As You Go technique lets you focus on one block at a time, offering the satisfaction of seeing your quilt take shape from the very beginning.
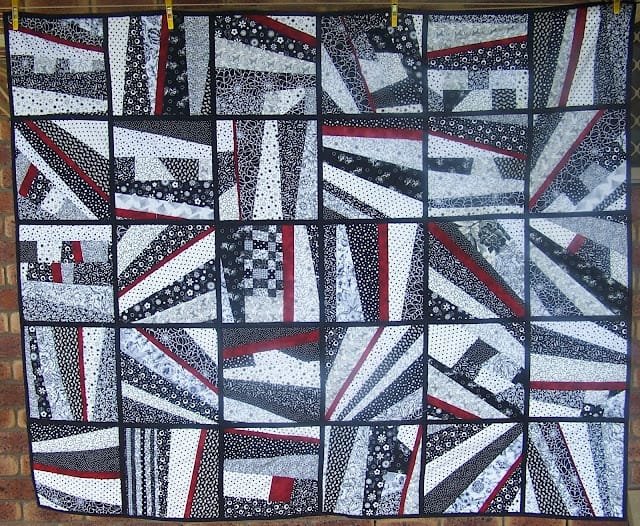
The Quilt As You Go method also provides the unique opportunity to add sashing between blocks, creating a cohesive and polished look. With sashing, your blocks are bordered by strips that enhance the design while joining each block together seamlessly.
This combination of Quilt As You Go Tutorial and Sashing QAYG Blocks can transform your quilting projects, making them easier to handle and giving your quilt an impressive, finished look.
In this guide, we’ll walk you through the essentials of the QAYG method, explain how to add sashing to your quilt blocks, and explore useful tips to help you get the most out of this technique. Let’s dive in and discover the joy of creating quilts with Quilt As You Go!
1. Understanding the Quilt As You Go (QAYG) Method
The Quilt As You Go technique is a great method for creating quilts one block at a time. It’s particularly helpful for those with limited sewing space or those who may find it challenging to handle large quilt tops on a traditional machine.
- What Is Quilt As You Go (QAYG)? The Quilt As You Go method involves quilting each block individually before assembling them into a larger quilt. By focusing on smaller sections, you can manage the quilting process more easily, making it ideal for beginners and experienced quilters alike.
- Advantages of QAYG: One of the main benefits of this technique is that it reduces bulk. When you work on smaller sections, handling each piece becomes more manageable, and you avoid dealing with a heavy, full-sized quilt on your machine. Additionally, QAYG allows you to experiment with different quilting patterns on each block.
- Materials Needed: For Quilt As You Go, you’ll need your typical quilting supplies, such as fabric for your quilt blocks, batting, and backing fabric. A walking foot for your sewing machine can also help ensure that your stitches stay even and prevent shifting layers.
- Quilting Each Block Individually: After preparing your materials, you can start quilting each block separately. The QAYG method allows you to finish each block completely with its own quilting before moving on to the next, giving you a sense of progress as you work.
- Saving Time with QAYG: Another advantage of QAYG is that you don’t need to do all the quilting at the end. By completing each block as you go, you save time and energy when piecing the quilt together.
- Perfect for Beginners: Because it breaks down the process into manageable steps, the QAYG method is beginner-friendly. It allows new quilters to practice quilting techniques on smaller pieces, building confidence before tackling larger projects.
2. Adding Sashing to Quilt As You Go (QAYG) Blocks
Adding sashing to your Quilt As You Go blocks is a popular way to enhance the overall look of your quilt. Sashing is the fabric strip that goes between each block, providing definition and continuity across your quilt top.
- Choosing the Right Fabric for Sashing: For sashing, select a fabric that complements the colors and patterns in your quilt blocks. A neutral or solid color can work well to create balance, or you can use a contrasting color to add interest.
- Measuring and Cutting Sashing Strips: Measure your blocks accurately and cut sashing strips accordingly. Make sure each strip is the same width to create a uniform look. Common widths for sashing range from 1.5 to 2 inches, depending on the desired effect.
- Attaching Sashing to Blocks: To attach sashing, sew each strip to the side of a block. When adding sashing to rows of blocks, be sure to match the ends and ensure the strips are aligned evenly for a clean, professional look.
- Joining Blocks with Sashing: When your sashed blocks are ready, sew them together row by row. Sashing between each block creates visual separation and allows each design to stand out.
- Creating Cornerstones: If desired, add small squares, known as cornerstones, at the intersections of your sashing strips. This technique adds an additional design element and helps to keep rows aligned.
- Quilting Sashing Separately: You may want to quilt your sashing separately before attaching it to the blocks. This ensures even stitching and prevents any shifting that could occur while piecing the quilt top together.
3. Tips for Successful Quilt As You Go Projects
To make the most out of Quilt As You Go Tutorial and Sashing QAYG Blocks, consider these practical tips for a smooth and enjoyable quilting experience.
- Use Basting Spray or Pins: When quilting each block, use basting spray or pins to secure the layers. This helps prevent the fabric from shifting and maintains the block’s shape during quilting.
- Trim Blocks Consistently: After quilting, trim each block to the same size. This is essential for an even look when assembling the quilt, especially when adding sashing.
- Choose a Consistent Quilting Pattern: While one advantage of QAYG is the ability to try different patterns, sticking with a consistent design can create a more cohesive appearance. Decide if you want uniformity across your blocks or prefer each one to have a unique style.
- Align Blocks Carefully: When sewing blocks together with sashing, align the seams carefully. Proper alignment will make your quilt look polished and professional, avoiding any gaps or misaligned blocks.
- Backstitch at Corners: Secure the corners and edges by backstitching, which reinforces the stitching and ensures durability. Backstitching also prevents unraveling at high-stress areas of the quilt.
- Press Seams Open: Press seams open for a flat, smooth quilt top. This reduces bulk, especially with the added sashing, and gives your quilt a crisp, clean finish.
4. Quilting the Final Assembled Quilt
Once all your Quilt As You Go Tutorial and Sashing QAYG Blocks are assembled, it’s time to focus on finishing the quilt. This final stage brings all your work together and gives your quilt a lasting, professional appearance.
- Joining Blocks into Rows: Once each block is quilted and sashed, arrange them into rows. Sew each row together, making sure that seams align for a balanced, cohesive look.
- Adding Border and Binding: To complete your quilt, add a border around the outside edge. This frame adds stability and helps protect the edges. Bind the quilt using a complementary fabric for a clean, finished look.
- Adding Final Quilting: If desired, add some final quilting stitches to secure all layers. You can stitch in the ditch along the sashing or add decorative quilting patterns that complement the overall design.
- Trimming and Squaring: Before binding, trim any excess batting and backing, and square up your quilt. A clean edge ensures your binding will be even.
- Attaching the Binding: Attach binding around the edges to finish off your quilt. Use either machine binding or hand-stitching, depending on your preference and skill level.
- Finishing Touches: Finally, inspect the quilt for loose threads or uneven areas. Make any necessary adjustments, and admire your finished Quilt As You Go masterpiece!
FAQ
1. What is the Quilt As You Go (QAYG) method?
The QAYG method involves quilting each block separately before assembling them into a larger quilt, making it easier to handle and more manageable for beginners.
2. Do I need special tools for Quilt As You Go?
You’ll need basic quilting tools, such as fabric, batting, a sewing machine, and possibly a walking foot to manage multiple layers. Basting spray or pins can also help with securing fabric layers.
3. How do I choose fabric for sashing?
Choose a fabric that complements your quilt blocks. Neutrals work well for a balanced look, while contrasting colors can add interest and make each block stand out.
4. Can I add sashing to Quilt As You Go blocks?
Yes, sashing is a popular addition that provides structure and visual separation between blocks. It also helps align and secure rows when piecing the quilt top together.
5. Do I quilt the sashing separately?
Quilting the sashing separately can ensure even stitches and reduce the risk of shifting, especially if you’re working with longer strips.
6. What are cornerstones in quilting?
Cornerstones are small squares placed at the intersections of sashing strips. They add a decorative element and help align rows more accurately.
Join our VIP broadcast list and gain access to exclusive patterns, all for free. As a VIP member, you’ll receive the best patterns daily, delivered directly to your device. ✨📱 It’s a unique opportunity to stay up-to-date with the latest trends and designs, curated just for you. Don’t miss out on enhancing your projects and discovering new inspirations with the best patterns every day! 🎨🔝
Conclusion
In this Quilt As You Go Tutorial and Sashing QAYG Blocks guide, we’ve covered everything from understanding the basics of Quilt As You Go to adding sashing and putting the final touches on your quilt.
This method simplifies quilting by breaking down the process into manageable steps, allowing you to focus on one block at a time. Adding sashing not only enhances the appearance of your quilt but also makes assembly easier and more visually appealing.
We hope this tutorial has inspired you to try Quilt As You Go with sashing on your next project! Please share your thoughts and let us know if you have any suggestions for future tutorials. Happy quilting!

