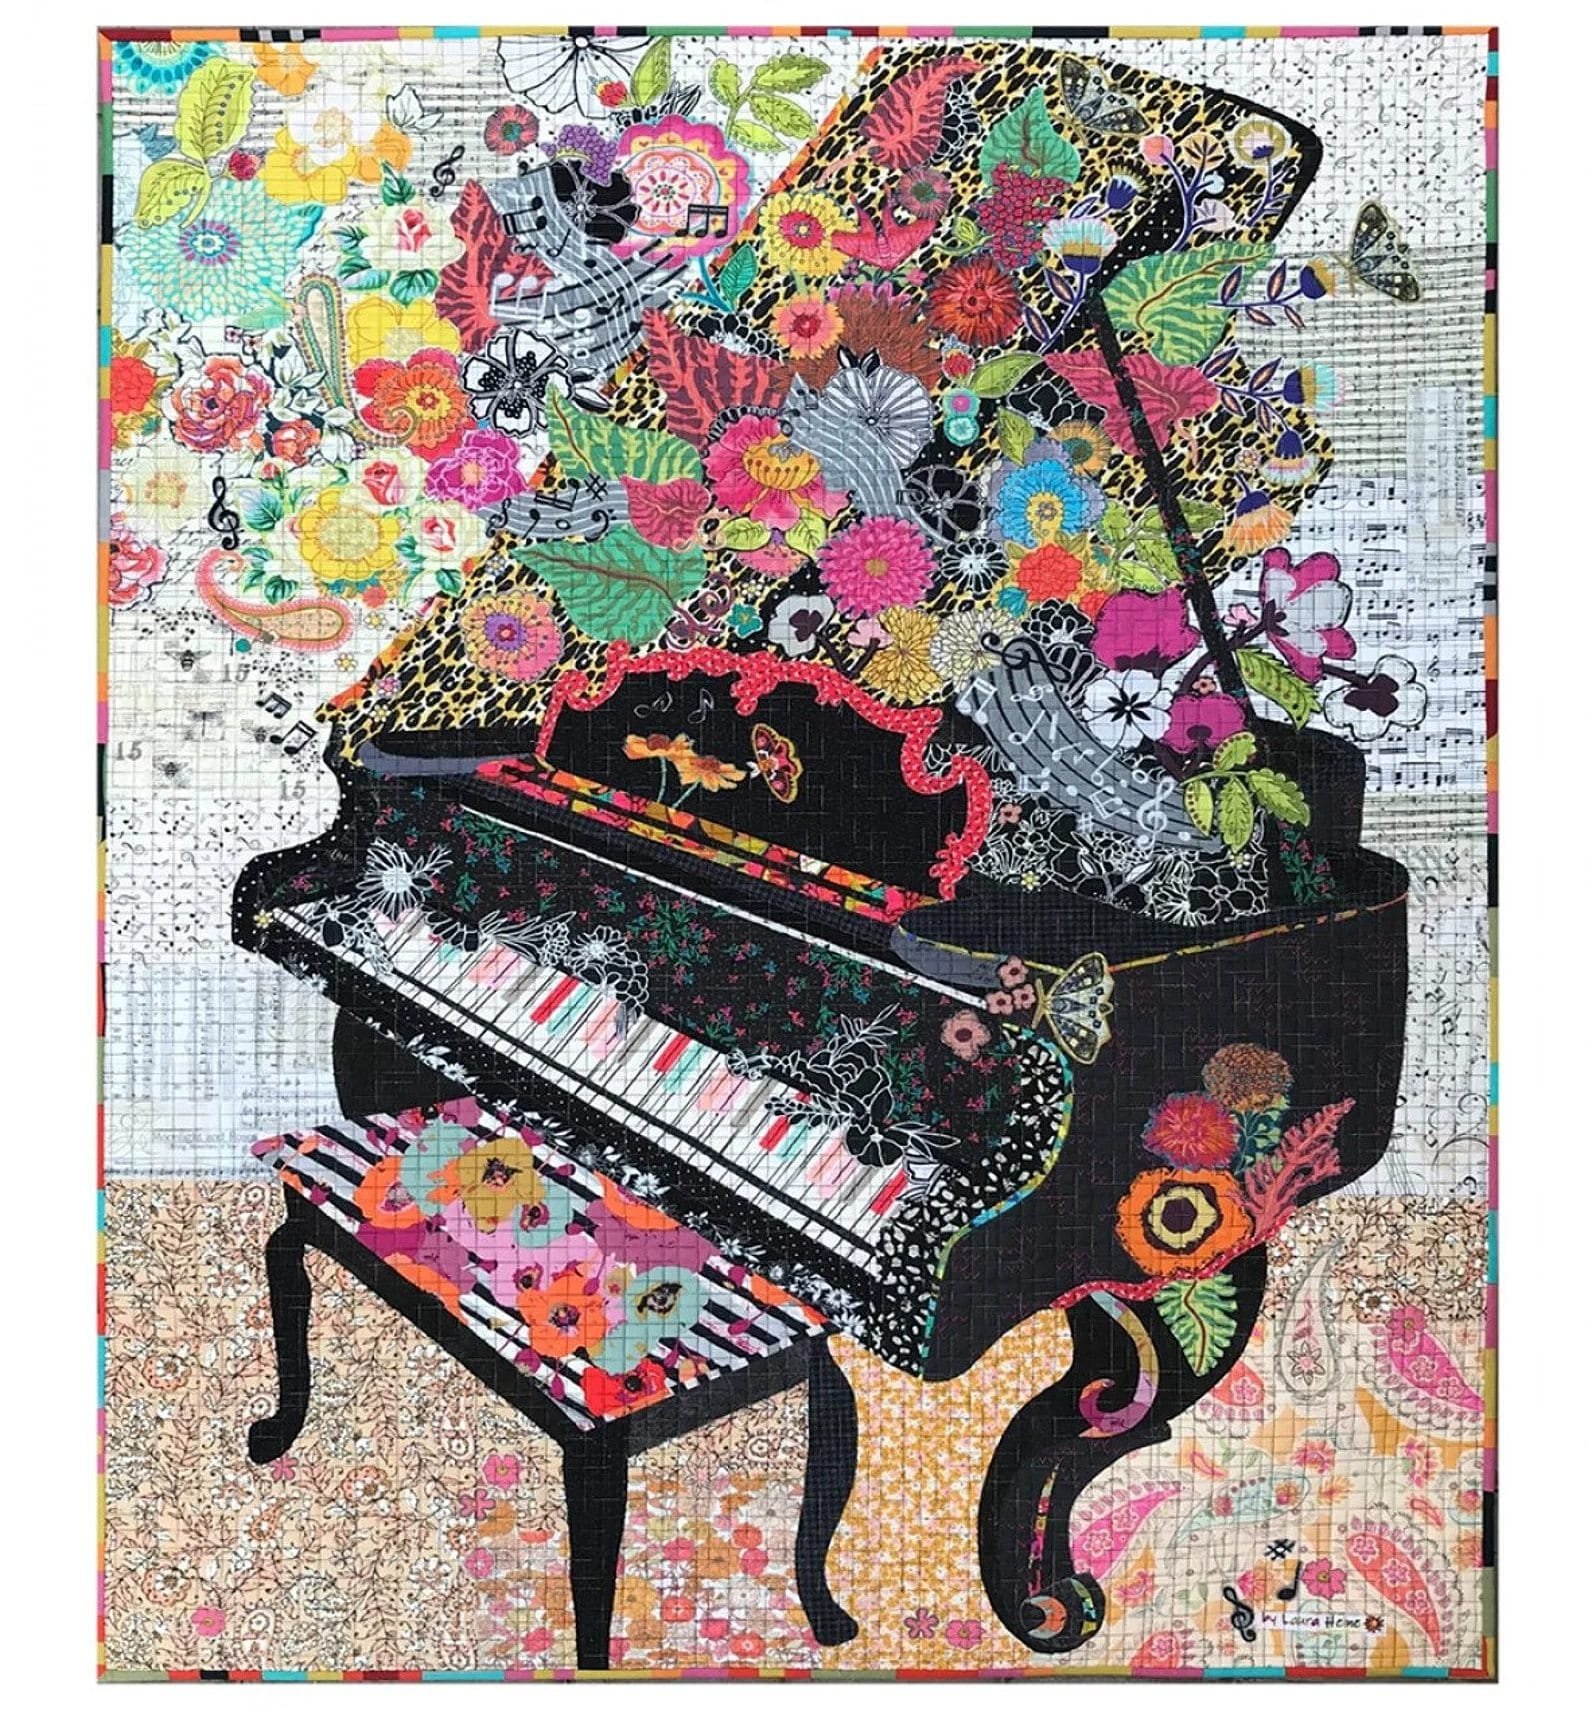
The Piano Collage Pattern quilt by Laura Heine is not just a quilt—it’s a work of art. Designed for creative souls who appreciate music, fabric, and bold artistic expression, this pattern has taken the quilting community by storm. Combining vibrant colors, textures, and detailed layering, the Piano Collage Pattern offers an exciting project for quilters of all levels who are looking to dive into collage quilting.
From the very first glance, the Piano Collage Pattern quilt by Laura Heine captures the heart with its imaginative structure and free-flowing artistic style. This is not a traditional block-by-block quilt but rather a canvas of creativity. Laura Heine is renowned for her collage quilt patterns, and this design beautifully blends musical themes with floral elements, creating a visually striking harmony.
If you’re a quilter looking for something different, the Piano Collage Pattern is an inspiring choice. It lets you break away from structured piecing and instead encourages you to play with fussy cutting, fabric placement, and your own sense of design. In this article, you’ll explore everything you need to know to get started with this pattern—from fabric selection to finishing touches.
Understanding the Piano Collage Technique
The Piano Collage Pattern uses a unique form of quilting that’s different from traditional patchwork. Collage quilting involves using hundreds of small fabric pieces, cut from various prints, to create an image or scene.
This technique relies heavily on fusible web to hold pieces in place before stitching. The result is a flat, textured composition that looks more like a painting than a quilt. With Laura Heine’s guidance, the collage process becomes approachable and deeply enjoyable.
Rather than sewing blocks together, you’ll be arranging fabric motifs to create the outline of a piano, then gradually filling in the background and foreground with coordinated elements. Each quilter ends up with a slightly different result, which adds a personal, expressive quality to the Piano Collage Pattern quilt.
Selecting fabrics is part of the fun. Bold florals, whimsical prints, and even abstract shapes can be combined to create depth and visual interest. The pattern encourages you to be fearless with color and to enjoy the process of letting creativity guide your hands.
Choosing the Right Fabrics for Impact
When working with the Piano Collage Pattern, fabric selection is key to the overall aesthetic. Since this is a collage quilt, it’s important to gather a variety of prints, sizes, and colors.
Start by choosing a focal point—typically, the piano itself. You’ll want dark fabrics or high-contrast motifs to ensure it stands out from the background. Black-and-white prints work beautifully for this purpose and mimic the classic look of piano keys.
Next, turn to the surrounding elements. Floral fabrics in various scales are perfect for adding life and color. Laura Heine’s style often incorporates roses, daisies, and foliage to bring natural beauty into her quilts. These also help fill space and transition between the main image and the border.
You can also mix in whimsical elements like birds, butterflies, or music notes for added charm. The beauty of the Piano Collage Pattern is its flexibility. There’s no right or wrong—your fabric choices reflect your personality and artistic vision.
Layering is essential in collage quilting. You’ll want to place lighter colors on top and darker ones beneath to create dimension. Be sure to audition your fabrics before cutting and fusing. This step helps you visualize how the quilt will come together.
Tools and Preparation Before Starting
Creating a Piano Collage Pattern quilt requires a few essential tools, most of which you probably already have in your sewing room.
The number one must-have is fusible web—usually Steam-A-Seam 2. This product lets you lightly tack pieces in place and reposition them before final ironing. A light box can also be helpful when tracing templates from the pattern onto fusible.
Sharp fabric scissors or a rotary cutter are crucial for fussy cutting the detailed shapes. You’ll also need a non-stick pressing sheet to prevent fusible web from damaging your iron or surface. Make sure your iron is clean and works well at medium heat.
Having a design board or large surface to work on will help you visualize your layout as you go. Unlike regular piecing, you’ll be building the quilt image on a foundation, so keeping it flat and accessible is important.
It’s also a good idea to sort your fabrics by color and theme in advance. This makes it easier to locate the right piece when you’re in the creative flow. Prep time can seem long at first, but it pays off by making the actual design process much smoother.
Assembling and Finishing the Quilt
Once you’ve gathered your fabrics and tools, the real fun begins—assembling your Piano Collage Pattern quilt. Start with the piano silhouette, using the pattern as a guide to lay out your pieces.
Don’t rush this part. Take time to adjust shapes and overlap edges slightly for a seamless look. As you build up the collage, step back occasionally to see how it’s coming together from a distance. This helps maintain balance and flow.
After all your pieces are placed and you’re satisfied with the composition, it’s time to fuse them down permanently. Use your iron and pressing sheet to carefully secure everything in place. This step locks in the design and prepares it for stitching.
Stitching is typically done with free-motion quilting or raw-edge appliqué. These methods not only secure the pieces but also add texture. You can use invisible thread, colorful threads for contrast, or even metallics to enhance the visual impact.
Finally, finish your quilt with a traditional backing and binding. Many quilters choose to mount collage quilts like wall art because of their intricate designs. Whether you hang it or drape it over a couch, the Piano Collage Pattern is guaranteed to be a conversation starter.
Frequently Asked Questions (FAQ)
What is a Piano Collage Pattern quilt by Laura Heine?
It’s a collage-style quilt pattern designed by Laura Heine, where you use small cutouts of fabric to build the image of a piano surrounded by floral and artistic elements. It emphasizes creativity and visual storytelling.
Is this pattern beginner-friendly?
Yes, while it looks complex, the instructions are clear and it doesn’t require precision piecing. Beginners can succeed by taking their time and following each step carefully.
What fabrics work best for this pattern?
Variety is key—floral fabrics, text prints, and textured blenders work great. You’ll want to include both light and dark fabrics to create contrast and depth in the collage.
Do I need a sewing machine to make this quilt?
Yes, although most of the visual work is done through fabric placement and fusing, a machine is needed for stitching everything down and quilting the final piece.
How large is the finished quilt?
Sizes vary depending on layout, but most Piano Collage Pattern quilts end up as wall hangings or small throws. The pattern usually includes measurements and layout guides.
Can I customize the design?
Absolutely. That’s one of the joys of collage quilting. You can modify colors, shapes, or even add personal touches like initials or symbols.
Conclusion
The Piano Collage Pattern quilt by Laura Heine is more than a sewing project—it’s a joyful journey through creativity and personal expression. Whether you’re a seasoned quilter or just beginning, this pattern opens the door to a whole new form of textile art. From selecting the perfect fabrics to layering shapes and final stitching, every step brings a sense of accomplishment and beauty.
If you’re looking to challenge yourself and create something truly special, give the Piano Collage Pattern a try. It might just become your favorite project yet. We’d love to hear your honest opinion—did this guide help you? Have you made this pattern or are thinking about starting? Drop your thoughts and suggestions below!

