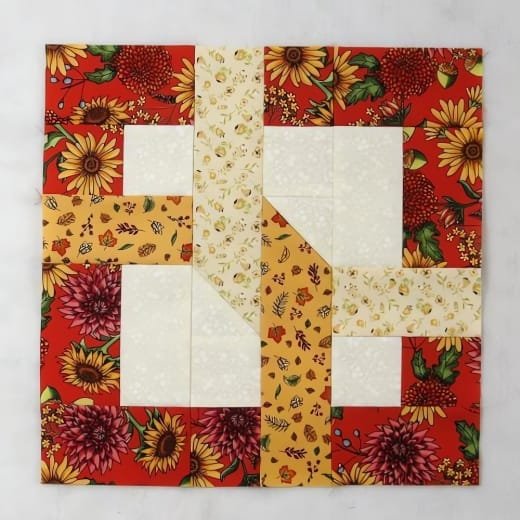
If you are looking to add a fun and dynamic design to your next quilting project, the Loop the Loop Quilt Block – Tutorial is a great place to start.
This tutorial will guide you through the steps of creating this captivating block, whether you’re a seasoned quilter or just beginning your quilting journey. The Loop the Loop Quilt Block offers a playful and intricate look, perfect for creating a quilt that stands out.
In this tutorial, we will explain how to make the Loop the Loop Quilt Block, highlighting each phase of the process from cutting your fabric to piecing the block together.
Using this quilt block pattern, you’ll be able to craft beautiful quilts that showcase both color and movement. We’ll also discuss tips and tricks for perfecting your technique, so you can confidently tackle this project.
Incorporating the Loop the Loop Quilt Block into your quilt designs can elevate your project’s aesthetic appeal, making it an eye-catching centerpiece. Below, we’ll break down the steps in a clear, easy-to-follow way, ensuring you can master this block with ease. Let’s get started!
1. Selecting Fabrics for the Loop the Loop Quilt Block
When beginning any quilt block, especially one as visually interesting as the Loop the Loop Quilt Block, fabric selection is crucial. The colors and patterns you choose will influence the overall effect of your quilt, so take time to plan accordingly.
- Bright and Bold Colors: The Loop the Loop Quilt Block really shines when bold colors are used. Consider selecting bright, contrasting colors that will make the looping pattern pop. Bold blues, reds, and yellows are great choices to emphasize the movement within the block.
- Complementary Patterns: You can also mix and match patterned fabrics with solids to create more depth and interest. For example, try pairing polka dots or stripes with solid colors to give the quilt block a unique, modern feel.
- Choosing Fabric Quality: Always opt for high-quality quilting fabrics. Cotton fabrics work best for the Loop the Loop Quilt Block due to their durability and ease of use. High-quality cottons will hold their shape better and withstand repeated handling as you sew the block together.
- Pre-Washing Fabrics: Don’t forget to pre-wash your fabrics, especially if you’re working with bright colors. Pre-washing helps prevent any color bleeding and ensures that your quilt remains vibrant after washing.
- Coordinating Backgrounds: The background fabric for the Loop the Loop Quilt Block should be neutral to allow the loop design to stand out. White, cream, or light gray are excellent choices for creating a crisp contrast with the main fabrics.
- Using Scraps: If you’re looking to make a scrappy quilt, this block is a perfect opportunity to use up small fabric scraps. The loops in this block are great for mixing different colors and prints, giving your quilt a playful, patchwork feel.
2. Cutting and Preparing Fabric Pieces
Precision is key when it comes to cutting your fabric for the Loop the Loop Quilt Block. Following the correct measurements will ensure that your quilt blocks fit together smoothly and create the desired looping effect.
- Gather Your Tools: Before you start cutting, make sure you have the right tools on hand. A sharp rotary cutter, a ruler, and a cutting mat are essential for ensuring your pieces are cut accurately.
- Cutting on the Grain: When cutting your fabric, always cut on the grain of the fabric to prevent any stretching or warping. The grain refers to the threads in the fabric that run parallel to the selvage edge.
- Precision in Measurements: The Loop the Loop Quilt Block requires precise measurements to ensure the loops line up correctly. Measure twice and cut once to avoid any mistakes. Use a ruler to ensure your fabric pieces are uniform.
- Label Your Pieces: As you cut out your fabric pieces, label them to keep everything organized. This will make assembling the quilt block much easier later on. You can use small sticky notes or fabric-safe markers for this task.
- Cutting Bias Strips: For the curved portions of the Loop the Loop Quilt Block, you’ll need to cut fabric on the bias. Bias strips are cut at a 45-degree angle to the grain, allowing the fabric to stretch slightly and create smooth curves.
- Chain Cutting: If you are making multiple Loop the Loop Quilt Blocks, you can speed up the cutting process by chain cutting. Stack several layers of fabric on top of each other and cut through them simultaneously, ensuring all pieces are the same size.
3. Assembling the Loop the Loop Quilt Block
Once your fabric pieces are cut and prepared, it’s time to begin assembling the Loop the Loop Quilt Block. This is where the design starts to come together, and you can see the loops form.
- Start with the Background: Lay out your background pieces first. This will help you visualize how the looping design will fit into the block and ensure you have all your pieces ready to go before you start sewing.
- Sewing the Loops: Begin sewing the curved loop pieces to the background fabric. When sewing curves, go slowly and use plenty of pins to hold the fabric in place. Be careful not to stretch the fabric, especially along the bias edges.
- Pressing Seams: After sewing each seam, press your seams open or to one side, depending on your preference. Pressing is crucial to ensure the quilt block lies flat and your loops are clearly defined.
- Piecing the Loops Together: Once you’ve sewn all the curved sections, start piecing them together. Take your time aligning the seams where the loops meet. This step requires precision to make sure the loops flow smoothly from one section to the next.
- Trimming the Block: After the Loop the Loop Quilt Block is fully assembled, trim the edges to make sure it is square. Use a ruler to ensure all sides are even, and make adjustments if necessary.
- Checking for Accuracy: Lay the block flat and check for any puckers or misaligned seams. If necessary, go back and make adjustments. A well-pieced block will lie flat and have evenly aligned loops.
4. Adding the Finishing Touches
With your Loop the Loop Quilt Block assembled, it’s time to add the finishing touches. This step will ensure that your quilt block is ready to be incorporated into a larger quilt.
- Adding Borders: If desired, you can add a border around the Loop the Loop Quilt Block to frame the design. This is a great way to showcase the block and give it some extra visual weight within the quilt.
- Basting the Quilt: Once your blocks are complete and sewn together, it’s time to baste your quilt. Basting is the process of temporarily securing the quilt top, batting, and backing fabric together before quilting. Use basting spray or safety pins to hold everything in place.
- Quilting the Layers: Quilting adds texture and interest to your quilt. For the Loop the Loop Quilt Block, consider using quilting designs that echo the loops in the block. Free-motion quilting or gentle waves can complement the design beautifully.
- Binding the Quilt: After quilting, bind the edges of your quilt to give it a clean, finished look. Binding also helps protect the edges of the quilt from fraying.
- Washing the Quilt: Before using or gifting your quilt, wash it to remove any residue from the quilting process. This will also soften the quilt and give it a lovely, crinkled texture.
- Displaying Your Quilt: Once your Loop the Loop Quilt Block quilt is finished, display it proudly! Whether you use it as a bedspread, wall hanging, or throw, this quilt is sure to impress with its intricate design and vibrant colors.
FAQ: Frequently Asked Questions
1. What is the Loop the Loop Quilt Block?
The Loop the Loop Quilt Block is a quilt pattern that features curving, looping designs, creating a dynamic and playful look. It is a great pattern for adding movement and interest to a quilt.
2. Is the Loop the Loop Quilt Block suitable for beginners?
While the Loop the Loop Quilt Block involves sewing curves, which can be challenging for beginners, it is still accessible with practice. Taking your time with the curved seams and using plenty of pins will help you achieve success.
3. What fabrics work best for the Loop the Loop Quilt Block?
High-quality cotton fabrics are ideal for this block. You can use a combination of solid and patterned fabrics to create contrast and interest in the looping design.
4. How do I sew curves in the Loop the Loop Quilt Block?
Sewing curves requires patience and precision. Use a lot of pins to hold the fabric in place, go slowly while sewing, and avoid stretching the fabric, especially along bias edges.
5. Can I use scrap fabric for the Loop the Loop Quilt Block?
Yes! The Loop the Loop Quilt Block is a great way to use up fabric scraps. Mixing different colors and patterns can add a unique, scrappy look to your quilt.
6. What type of quilting design works best with the Loop the Loop Quilt Block?
Quilting designs that echo the loops or curves in the block work well. Free-motion quilting or wavy lines can enhance the movement of the loop design.
Join our VIP broadcast list and gain access to exclusive patterns, all for free. As a VIP member, you’ll receive the best patterns daily, delivered directly to your device. ✨📱 It’s a unique opportunity to stay up-to-date with the latest trends and designs, curated just for you. Don’t miss out on enhancing your projects and discovering new inspirations with the best patterns every day! 🎨🔝
Conclusion
In this Loop the Loop Quilt Block – Tutorial, we covered every step of the process, from selecting fabrics to finishing your quilt block. This block is a beautiful and dynamic addition to any quilt, and while it may involve some challenging curves, the final result is well worth the effort. We hope this tutorial has been helpful and that you feel confident tackling this project.
PATTERN HERE
We would love to hear your thoughts! Please leave a comment below with your feedback, suggestions, or any ideas for future tutorials. Happy quilting!

