If you’ve been searching for a Liberty Butterflies Quilt – Tutorial, you’re in the right place. This tutorial is designed to help quilters of all levels create a stunning quilt with intricate butterfly patterns.
Whether you’re new to quilting or have been doing it for years, this guide will walk you through every step of the process, ensuring you can confidently complete your very own Liberty Butterflies quilt.
In this tutorial, we’ll cover everything from selecting the right materials to piecing the quilt blocks together. By following these steps, you’ll be able to create a quilt that’s both beautiful and functional.
The Liberty Butterflies Quilt is perfect for adding a touch of whimsy to any room, and the patterns offer endless customization options.
The best part? This Liberty Butterflies Quilt – Tutorial is beginner-friendly but versatile enough for experienced quilters to enjoy. Ready to dive in? Let’s get started on your next quilting project!
1. Choosing the Right Materials for the Liberty Butterflies Quilt
Before beginning your Liberty Butterflies Quilt, it’s essential to gather the right materials. This will not only make the process smoother but also ensure your quilt has the durability and visual appeal you’re after.
- Fabric Selection: For this quilt, you’ll want to choose fabrics with vibrant, nature-inspired prints, ideally from Liberty Fabrics’ butterfly collection. Liberty prints are known for their quality and unique designs, which will elevate the overall look of your quilt.
- Thread Type: Use a high-quality cotton thread that matches the base color of your quilt fabric. This ensures the seams are strong, and the thread blends into the design.
- Batting: The batting is the layer that gives your quilt its warmth. Choose a batting made of cotton or a cotton blend for a soft yet sturdy quilt.
- Quilt Backing: The backing of the Liberty Butterflies Quilt can be a solid color or a subtle pattern that complements the front design. Make sure to match the color scheme of the butterfly patterns on the front.
- Cutting Tools: A rotary cutter and a cutting mat will give you the precision you need when cutting your fabric pieces. Accuracy in cutting is vital for aligning your quilt blocks.
- Rulers: Invest in a few quilting rulers to help measure and cut your fabric. A square ruler is ideal for cutting your butterfly blocks evenly.
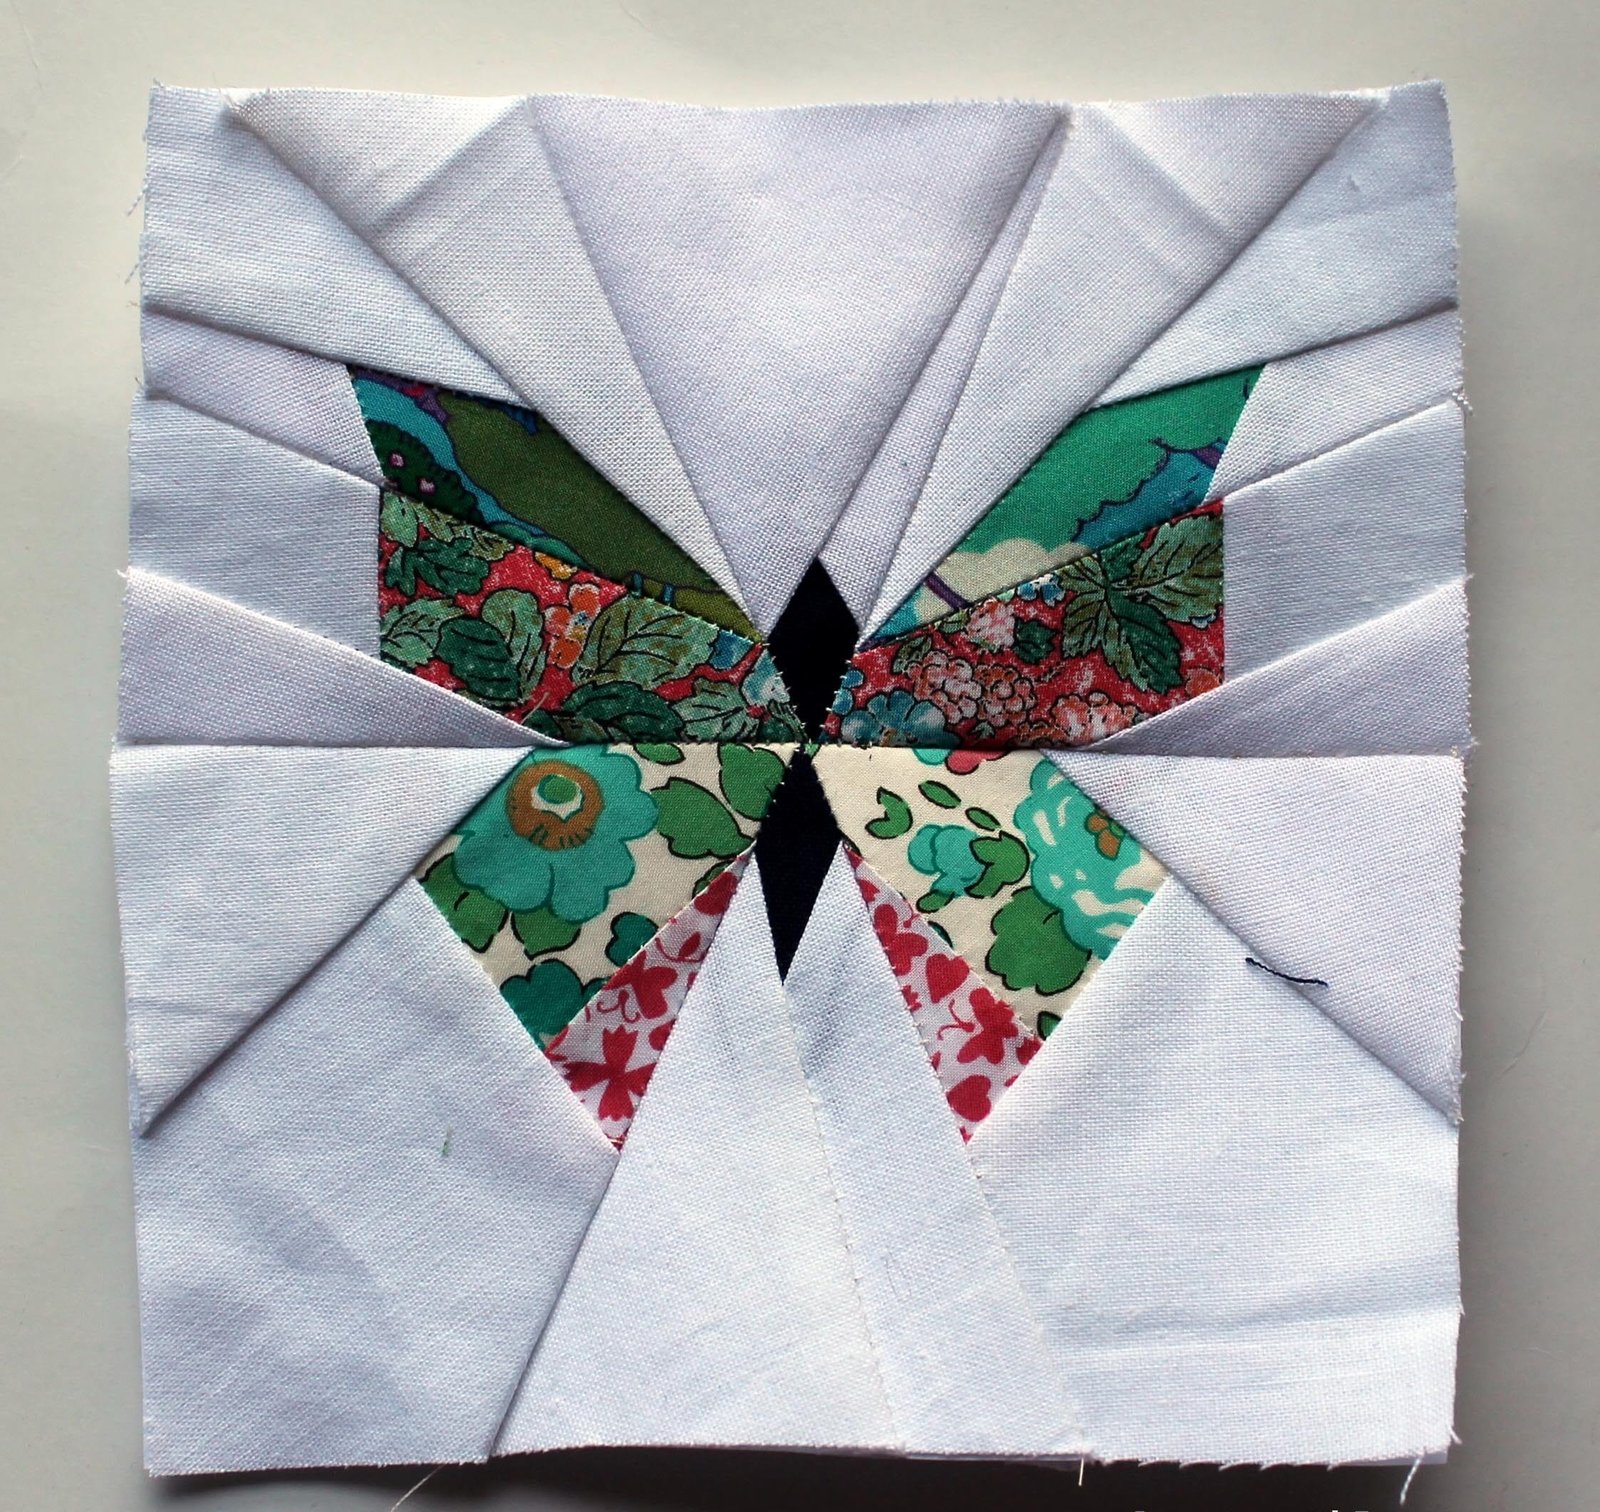
2. Preparing the Quilt Blocks
Now that you have your materials ready, it’s time to start preparing the quilt blocks. The butterfly blocks are the stars of the Liberty Butterflies Quilt, so it’s important to take your time with this step.
- Cutting the Fabric: Start by cutting your fabric into squares. Each butterfly design will be made up of smaller triangles, so you’ll need to divide your squares into half-square triangles (HSTs). Use a rotary cutter and ruler to ensure clean, accurate cuts.
- Sewing the HSTs: To create the butterfly effect, you’ll need to sew the HSTs together carefully. Align the triangles, and sew with a consistent seam allowance for uniformity in your blocks.
- Pressing the Seams: Once sewn, press the seams to one side. This will keep the quilt top flat and make it easier to quilt later on. Be gentle when pressing to avoid stretching the fabric.
- Assembling the Butterfly Block: After preparing several HSTs, arrange them to form the butterfly wings. You can alternate colors or patterns to create a more dynamic design.
- Sewing the Butterfly Block Together: Stitch the triangles together to form each block. Once your butterfly block is complete, press the seams again to ensure everything lies flat.
- Trimming the Blocks: Trim each block to ensure all blocks are the same size. This is crucial for assembling the quilt top later.
3. Assembling the Quilt Top
With your butterfly blocks completed, it’s time to piece the Liberty Butterflies Quilt top together.
- Laying Out the Quilt Top: Lay your blocks out on a large surface to see how they look together. You can rearrange the butterfly blocks until you’re happy with the layout. Aim for balance in colors and patterns.
- Sewing the Blocks Together: Begin sewing the blocks into rows. Ensure that each block aligns perfectly with the one next to it to avoid a crooked quilt top.
- Joining the Rows: After sewing the individual rows, join the rows together to complete the quilt top. Press all the seams as you go to keep everything smooth.
- Adding Borders: If you’d like, you can add a border around your quilt top. This can help frame the butterfly blocks and give the quilt a more finished look. Choose a border fabric that complements the butterflies.
- Checking the Quilt Top for Errors: Before moving on, inspect your quilt top for any mistakes or misaligned blocks. Fix any errors before proceeding to the next step.
- Pressing the Entire Quilt Top: Give the entire quilt top one final press before moving on to quilting. This will help it lie flat and make the quilting process easier.
4. Quilting and Finishing Your Liberty Butterflies Quilt
The final step in the Liberty Butterflies Quilt – Tutorial is to quilt and bind your project.
- Layering the Quilt: Start by laying the backing fabric down on a flat surface. Smooth it out to remove any wrinkles. Then, lay the batting on top, followed by your quilt top.
- Basting the Quilt: To keep the layers from shifting while you quilt, baste them together using either safety pins or a basting spray. Baste every few inches to ensure everything stays in place.
- Quilting the Layers: You can quilt by hand or with a sewing machine. For this quilt, consider outlining the butterfly shapes with your quilting stitches. This will highlight the butterfly patterns while securing the layers together.
- Removing the Basting Pins: Once you’ve quilted the entire project, remove the basting pins or spray.
- Trimming the Excess Fabric: Trim any excess batting or backing fabric that extends beyond the quilt top. Make sure everything is even before adding the binding.
- Adding the Binding: Bind the edges of your quilt using a coordinating fabric. Fold the binding over the raw edges and sew it in place for a clean, professional finish.
FAQ about Liberty Butterflies Quilt
1. What fabric is best for the Liberty Butterflies Quilt? The best fabric for the Liberty Butterflies Quilt is Liberty Fabrics, known for its vibrant prints and high-quality cotton. This fabric will bring the butterfly patterns to life and ensure your quilt is durable.
2. How many blocks do I need for a full-size quilt? The number of blocks needed depends on the size of your quilt. For a standard full-size quilt, you might need around 30-40 butterfly blocks, depending on the block size you choose.
3. Can I hand quilt the Liberty Butterflies Quilt? Yes! Hand quilting is a great option if you prefer a more traditional look. It may take longer than machine quilting, but the result will be a beautiful, handmade finish.
4. What’s the easiest way to make half-square triangles for beginners? A simple method for beginners is to cut two fabric squares, place them right sides together, draw a diagonal line, and sew ¼ inch on each side of the line. Then, cut along the line to create two HSTs.
5. Can I add sashing between the butterfly blocks? Yes, adding sashing between the blocks can help define each butterfly design and give the quilt a more structured appearance.
6. What thread color should I use for quilting? Choose a thread color that complements your fabric. A neutral color like white or gray works well if your quilt has multiple colors.
Join our VIP broadcast list and gain access to exclusive patterns, all for free. As a VIP member, you’ll receive the best patterns daily, delivered directly to your device. ✨📱 It’s a unique opportunity to stay up-to-date with the latest trends and designs, curated just for you. Don’t miss out on enhancing your projects and discovering new inspirations with the best patterns every day! 🎨🔝
Conclusion
Creating a Liberty Butterflies Quilt is a rewarding project that results in a beautiful, one-of-a-kind piece. From selecting the right fabrics to quilting the final product, this tutorial has covered each step to ensure you can confidently create your quilt. Remember, quilting is an art form, and your creativity shines through every stitch.
I hope this Liberty Butterflies Quilt – Tutorial has been helpful. If you have any feedback or suggestions, feel free to share them in the comments below. Happy quilting!

