The Hunter’s Star Quilt Block – Quick & Easy Tutorial is a must-have for any quilting enthusiast. This timeless pattern, known for its striking geometric design, has been a favorite among quilters for generations.
Its versatility and visual appeal make it an excellent choice for both beginners and experienced crafters.
Creating the Hunter’s Star Quilt Block doesn’t have to be intimidating. With the right tools, techniques, and a bit of guidance, you can craft a stunning quilt block in no time.
This pattern is perfect for showcasing contrasting fabrics, bold color schemes, or even subtle, tonal palettes.
In this tutorial, we’ll walk you through the steps to create a Hunter’s Star Quilt Block with ease.
From selecting your fabrics to assembling the block, you’ll have all the information you need to bring this classic design to life.
1. Understanding the Hunter’s Star Quilt Block
The Hunter’s Star Quilt Block is a dynamic pattern that uses intersecting shapes to create a star motif. Let’s dive into its key characteristics and why it’s a favorite among quilters.
- Historical Significance
The Hunter’s Star Quilt Block has deep roots in traditional quilting. Its timeless appeal stems from its symmetrical and intricate design, which has inspired countless variations over the years. - Design Elements
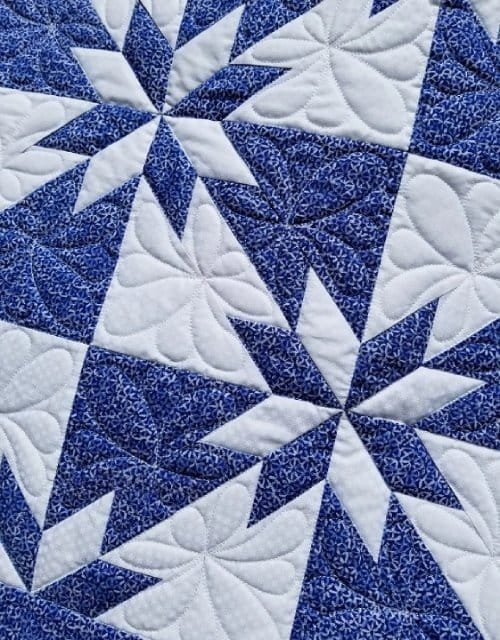
This quilt block features diamonds and triangles that come together to form a star. The contrasting fabric colors enhance its three-dimensional effect, making the star pop. - Fabric Choices
The key to a stunning Hunter’s Star Quilt Block lies in fabric selection. High-contrast colors, such as navy and white or red and cream, work beautifully to highlight the star pattern. - Block Size Options
The pattern can be adapted to various sizes, from small blocks for table runners to large blocks for full-size quilts. The choice depends on your project and preference. - Skill Level
Although the design may seem complex, modern tools and techniques have made it more accessible. Beginners can achieve great results by following a step-by-step approach. - Popular Variations
Quilters often experiment with different color layouts or add additional borders to customize their Hunter’s Star Quilt Block.
2. Materials Needed for Your Hunter’s Star Quilt Block
Before you start, gather all the materials needed to complete your Hunter’s Star Quilt Block – Quick & Easy Tutorial. Having everything prepared ensures a smooth quilting experience.
- Fabric Selection
Choose two fabrics with high contrast to emphasize the star design. A solid and a patterned fabric combination works wonderfully. - Cutting Tools
A rotary cutter, cutting mat, and quilting ruler are essential for precise cuts, which are critical for this intricate pattern. - Templates or Rulers
Templates specific to the Hunter’s Star Quilt Block can simplify cutting the diamonds and triangles. Alternatively, use a specialty ruler designed for this pattern. - Sewing Machine
Ensure your sewing machine is in good condition, and use a quarter-inch foot for consistent seam allowances. - Thread and Needles
Choose a thread color that complements your fabrics. Use a high-quality needle suited for quilting. - Iron and Pressing Tools
Pressing seams as you go is vital for a polished finish. A steam iron and pressing mat will be invaluable.
3. Step-by-Step Instructions for Sewing the Hunter’s Star Quilt Block
Follow these instructions to create your own Hunter’s Star Quilt Block with confidence.
- Cutting Your Pieces
Begin by cutting your fabrics into diamonds and triangles based on your desired block size. Use templates or rulers for accuracy. - Arranging the Layout
Lay out your pieces on a flat surface to visualize the pattern. Make adjustments to ensure the star is centered and symmetrical. - Piecing the Diamonds
Sew the diamonds together in pairs, ensuring accurate seams. Press each seam to one side for a smooth assembly. - Assembling the Star
Join the diamond pairs to form the star shape. Take your time aligning the edges for precise intersections. - Adding Background Triangles
Attach the background triangles to the star. This step completes the square shape of the block. - Final Pressing and Trimming
Press the finished block thoroughly and trim any uneven edges to achieve a crisp, professional result.
4. Tips and Tricks for Perfecting Your Hunter’s Star Quilt Block
Mastering the Hunter’s Star Quilt Block is all about practice and attention to detail. Here are some tips to help you achieve perfection.
- Use Starch for Stability
Starching your fabric before cutting can prevent stretching, especially with bias edges found in this block. - Chain Piecing for Efficiency
Sew multiple pieces in a continuous chain to save time and maintain consistent seams. - Check Seam Allowances
A consistent quarter-inch seam allowance is critical for the pieces to align correctly. - Practice with Scraps
If you’re new to this pattern, practice with scrap fabric before cutting into your chosen materials. - Mark Matching Points
Use a fabric marker or pins to indicate key matching points, ensuring precise assembly. - Experiment with Layouts
Before sewing, experiment with different fabric arrangements to find the most visually appealing design.
FAQ
1. What is the best fabric for a Hunter’s Star Quilt Block?
High-contrast fabrics, such as a combination of light and dark tones, work best to highlight the star pattern.
2. Can beginners make a Hunter’s Star Quilt Block?
Yes! While it may look complex, following a detailed tutorial simplifies the process, making it suitable for beginners.
3. How big should my Hunter’s Star Quilt Block be?
The size depends on your project. Common sizes range from 12 to 16 inches, but you can adjust based on your needs.
4. Do I need special tools for this pattern?
While templates and specialty rulers can make the process easier, they’re not mandatory. A standard rotary cutter and quilting ruler work well.
5. How long does it take to make a Hunter’s Star Quilt Block?
The time varies depending on your experience and the block size. On average, it may take 1-2 hours for a beginner.
6. Can I use scraps for this pattern?
Absolutely! Scraps are a great way to create a colorful and unique Hunter’s Star Quilt Block.
Join our VIP broadcast list and gain access to exclusive patterns, all for free. As a VIP member, you’ll receive the best patterns daily, delivered directly to your device. ✨📱 It’s a unique opportunity to stay up-to-date with the latest trends and designs, curated just for you. Don’t miss out on enhancing your projects and discovering new inspirations with the best patterns every day! 🎨🔝
Conclusion
The Hunter’s Star Quilt Block – Quick & Easy Tutorial provides a straightforward approach to creating a timeless quilting design. By following the steps and tips in this guide, you’ll have a beautiful quilt block ready to showcase. Whether you’re making a single block or an entire quilt, this pattern is sure to impress.
PATTERN HERE
We’d love to hear about your experience! Share your thoughts and suggestions in the comments below. Happy quilting!

