The Half Log Cabin Quilt Pattern is a timeless design that continues to captivate quilters of all skill levels. Whether you’re new to quilting or have years of experience under your belt, this pattern offers both simplicity and creative freedom. Right from the first stitch, you’ll discover why the Half Log Cabin Quilt remains one of the most beloved and enduring patterns in the quilting world.
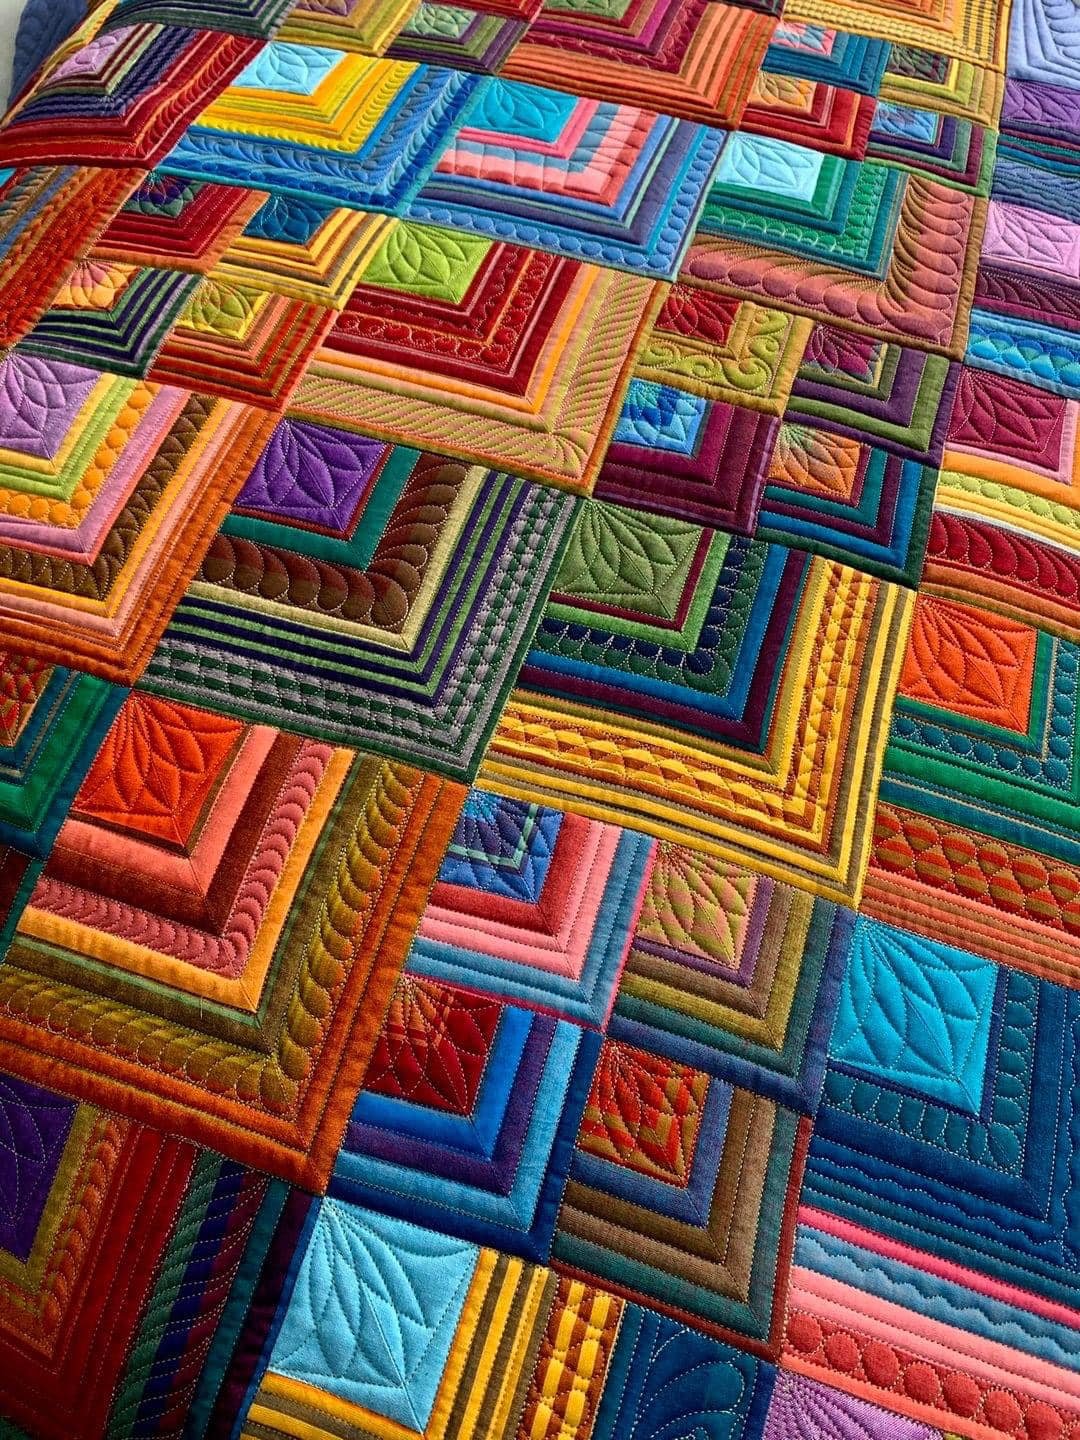
At its core, the Half Log Cabin Quilt features a striking geometric layout, usually built around a central square, with fabric strips radiating out in one direction. This asymmetrical approach gives the design its signature visual twist, unlike the traditional full log cabin layout. Its bold yet flexible structure makes it ideal for experimenting with color, texture, and layout—whether you prefer subtle gradients or vibrant contrasts.
This pattern is also highly practical. It allows you to make use of fabric scraps and pre-cut strips, reducing waste while adding a unique charm to each block. From modern minimalist styles to vintage country vibes, the Half Log Cabin Quilt Pattern adapts beautifully to your personal taste. Let’s explore the creative potential, assembly steps, design variations, and useful tips for mastering this versatile pattern.
What Makes the Half Log Cabin Quilt Unique
The Half Log Cabin Quilt Pattern is distinguished by its off-center block construction. While traditional log cabins balance fabric strips around a central square, the half version builds out from only one side, creating dynamic diagonal movement in the quilt layout.
Each block starts with a central square—often a contrasting or focal color—and then builds outward using strips of fabric on just two adjacent sides. This construction gives the quilt an angular, directional look, often resulting in a visual “stair-step” or “zigzag” across the quilt top.
What truly makes this pattern unique is its flexibility in layout. Depending on how the blocks are arranged—such as stair-step, chevron, or even radiating spirals—the finished quilt can look dramatically different. You’re not bound to just one arrangement, which opens up endless creative paths.
Another standout feature is the way it plays with light and dark fabric values. Many quilters use contrasting fabrics to enhance the directional lines of the quilt, which adds depth and movement. This classic light/dark technique is often called “value play,” and it’s essential to achieving that signature log cabin flair.
In terms of size, the pattern can easily be scaled for anything from a mini wall hanging to a king-size bed quilt. Each block is independent, so you can adjust the number of blocks based on your desired final dimensions. That’s part of what makes it so beginner-friendly.
Finally, the Half Log Cabin Quilt is also a joy to quilt. Whether you’re quilting by hand or using a machine, the seams naturally lend themselves to a variety of quilting motifs, from straight-line echoes to curving vines. This makes finishing your quilt just as satisfying as constructing it.
Fabric Selection and Color Planning
Choosing the right fabrics is one of the most exciting steps in creating a Half Log Cabin Quilt Pattern. Because the layout naturally highlights contrast, your choices will have a major impact on the final result.
Start with a central square fabric that either contrasts strongly with the strips or blends smoothly depending on the effect you’re going for. Many quilters choose a bold print or solid color for the center to draw attention.
When selecting strip fabrics, you’ll want to play with both color and value. Arrange fabrics in two groups: one light and one dark. This “value contrast” gives the quilt its dynamic movement. Keep in mind that high-contrast blocks will create a more dramatic pattern.
Using pre-cut fabric packs like jelly rolls can simplify the process and ensure color coordination. However, scrap fabrics also work wonderfully, especially if you’re aiming for a more rustic, eclectic look.
Print scale is another consideration. Smaller prints tend to work better in log cabin strips, as they allow the piecing to shine. Larger prints may get lost or become distorted when cut into narrow strips.
Don’t be afraid to use solids or tone-on-tone prints. They can add sophistication and balance to more complex prints. In fact, a mix of solids and prints often results in a visually rich quilt that doesn’t feel too busy.
Once you’ve selected your fabrics, laying them out beforehand is key. Use a design wall or floor space to test different block arrangements and adjust as needed. This early preview can help you avoid fabric regret later in the process.
Step-by-Step Construction Guide
Now that your fabrics are selected, it’s time to start building your Half Log Cabin Quilt. The construction process is straightforward and perfect for chain-piecing enthusiasts.
Begin by cutting your center squares. Standard sizes range from 2″ to 4″, depending on your desired block size. Each square forms the foundation for its block.
Next, cut your strip fabrics. Traditionally, strips are 2.5″ wide, but you can adjust this to suit your aesthetic or fabric supply. Organize strips into light and dark categories for ease of use.
To begin building the block, sew a strip to one side of the center square. Press the seam and trim if necessary. Then rotate and sew a strip to the adjacent side. Continue this process, always adding to the same two sides.
Repeat this process to build all your blocks. Once done, trim each block to a uniform size—this will ensure clean assembly later. Accuracy here will save time and frustration down the line.
Lay out your blocks in your chosen arrangement. Popular options include stair-step, offset rows, or radiating patterns. Spend time tweaking this layout until it feels balanced and pleasing to the eye.
Sew blocks together into rows, then sew the rows together. Press all seams carefully, and your quilt top will be ready for layering and quilting.
Finishing Touches and Quilting Techniques
Once your quilt top is assembled, it’s time to finish your Half Log Cabin Quilt Pattern with care and creativity. The quilting process not only secures the layers but adds artistic flair.
Start by creating a quilt sandwich: your backing fabric, batting, and quilt top. Baste the layers together using pins, spray, or thread basting, depending on your preference.
Consider your quilting design. Straight-line quilting works beautifully with the angular structure of the pattern. You can stitch in the ditch along seam lines or use diagonal lines to echo the block direction.
Free-motion quilting is another excellent option. Swirls, pebbles, or feathers can soften the blocky layout and add a handmade texture. This is especially nice for quilts with solid fabrics where the quilting shows more.
If you’re using a domestic machine, start quilting from the center and work outward to minimize puckering. Use a walking foot or darning foot depending on your technique.
After quilting, square up the edges of your quilt to ensure clean lines before adding binding. Choose a binding fabric that complements or contrasts your border, depending on the statement you want to make.
Finally, add a label to your quilt with the date, your name, and any special notes. This gives your Half Log Cabin Quilt a lasting legacy and adds a personal touch for gifting or displaying.
FAQ: Half Log Cabin Quilt Pattern
What is the difference between a Half Log Cabin and a traditional Log Cabin Quilt?
A traditional log cabin builds out strips on all four sides of a center square. A Half Log Cabin Quilt adds strips only to two sides, creating a more directional and asymmetrical look.
Can beginners make a Half Log Cabin Quilt?
Yes! This pattern is perfect for beginners. Its repetitive structure helps build sewing skills while still allowing for creative expression.
How many fabrics do I need for a Half Log Cabin Quilt?
You’ll need at least two groups of fabrics: one light and one dark. The exact number depends on the size of your quilt, but most throw-size versions use 8–12 fabrics total.
What’s the best size for the center square?
Common sizes range from 2″ to 4″. Smaller centers create more “frame” effect with strips, while larger centers make the middle fabric a focal point.
Can I use scraps for this pattern?
Absolutely. The Half Log Cabin Quilt Pattern is scrap-friendly. As long as your strips are consistent in width, mixing fabric styles can create a beautiful result.
What layouts work well with Half Log Cabin blocks?
Popular layouts include stair-step, zigzag, spirals, and offset rows. Experiment with block orientation to create different visual effects.
Conclusion
The Half Log Cabin Quilt Pattern offers the perfect blend of tradition and modern creativity. From its beginner-friendly construction to its limitless layout options, this design continues to inspire quilters around the world. You’ve learned how to choose fabrics, build your blocks, assemble the top, and add those final finishing touches with confidence.
Whether you’re using scraps from past projects or a fresh bundle of fat quarters, the Half Log Cabin Quilt gives you room to experiment and express yourself. It’s a pattern that grows with your skills and always delivers a beautiful result.

