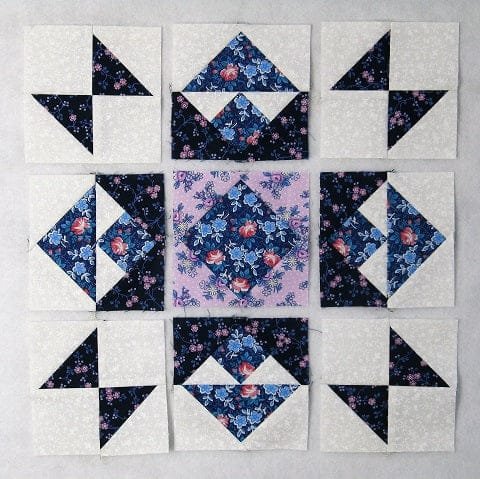
The holiday season is the perfect time to get creative with quilting, and there’s nothing more festive than a Free Christmas Star Quilt Block Pattern – Tutorial.
This guide will take you step-by-step through the process of creating a beautiful Christmas star quilt block, a timeless design that will brighten up your holiday décor.
Whether you are an experienced quilter or a beginner, this tutorial provides all the instructions you need to create a stunning quilt block that celebrates the spirit of Christmas.
As you follow this Free Christmas Star Quilt Block Pattern – Tutorial, you’ll learn how to select the right fabrics, cut your pieces accurately, and sew the block together.
The beauty of the Christmas star lies in its simplicity and the ability to personalize it with your choice of fabrics. The patterns can be easily adapted for quilts, table runners, pillows, or even as standalone pieces to hang on the wall during the festive season.
This Christmas star block will surely become a family heirloom, passed down for generations. So, gather your materials and let’s start quilting! By the end of this tutorial, you’ll have a beautiful Christmas star quilt block to cherish for years to come.
1. Materials You Need for the Christmas Star Quilt Block
Before diving into the quilting process, it’s essential to gather the right materials for your Free Christmas Star Quilt Block Pattern – Tutorial. The right tools will ensure that your quilt block comes together smoothly and that you achieve the best results.
You’ll need fabric in red, white, green, and gold or any festive colors that resonate with the holiday spirit. Choose high-quality quilting cotton for easy handling and durability.
Next, make sure you have the necessary tools: a rotary cutter, cutting mat, and ruler to cut your fabric pieces precisely. This will prevent uneven cuts that could affect the overall design.
You’ll also need thread that complements your fabric colors. Consider using a neutral color like white or cream for piecing together the blocks. This will blend well with any fabric you choose.
A quilting machine or sewing machine with a quarter-inch foot is highly recommended for consistent seams, ensuring that each piece aligns perfectly.
Prepare your workspace, ensuring you have enough room for cutting and sewing. A well-lit, spacious area will make the process more comfortable and efficient.
Lastly, gather pins or clips to hold your fabric pieces in place as you sew. They’ll help prevent shifting and misalignment during the quilting process.
With all your materials ready, you can begin the process of crafting your Free Christmas Star Quilt Block Pattern.
2. Cutting the Fabric Pieces for the Christmas Star Block
The next step in this Free Christmas Star Quilt Block Pattern – Tutorial involves cutting the fabric pieces. Precision is key to ensure that your quilt block pieces fit together correctly.
Start by cutting your fabric into squares for the center of the star. For a 12-inch block, you’ll need a 4.5-inch square for the middle, which will be surrounded by smaller pieces.
Next, cut triangles for the points of the star. To do this, you can use a 45-degree triangle ruler or simply cut your fabric into strips and then subcut them into triangles.
Be sure to measure carefully. A small discrepancy in size can result in misaligned pieces, making the final star look uneven. Using a rotary cutter, ruler, and cutting mat will help ensure accuracy.
If you are creating a more complex version of the Christmas Star Quilt Block, you may need to cut additional pieces for background or borders. Adjust your fabric quantities based on the size of your block and the overall quilt design.
Don’t forget to cut extra pieces just in case of mistakes or fabric shrinkage after washing. It’s always better to have a little more fabric than not enough!
Finally, organize your cut pieces by laying them out in the shape of the star to double-check your measurements before starting to sew.
With your pieces neatly cut and organized, it’s time to move on to the next step: assembling the star points.
3. Assembling the Christmas Star Quilt Block
Assembling the Christmas Star Quilt Block is where the design really comes to life. This step involves sewing together the fabric pieces you’ve cut to form the star pattern.
Start by sewing together the triangles that will form the points of the star. Pin or clip the edges together before sewing to prevent fabric shifting. Use a quarter-inch seam allowance to ensure consistency in your seams.
Once the points are sewn together, carefully press the seams open. Pressing is crucial in quilting, as it helps reduce bulk and ensures that your blocks stay flat.
Next, sew the triangles to the center square. It’s helpful to sew the four points first, then attach the side pieces to complete the square. Again, use a quarter-inch seam allowance for a neat finish.
When joining the points to the center, take your time to match up the edges carefully. Pin the pieces together before sewing to ensure the seams align perfectly.
After the star points are attached, press the seams once more to ensure that all the fabric lies flat. Be careful not to distort the fabric while pressing.
Lastly, add any background pieces or borders to complete the block. The Christmas Star Quilt Block pattern is simple yet beautiful, and adding a solid color for the background can really make the star stand out.
Now that your star block is fully assembled, you’re ready to move on to the final steps.
4. Finishing Your Christmas Star Quilt Block
After assembling your Christmas Star Quilt Block, it’s time to finish the edges and prepare it for inclusion in your quilt or as a standalone piece.
Trim the block to ensure all the edges are straight and uniform. Use your cutting mat and ruler to make sure your block is the correct size. For a 12-inch block, it should measure 12.5 inches before trimming, allowing for seam allowances.
Next, if you’re incorporating the star block into a larger quilt, sew it together with other blocks. Make sure to match the seams as you join each block to maintain a consistent pattern.
If you plan to use this Christmas Star Quilt Block as a standalone piece, consider adding a quilted border or frame to enhance the design. A simple border can make the block feel finished and add extra dimension.
For a polished look, quilt the entire block with decorative stitches. You can choose a simple straight line, or opt for free-motion quilting to add texture and interest.
Once your block is quilted, trim any excess batting and backing fabric to match the quilted block.
Finally, bind the edges of the quilt block with fabric strips to give it a clean, finished appearance. You can use a contrasting fabric for the binding to add an extra touch of holiday flair.
With these final touches, your Free Christmas Star Quilt Block Pattern – Tutorial is complete, and you now have a beautiful holiday quilt block to cherish.
FAQ
Q1: How can I make the Christmas Star Quilt Block bigger?
To increase the size of the block, simply scale up the size of each piece proportionally. Adjust the measurements for the center square, triangles, and background pieces as needed.
Q2: Can I make this quilt block using other colors, or is it only for Christmas?
Yes, you can definitely customize the colors. The Christmas Star pattern works well in a variety of color schemes, making it suitable for any occasion or season.
Q3: How do I ensure the points of the star are sharp and even?
To ensure sharp, even points, press the seams open and use a precise quarter-inch seam allowance. Take your time when piecing together the triangles and matching up the edges.
Q4: Can I add embellishments like buttons or beads to the Christmas Star Quilt Block?
Absolutely! Adding embellishments like buttons or beads can make the Christmas Star even more festive. Just be mindful of their placement to avoid crowding the star design.
Q5: How do I wash my finished quilt block?
Once your quilt is complete, wash it according to the fabric care instructions. Typically, quilts can be machine-washed on a gentle cycle, but it’s best to check the care recommendations for your specific fabrics.
Q6: Can I use this pattern for a full quilt?
Yes, the Christmas Star Quilt Block pattern can easily be adapted for a full quilt. Simply make multiple blocks and sew them together to create a larger quilt.
Join our VIP broadcast list and gain access to exclusive patterns, all for free. As a VIP member, you’ll receive the best patterns daily, delivered directly to your device. ✨📱 It’s a unique opportunity to stay up-to-date with the latest trends and designs, curated just for you. Don’t miss out on enhancing your projects and discovering new inspirations with the best patterns every day! 🎨🔝
Conclusion
In this Free Christmas Star Quilt Block Pattern – Tutorial, you’ve learned how to create a beautiful and festive quilt block that can be used for various holiday projects. From cutting and piecing together the star to finishing your block with decorative quilting, this project has given you the tools to bring the Christmas spirit into your home.
We’d love to hear about your experience with this tutorial! Please share your thoughts, suggestions, and any creative twists you added to your project. Your feedback helps us create more helpful guides for fellow quilters. Happy quilting, and enjoy the holiday season!

