Are you ready to create a unique and eye-catching quilt? In this Fiddlesticks and Fancies Quilt – Tutorial, we’ll walk you through the process of making a beautiful quilt that combines traditional and whimsical design elements.
The Fiddlesticks and Fancies Quilt is a perfect project for both beginners and experienced quilters, offering a blend of intricate patterns and playful accents that make it stand out from the usual quilt designs. Whether you want to make a gift for a loved one or add a special touch to your home, this quilt will certainly do the trick!
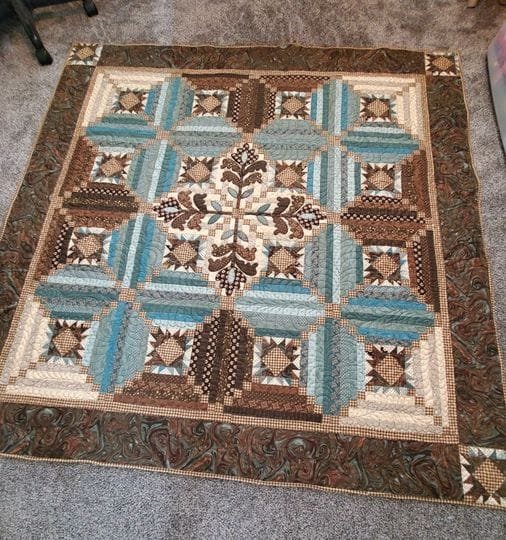
The Fiddlesticks and Fancies Quilt is all about creativity and fun. The quilt features a combination of traditional block patterns and freeform designs, which gives it a “fanciful” feel.
You can customize the colors, fabric types, and even the arrangement of the blocks to match your personal style or the theme of a room. It’s a wonderful project for quilters who love to experiment with color and design while still adhering to some classic quilting techniques.
In this tutorial, we’ll guide you step by step, from selecting your materials to piecing the quilt top and finishing it with binding.
You’ll also find helpful tips on cutting, sewing, and pressing to ensure your quilt turns out as perfect as possible. So, let’s dive in and start creating your very own Fiddlesticks and Fancies Quilt!
1. Materials Needed for Fiddlesticks and Fancies Quilt
Before you start crafting your Fiddlesticks and Fancies Quilt, it’s important to gather all your materials to ensure a smooth quilting process. Here’s a list of what you’ll need:
- Quilting Fabric: You will need fabric for both the quilt top and the backing. Consider choosing a mix of solid colors and patterned fabrics for variety and visual interest. For a quilt measuring 60” x 80”, you’ll need approximately 4-5 yards of fabric in total.
- Quilt Batting: Batting adds warmth and structure to your quilt. Select a medium-weight cotton or polyester batting depending on your preferences.
- Rotary Cutter and Mat: A rotary cutter ensures clean, precise cuts, while the mat protects your work surface. Make sure your blades are sharp to prevent fraying.
- Sewing Machine: Although this quilt can be sewn by hand, a sewing machine will make the process much faster. Be sure your machine is in good working condition.
- Quilting Ruler: Use a quilting ruler to help you measure and cut your fabric pieces accurately. Accuracy is key in creating evenly sized blocks.
- Thread and Needles: Choose a high-quality thread that matches or complements your fabric. You’ll also need extra needles for your sewing machine and hand sewing.
- Iron and Ironing Board: Pressing seams between each step is crucial for a neat, professional-looking quilt. A good iron will help flatten your fabric pieces, making them easier to sew together.
With your materials ready, you’re all set to begin crafting your Fiddlesticks and Fancies Quilt. Next, we’ll walk you through the cutting and piecing process.
2. Cutting and Piecing Your Quilt
Now that your materials are gathered, it’s time to start cutting and piecing the quilt top. The Fiddlesticks and Fancies Quilt combines both traditional square blocks and more freeform designs, so you’ll want to pay close attention to the cutting and sewing process.
- Plan Your Quilt Layout: Before cutting, decide on the layout of your quilt. You can alternate between traditional block patterns, like four-patch or nine-patch squares, and more playful, asymmetrical designs to create a “fancies” effect. Use graph paper to sketch out your design.
- Cutting the Blocks: Start by cutting your fabric into squares or rectangles, depending on your design. For a standard block size, cut your fabric into 6-inch squares. Use your rotary cutter and quilting ruler to ensure precise measurements.
- Creating the Fiddlesticks Elements: The “fiddlesticks” portion of the quilt refers to narrow strips of fabric that create a whimsical, random pattern across the quilt. Cut strips that are 1.5 to 2 inches wide and the length of your quilt block. These strips can be added as accents between the blocks or as part of the blocks themselves.
- Piecing the Blocks: Once your fabric is cut, begin sewing the pieces together to create your blocks. Use a ¼-inch seam allowance for all sewing. If you’re working with patterned fabrics, be mindful of how the patterns line up at the seams.
- Adding the Fancies: Incorporate your fiddlesticks strips into the design by sewing them between blocks or adding them as random accents across the quilt top. This creates a playful, unexpected element that gives the quilt its “fancies” feel.
- Pressing the Seams: As you piece your quilt, press the seams flat with your iron. Pressing ensures that your blocks lie flat and that the quilt top will come together smoothly.
By the time you finish piecing your quilt top, you’ll have a beautiful combination of traditional blocks and fanciful accents that make your Fiddlesticks and Fancies Quilt truly unique.
3. Assembling and Quilting Your Quilt
Once your quilt top is pieced together, it’s time to assemble the layers of your quilt and begin the quilting process. The Fiddlesticks and Fancies Quilt can be quilted using either hand quilting or machine quilting, depending on your preference.
- Prepare the Quilt Sandwich: Lay out your quilt backing on a flat surface, right side down. Place your quilt batting on top, followed by your quilt top, right side up. Smooth out any wrinkles in each layer.
- Basting the Quilt Layers: To hold the layers in place while quilting, you can baste them using either safety pins or basting spray. Make sure the quilt top is secure, with no wrinkles or folds.
- Decide on a Quilting Pattern: For the Fiddlesticks and Fancies Quilt, you can choose a simple straight-line quilting pattern or opt for free-motion quilting to enhance the playful, whimsical nature of the design. Straight-line quilting involves sewing lines across the quilt in a grid or diagonal pattern, while free-motion quilting allows for more creative, flowing designs.
- Quilting the Layers: If using a sewing machine, lower the feed dogs (if you’re free-motion quilting) and begin quilting. Start in the center of the quilt and work outward to avoid creating puckers in the fabric. If hand quilting, use a sturdy needle and quilting thread, stitching small, even stitches to secure the layers.
- Check for Tension Issues: Whether you are machine or hand quilting, always check the tension of your stitches to ensure they are tight enough to hold the layers together but not so tight that the quilt bunches.
After quilting, your Fiddlesticks and Fancies Quilt will be fully assembled, with all layers securely in place. The final step is to add the finishing touches to your quilt.
4. Binding and Finishing Your Quilt
The final step in completing your Fiddlesticks and Fancies Quilt is adding the binding and finishing touches. The binding creates a clean, finished edge for your quilt and ensures that the raw edges are secure.
- Cut the Binding Strips: Cut your fabric into 2.5-inch-wide strips for the binding. You will need enough strips to go around the entire perimeter of the quilt. Join the strips together with a diagonal seam to create one long continuous strip.
- Attach the Binding: Begin attaching the binding by sewing it to the front of the quilt, aligning the raw edges. Use a ¼-inch seam allowance and miter the corners to create a neat, professional finish.
- Fold and Press the Binding: After sewing the binding to the front, fold it over to the back of the quilt and press it flat with your iron. This creates a smooth, even edge.
- Hand Stitch the Binding: Use a blind stitch to hand-sew the binding to the back of the quilt. This stitch is nearly invisible from the front, giving your quilt a polished look.
- Label Your Quilt: Consider adding a label to the back of your quilt with the date and your name or initials. This is especially important if you’re giving the quilt as a gift or entering it into a quilt show.
- Final Pressing: Give your finished quilt a final press to smooth out any wrinkles. Your Fiddlesticks and Fancies Quilt is now complete and ready to be used or displayed!
FAQ
1. What size should my Fiddlesticks and Fancies Quilt be?
The size of your quilt depends on your needs. A standard throw quilt measures about 60” x 80”, but you can adjust the dimensions to create a smaller or larger quilt.
2. Can I use scraps for this quilt?
Yes! The Fiddlesticks and Fancies Quilt is perfect for using up fabric scraps. The playful nature of the design allows for a mix of colors and patterns, making it a great stash-busting project.
3. What quilting pattern works best for this design?
Both straight-line quilting and free-motion quilting work well for this quilt. Straight-line quilting creates a more traditional look, while free-motion quilting enhances the whimsical elements of the design.
4. Can beginners make this quilt?
Absolutely! This quilt is beginner-friendly, especially if you start with simple block patterns and gradually add more playful elements as you gain confidence.
5. How long does it take to make the Fiddlesticks and Fancies Quilt?
The time it takes depends on your skill level and the complexity of your design. On average, expect to spend a few days to a week completing the quilt, depending on how much time you dedicate to the project each day.
6. How do I care for my finished quilt?
Machine wash your quilt in cold water on a gentle cycle. Tumble dry on low heat or air dry to preserve the fabric and batting.
Join our VIP broadcast list and gain access to exclusive patterns, all for free. As a VIP member, you’ll receive the best patterns daily, delivered directly to your device. ✨📱 It’s a unique opportunity to stay up-to-date with the latest trends and designs, curated just for you. Don’t miss out on enhancing your projects and discovering new inspirations with the best patterns every day! 🎨🔝
Conclusion
In this Fiddlesticks and Fancies Quilt – Tutorial, we’ve walked you through every step of creating a fun and unique quilt, from gathering materials to adding the final binding. This project is a fantastic way to explore your creativity and experiment with both traditional and whimsical design elements. Whether you’re a beginner or an experienced quilter, the Fiddlesticks and Fancies Quilt is a delightful project that results in a beautiful, personalized quilt.
We’d love to hear your thoughts! Please leave a comment below with your honest feedback, and feel free to share any suggestions or ideas for future quilting projects. Happy quilting!

