Fabric Plush Bunny Pattern is one of the most charming and beginner-friendly sewing projects you can try. Whether you’re crafting a thoughtful handmade gift or simply exploring your creativity, this pattern offers a fun and rewarding experience.
Working with a Fabric Plush Bunny Pattern allows you to combine creativity with practicality. You can choose different fabrics, colors, and details to personalize your bunny, making each creation unique. This project is also a great way to practice essential sewing techniques like cutting.
In this complete guide to a Fabric Plush Bunny Pattern, you’ll learn how to prepare your materials, follow a simple pattern, assemble the bunny step by step, and customize it to your liking. Even if you’re new to sewing, this structured approach will help you achieve beautiful results with confidence.
Understanding the Fabric Plush Bunny Pattern Basics
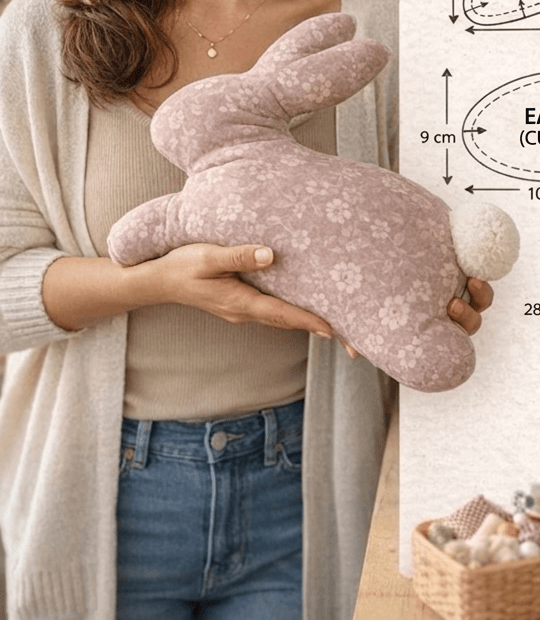
Before starting your Fabric Plush Bunny Pattern, it’s important to understand how the pattern works. A typical plush bunny pattern includes a few simple pieces that, when sewn together, form the body, ears, and sometimes limbs. These shapes are designed to be easy to cut and assemble, making them perfect for beginners.
Most patterns use two identical body pieces. These are stitched together and then turned inside out to create the bunny’s main shape. The ears may be sewn separately and attached later, or included as part of the main body design depending on the pattern style.
Seam allowance is another key concept. This refers to the extra fabric around the edges of your pattern pieces, which allows space for stitching. Maintaining a consistent seam allowance helps ensure that your bunny turns out symmetrical and well-shaped.
Patterns can be scaled up or down depending on your needs. A smaller pattern creates a pocket-sized bunny, while a larger one makes a cuddly plush toy. This flexibility makes the Fabric Plush Bunny Pattern suitable for a variety of uses.
It’s also important to transfer the pattern accurately onto your fabric. Using a fabric marker or chalk ensures clean lines that guide your stitching. Precision at this stage makes the entire process smoother.
Understanding these basics will make it much easier to follow your Fabric Plush Bunny Pattern and achieve a polished final result.
Materials and Tools You Will Need
To successfully complete your Fabric Plush Bunny Pattern, you’ll need a few essential materials and tools. The good news is that most of these items are easy to find and affordable.
Start with fabric selection. Cotton is a popular choice for its ease of use, while fleece provides a softer, plush feel. Felt is also a great option because it doesn’t fray, making it ideal for beginners.
You’ll need stuffing material to give your bunny its shape. Polyester fiberfill is widely used because it’s lightweight, washable, and creates a soft finish. Make sure the stuffing is evenly distributed for the best look.
Basic sewing tools are essential. These include a needle or sewing machine, thread, scissors, pins, and a fabric marker. Each tool plays an important role in ensuring your project runs smoothly.
A pattern template is, of course, necessary. You can draw your own or use a pre-designed template. Either way, make sure the pieces are clearly defined and easy to follow.
For finishing touches, consider embroidery thread or fabric-safe markers to create facial features. These details bring your bunny to life and add personality.
Having all your materials ready before starting your Fabric Plush Bunny Pattern helps you stay organized and focused throughout the process.
Step-by-Step Instructions to Create Your Bunny
Following a clear process is key when working with a Fabric Plush Bunny Pattern. Breaking it down into steps makes the project manageable and enjoyable.
Begin by placing your pattern pieces on the fabric and tracing them carefully. Make sure to include seam allowance and mark any important points, such as where to leave an opening for stuffing.
Cut out the fabric pieces neatly. Clean and accurate cuts ensure that the pieces align properly when sewn together. This step is crucial for a symmetrical result.
Next, place the fabric pieces together with the right sides facing inward. Secure them with pins to keep everything in place while sewing.
Sew around the edges, leaving a small opening. This gap will be used to turn the bunny right side out and insert the stuffing. Take your time to keep your stitches even.
Once sewn, carefully turn the bunny inside out. Use a blunt tool like a pencil to push out the ears and corners for a smooth shape.
Stuff the bunny with fiberfill, adding small amounts gradually. This helps create an even and soft texture without lumps.
Finally, close the opening using a hidden stitch. This gives your bunny a clean and professional finish, completing your Fabric Plush Bunny Pattern project.
Creative Ideas to Personalize Your Bunny
A Fabric Plush Bunny Pattern becomes even more special when you add personal touches. Customization allows you to create a one-of-a-kind piece that reflects your style.
Start by experimenting with fabric combinations. Use patterned fabric for the body and a contrasting color for the ears. This adds visual interest and makes your bunny stand out.
Facial features are another opportunity for creativity. Embroider eyes, nose, and mouth using thread for a soft and safe finish. You can create different expressions to give each bunny its own personality.
Adding accessories can enhance your design. Consider making a small bow, scarf, or outfit for your bunny. These details make your plush toy feel more complete and unique.
You can also personalize your bunny with names or initials. This is especially meaningful if you’re giving it as a gift for a special occasion.
Changing the size of the pattern is another way to customize your project. Larger bunnies are great for cuddling, while smaller ones make perfect decorations or keepsakes.
With these ideas, your Fabric Plush Bunny Pattern becomes more than just a craft—it becomes a creative expression.
FAQ – Frequently Asked Questions
1. Is the Fabric Plush Bunny Pattern beginner-friendly?
Yes, this pattern is simple and perfect for beginners who are learning basic sewing techniques.
2. Can I make this bunny without a sewing machine?
Absolutely. Hand sewing works just as well and is a great way to practice stitching skills.
3. What type of fabric is best?
Cotton, fleece, and felt are all excellent choices depending on the desired texture and look.
4. How long does it take to complete?
Most projects take between 1 to 3 hours, depending on experience and detail level.
5. Is it safe for children?
Yes, especially if you use embroidered features instead of small detachable parts.
6. Can I wash the plush bunny?
Yes, but hand washing is recommended to maintain its shape and quality.
7. Can I sell bunnies made from this pattern?
Yes, handmade items are often sold, but ensure your pattern is original or permitted for commercial use.
Conclusion
Creating a Fabric Plush Bunny Pattern is a delightful and fulfilling project that combines creativity, skill, and personalization. Throughout this guide, you’ve learned the basics of patterns, essential materials, step-by-step construction, and creative customization ideas. These insights make it easy for anyone to start and complete their own handmade bunny.
With practice, you can refine your technique and create even more detailed and unique designs. Whether for personal use, gifts, or small business ideas, this project offers endless possibilities.
If you enjoyed this guide, feel free to share your honest opinion and suggestions. Your feedback helps improve future content and inspires more creative ideas.

