The Dalia Crossing Throw Quilt Pattern: A Comprehensive Guide is the perfect resource for both beginner and advanced quilters looking to create a stunning throw quilt. This pattern offers a balance between traditional quilt blocks and modern design elements, making it ideal for those who want to experiment with both color and technique.
In this guide, we will walk you through everything you need to know about the Dalia Crossing Throw Quilt Pattern, including tips on fabric selection, cutting techniques, assembly, and quilting methods.
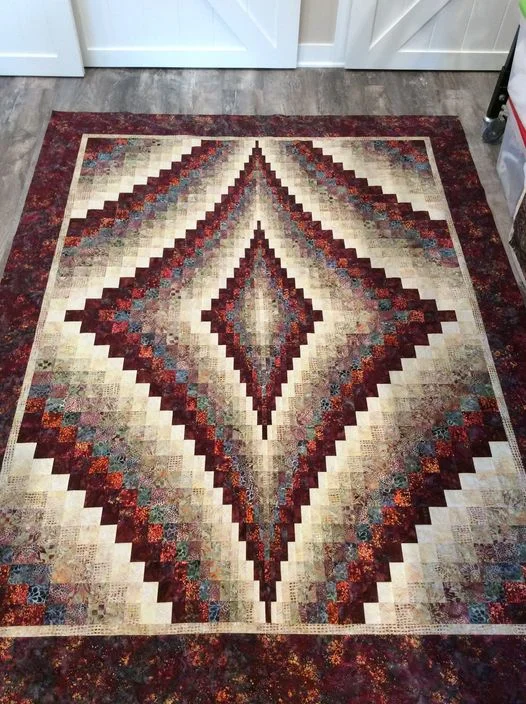
Creating the Dalia Crossing Throw Quilt is not only a rewarding process but also an opportunity to hone your quilting skills. With its striking cross pattern framed by contrasting fabrics, this throw quilt makes for a beautiful accent in any room.

The design allows for endless customization with colors and patterns, making it a versatile project. Whether you want to make a cozy throw for your living room or a personalized gift for someone special, this pattern is sure to impress.
In this comprehensive guide, we’ll cover each step of the process, from selecting the right materials to adding the finishing touches. By the end of this article, you’ll be well-equipped to start your own Dalia Crossing Throw Quilt and create a masterpiece that showcases your unique style and creativity.
1. Understanding the Dalia Crossing Throw Quilt Pattern
The Dalia Crossing Throw Quilt Pattern is a beautifully structured design that features a series of crosses made from strips of fabric. This pattern, which is ideal for quilters of all levels, combines both traditional quilting techniques and a modern, minimalist aesthetic.
- The Cross Motif: The central feature of the Dalia Crossing Throw Quilt is the cross design, made up of strips of fabric. These crosses create an interesting geometric pattern that can be enhanced with various fabric choices.
- Choosing the Right Fabrics: When selecting fabrics for this quilt, it’s essential to choose a combination of bold and neutral tones. The crosses are typically highlighted with brighter or patterned fabrics, while the background fabric is kept more neutral to allow the design to stand out.
- Pattern Sizing: The typical size for a throw quilt is around 50×60 inches, but the Dalia Crossing Throw Quilt Pattern can easily be adjusted to make larger or smaller quilts depending on your needs.
- Cutting the Fabric: Precision is key when cutting the strips of fabric for this pattern. Using a rotary cutter and a cutting mat will help ensure that your strips are perfectly straight and uniform.
- Block Assembly: The quilt is made up of individual blocks, each containing a cross. These blocks are sewn together in rows, and the rows are then assembled to complete the quilt top.
- Quilting the Design: After the quilt top is assembled, you can add quilt lines to enhance the design. Some quilters opt for straight-line quilting to emphasize the geometric shapes, while others prefer free-motion quilting for a softer look.
2. Step-by-Step Guide to Making the Dalia Crossing Throw Quilt
Now that you understand the basics of the Dalia Crossing Throw Quilt Pattern, let’s walk through the steps needed to bring this design to life. Follow these instructions for a seamless quilting experience.
- Step 1: Gathering Supplies: Before you begin, make sure you have all the necessary materials. You will need fabric for the quilt top (in both cross and background colors), batting, backing fabric, quilting thread, and basic quilting tools like a rotary cutter, ruler, and sewing machine.
- Step 2: Cutting the Fabric: Begin by cutting your fabric into the required strips. These strips will form the crosses and the background pieces. It’s important to follow the pattern’s measurements carefully to ensure that the blocks fit together perfectly.
- Step 3: Assembling the Crosses: Once you have your fabric cut, start piecing together the cross blocks. Sew the fabric strips together, alternating between the cross fabric and the background fabric. Press your seams open to create a crisp, clean finish.
- Step 4: Sewing the Blocks Together: After all your blocks are assembled, lay them out on a flat surface to decide on the layout of the quilt. Once you’re happy with the arrangement, sew the blocks together in rows, and then sew the rows together to complete the quilt top.
- Step 5: Layering and Quilting: Sandwich the quilt top, batting, and backing fabric together. Use basting pins or spray to hold the layers in place. Once your quilt sandwich is secure, you can begin quilting. You can choose a simple straight-line quilting pattern or something more intricate, depending on your skill level and personal preference.
- Step 6: Binding the Quilt: The final step is to bind the edges of the quilt. Cut strips of fabric to create a binding, and sew it around the edges to give your quilt a finished, professional look.
3. Choosing Fabrics and Colors for Your Dalia Crossing Throw Quilt
Selecting the right fabrics and colors is crucial to the success of your Dalia Crossing Throw Quilt. The fabrics you choose will determine the overall look and feel of the finished product, so it’s worth spending some time on this step.
- Tip 1: Start with the Cross Fabric: The cross design is the focal point of this quilt, so choose a fabric that stands out. You can opt for a bright color, a bold print, or even something textured to add depth to the design.
- Tip 2: Select a Neutral Background: To make the crosses pop, choose a neutral background fabric such as white, gray, or beige. This will provide contrast without overwhelming the design.
- Tip 3: Consider a Monochromatic Look: If you prefer a more subtle design, you can stick with shades of the same color for both the cross and background fabrics. This creates a tonal look that is still visually interesting.
- Tip 4: Use Pre-Cuts: Many quilters prefer to use pre-cut fabric bundles, such as fat quarters or jelly rolls, for this pattern. Pre-cuts save time and ensure that all the fabrics coordinate well together.
- Tip 5: Think About Texture: Don’t be afraid to experiment with different fabric textures. You can mix cotton with linen or even incorporate some velvet for a touch of luxury.
- Tip 6: Test Your Color Palette: Before cutting into your fabric, lay your choices side by side to see how they interact. Make sure the colors complement each other and enhance the design.
4. Common Mistakes to Avoid When Making the Dalia Crossing Throw Quilt
While the Dalia Crossing Throw Quilt Pattern is beginner-friendly, there are a few common mistakes that can be easily avoided. Here are some tips to ensure your quilting process goes smoothly.
- Mistake 1: Inaccurate Cutting: One of the most important aspects of quilting is accurate cutting. Even small discrepancies can throw off your entire design, so take your time and measure twice before cutting.
- Mistake 2: Not Pressing Seams Properly: Pressing your seams as you go is essential for a professional-looking quilt. Always press your seams open or to the side, depending on the pattern’s instructions.
- Mistake 3: Skipping the Layout Step: Before sewing the blocks together, lay them out on the floor or design wall. This allows you to visualize the final product and make any necessary adjustments to the layout.
- Mistake 4: Rushing the Quilting Process: Quilting the layers together is just as important as piecing the top. Don’t rush this step. Take your time to plan out your quilting design and make sure it enhances the overall look of the quilt.
- Mistake 5: Neglecting the Binding: The binding is the finishing touch of your quilt, so don’t neglect it. Make sure the binding is securely sewn, and take care to miter the corners for a clean finish.
- Mistake 6: Choosing the Wrong Thread Color: The thread color can either blend in or stand out. Make sure you choose a thread color that complements your quilt without detracting from the overall design.
FAQ: Frequently Asked Questions About the Dalia Crossing Throw Quilt Pattern
- Q1: Is the Dalia Crossing Throw Quilt Pattern suitable for beginners? A1: Yes, the pattern is designed to be beginner-friendly, with straightforward cutting and piecing techniques.
- Q2: What size quilt does this pattern make? A2: The standard size for a throw quilt is approximately 50×60 inches, but you can easily adjust the pattern to make a larger or smaller quilt.
- Q3: Can I use scraps for this quilt? A3: Absolutely! The pattern is a great way to use up fabric scraps, especially for the cross designs.
- Q4: How long does it take to complete this quilt? A4: The time it takes to complete the quilt depends on your experience level and how much time you can dedicate to the project, but most quilters can finish it in a week or two.
- Q5: Do I need to pre-wash my fabrics? A5: Yes, it’s always a good idea to pre-wash your fabrics to prevent shrinking or color bleeding after the quilt is completed.
- Q6: Can I quilt this by hand? A6: While most people choose to quilt this pattern by machine, you can certainly quilt it by hand if you prefer.
Conclusion
The Dalia Crossing Throw Quilt Pattern is a beautiful and versatile project that allows quilters to showcase their creativity through fabric choice and design. Whether you’re making it for yourself or as a gift, this quilt is sure to be cherished for years to come.
With its simple construction and striking design, it’s the perfect project for quilters of all skill levels. If you’ve made this quilt or plan to, we’d love to hear your thoughts! Please leave a comment below with your opinions and any suggestions for future projects.