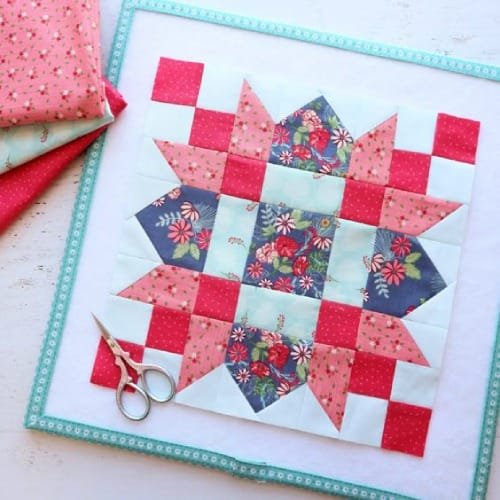
If you’re looking to add a touch of floral elegance to your quilt projects, the Daisy Chain Block Pattern – Tutorial is a perfect choice. This pattern features a delicate daisy chain design that can elevate any quilt into a vibrant masterpiece.
Whether you’re a beginner or an experienced quilter, this tutorial will guide you step-by-step in creating a beautiful Daisy Chain Block Pattern, ensuring your next quilt is both eye-catching and full of charm.
The Daisy Chain Block Pattern is versatile and can be used in a variety of quilting projects. From a bedspread to a table runner, this pattern works well in many settings. The combination of geometric precision and the soft floral motif brings a balance that appeals to both traditional and modern quilters.
By following this free tutorial, you’ll not only learn how to create this specific block but also improve your overall quilting skills.
In this article, we will break down the process of creating the Daisy Chain Block Pattern into easy-to-follow steps.
By the end, you’ll have a stunning quilt block that you can proudly incorporate into your projects. So grab your fabric and sewing machine, and let’s get started with this tutorial!
1. Materials You’ll Need for the Daisy Chain Block Pattern
Before you begin quilting, it’s important to gather all the materials you’ll need for the Daisy Chain Block Pattern – Tutorial. Having the right supplies on hand will make your sewing experience smoother and more enjoyable.
First and foremost, you’ll need fabric. For the Daisy Chain Block Pattern, it’s best to choose fabrics that contrast well. Pick a floral print for the daisies and a solid or lightly patterned fabric for the background to make the daisy design stand out. You’ll need several fabric cuts depending on how many blocks you plan to create. A fat quarter bundle is a great option for this pattern.
Next, you’ll need a rotary cutter, cutting mat, and ruler. Precision is key when cutting fabric for quilt blocks, and these tools ensure your pieces are cut accurately. Measure twice and cut once to avoid any fabric wastage.
You’ll also need thread that matches or complements your fabric choices. A neutral thread works well if you want the stitching to blend in, but you can use contrasting thread for added visual interest.
Other essential tools include sewing pins or clips, an iron for pressing seams, and a sewing machine. While it’s possible to hand-sew quilt blocks, a sewing machine speeds up the process and provides cleaner seams, especially when working with intricate patterns like the Daisy Chain Block Pattern.
Lastly, don’t forget a quilt ruler. This will help ensure your quilt blocks are all uniform in size, which is critical for piecing your quilt together smoothly.
2. Cutting and Piecing the Fabric for the Daisy Chain Block
Now that you have your materials ready, it’s time to cut and piece the fabric for your Daisy Chain Block Pattern. Accurate cutting and piecing are essential to create clean lines and ensure the daisy chain design stands out.
- Cutting the Background Fabric: Start by cutting your background fabric into squares. For this Daisy Chain Block Pattern, 4-inch squares work well, but you can adjust the size depending on your quilt dimensions. You’ll need four background squares per block.
- Cutting the Daisy Fabric: Next, cut smaller squares for the daisy petals. These should be contrasting in color to your background fabric. You’ll need eight petal squares for each block. Cut these into 2-inch squares for a dainty daisy design.
- Marking Your Pieces: Once your fabric is cut, mark diagonal lines on the back of your petal squares using a fabric marker. This will guide you when sewing the petal pieces to the background fabric, ensuring precision in your daisy chain design.
- Sewing the Petals: Place each petal square on the corners of the background squares, right sides together, and sew along the marked diagonal lines. After sewing, trim the excess fabric and press the seams open or to the side, depending on your preference.
- Piecing the Block Together: Once all the petal pieces are sewn and pressed, it’s time to piece the block together. Arrange the squares so the daisy petals form a chain-like design across the block. Pin the squares together, sew the rows, and then sew the rows together to complete the block.
- Pressing the Block: After sewing your Daisy Chain Block, give it a good press with your iron. This step ensures that all seams lay flat and your block is ready to be joined with other blocks in your quilt project.
3. Assembling Multiple Daisy Chain Blocks for a Quilt
Now that you’ve completed your first Daisy Chain Block, it’s time to think about how to assemble multiple blocks to create a full quilt. The beauty of this pattern is that it works wonderfully in repetition, creating a continuous daisy chain effect across your quilt.
- Plan Your Layout: Before you begin sewing your blocks together, lay them out on a flat surface to plan your quilt layout. You can arrange the blocks in straight rows for a classic look, or experiment with alternating patterns to create a more dynamic design.
- Sewing the Blocks Together: Once you’re happy with the layout, begin sewing the blocks together row by row. Use pins or clips to keep everything aligned as you sew. Remember to press each row after sewing to ensure your seams are neat and flat.
- Adding Sashing: If you want to create a more structured look, consider adding sashing between your Daisy Chain Blocks. Sashing is simply strips of fabric sewn between the blocks, creating a grid effect. This can help break up the design and give your quilt a clean, polished appearance.
- Borders and Binding: To finish your quilt, consider adding a border around the edges. A border frames your quilt and provides a final touch of color or pattern. Once your borders are sewn, attach the binding to complete the quilt.
- Quilting the Layers Together: After the quilt top is complete, layer it with batting and backing fabric. Quilt the layers together either by hand or with a sewing machine. You can follow the lines of the daisy chain design or use free-motion quilting for added texture.
- Finishing Touches: After quilting, trim any excess fabric and binding. Give your finished quilt one last press to smooth out any wrinkles, and your Daisy Chain Block Pattern Quilt is ready to be displayed or gifted!
4. Tips for Customizing Your Daisy Chain Block Pattern
One of the joys of quilting is the ability to customize your patterns and make them your own. The Daisy Chain Block Pattern is versatile, and there are many ways to add personal touches to your project.
- Experiment with Colors: While the classic Daisy Chain Block Pattern often features white daisies on a solid background, don’t be afraid to experiment with different color combinations. Try using bold, vibrant colors for the petals or a patterned fabric for the background to give your quilt a modern twist.
- Change the Block Size: You can easily adjust the size of the block by cutting larger or smaller squares. Larger blocks will create a more dramatic design, while smaller blocks offer a more delicate, intricate look. Just make sure to adjust your measurements consistently across all blocks.
- Add Appliqué: For a unique twist, consider adding appliqué to your Daisy Chain Block. You can use fabric scraps to create additional daisy designs or other floral elements to enhance the block. Appliqué adds texture and dimension, making your quilt stand out even more.
- Use Different Fabrics: Don’t feel limited to cotton fabric. You can experiment with different types of fabric such as linen, flannel, or even velvet for a luxurious touch. Mixing textures adds depth to your quilt and creates a one-of-a-kind piece.
- Incorporate Embroidery: If you want to add a personal touch to your quilt, consider incorporating hand embroidery. You could embroider the centers of the daisies or add small details like vines and leaves to further enhance the floral theme.
- Make Matching Accessories: Once you’ve mastered the Daisy Chain Block Pattern, use the same technique to create matching accessories such as pillow covers, table runners, or placemats. These pieces make great gifts and can add a cohesive look to your home décor.
FAQ
Q: Is the Daisy Chain Block Pattern suitable for beginners?
A: Yes, the Daisy Chain Block Pattern is beginner-friendly. The tutorial breaks down each step in detail, making it easy for quilters of all skill levels to follow along and create beautiful blocks.
Q: How long does it take to complete one block?
A: The time it takes to complete a block depends on your quilting experience and pace. On average, one block can take about 1-2 hours from start to finish, including cutting, sewing, and pressing.
Q: Can I use scraps for this pattern?
A: Absolutely! The Daisy Chain Block Pattern is a great way to use up fabric scraps. Just make sure the fabric pieces are large enough for the required cuts, and you can create a colorful, scrappy quilt.
Q: How many blocks do I need for a full quilt?
A: The number of blocks you need depends on the size of the quilt you’re making. For a standard lap quilt, you’ll typically need 20-30 blocks, but you can adjust this depending on your desired quilt size.
Q: What is the best fabric for this pattern?
A: Cotton fabric works best for the Daisy Chain Block Pattern, as it’s easy to work with and holds its shape well. You can also experiment with other fabrics like linen or flannel for different textures.
Q: Can I hand-sew this pattern instead of using a machine?
A: Yes, the Daisy Chain Block Pattern can be hand-sewn if you prefer. It may take a little longer, but the results will be just as beautiful.
Join our VIP broadcast list and gain access to exclusive patterns, all for free. As a VIP member, you’ll receive the best patterns daily, delivered directly to your device. ✨📱 It’s a unique opportunity to stay up-to-date with the latest trends and designs, curated just for you. Don’t miss out on enhancing your projects and discovering new inspirations with the best patterns every day! 🎨🔝
Conclusion
The Daisy Chain Block Pattern – Tutorial is a fantastic project for quilters of all skill levels. Whether you’re making a quilt for yourself or as a gift, this pattern offers endless customization possibilities and is sure to impress.
We hope this guide has provided you with the knowledge and inspiration to start your project. Don’t forget to share your thoughts, experiences, and any suggestions you may have in the comments below. Happy quilting!

