Welcome to our Crazy Ann block quilting tutorial! If you’re looking to add a unique and playful touch to your quilt, the Crazy Ann block is a fantastic choice.
This block combines geometric shapes and vibrant colors to create a dynamic design that is perfect for quilters of all skill levels. Whether you’re an experienced quilter or a beginner looking to expand your skills, this tutorial will guide you through the process step by step.
In this article, we’ll explore the materials you’ll need, the techniques involved in creating the Crazy Ann block, and tips to help you perfect your quilting.
We’ll also discuss how to incorporate this block into your larger quilting projects, allowing you to unleash your creativity.
By the end of this tutorial, you’ll have all the knowledge necessary to create stunning Crazy Ann blocks that will elevate your quilting game.
So, grab your fabric and tools, and let’s dive into this exciting quilting journey!
1. Materials Needed for the Crazy Ann Block
Before we start crafting our Crazy Ann block, it’s essential to gather all the necessary materials. Here’s what you’ll need:
The first thing on the list is fabric. You will need a variety of cotton fabrics in different colors and patterns. Choosing bold and contrasting colors will help your block stand out. Aim for at least three different fabrics to create a vibrant design.
Next, you will need a rotary cutter and cutting mat. These tools will help you achieve precise cuts, which are crucial for the accuracy of your quilt block. A ruler is also essential to measure your fabric pieces accurately.
Don’t forget your sewing machine! A reliable sewing machine will make the process faster and more enjoyable. Make sure you have a standard sewing foot and a quarter-inch foot for perfect seam allowances.
You will also need thread that matches your fabric choices. It’s best to choose a high-quality cotton thread for durability and to avoid any fraying.
Lastly, gather your quilting tools such as pins, scissors, and an iron. These tools will assist you in pinning your fabric pieces together, trimming excess fabric, and pressing your seams flat.
With all your materials ready, you’re one step closer to creating beautiful Crazy Ann blocks!
2. Cutting Your Fabric for the Crazy Ann Block
Now that we have all our materials, it’s time to cut our fabric pieces for the Crazy Ann block. This step is critical as precise cuts will ensure your blocks fit together correctly.
Start by laying your fabric flat on the cutting mat. Use the rotary cutter and ruler to cut your fabric into squares. For the Crazy Ann block, you’ll typically need 5-inch squares, but you can adjust the size depending on your quilt’s overall design.
Once you’ve cut out your squares, it’s time to cut them into triangles. Take each square and cut it diagonally from one corner to the opposite corner. You will end up with two triangles from each square.
After cutting, organize your triangles by color or pattern. This will make the assembly process easier and more visually appealing.
Keep in mind that accuracy is vital in quilting. Double-check your measurements and cuts to ensure everything is correct. If you make a mistake, don’t hesitate to re-cut the fabric pieces.
With all your fabric pieces cut and organized, you’re now ready to begin assembling your Crazy Ann block!
3. Assembling the Crazy Ann Block
The next exciting step in creating the Crazy Ann block is assembling the triangles into a cohesive design. This is where your creativity can truly shine.
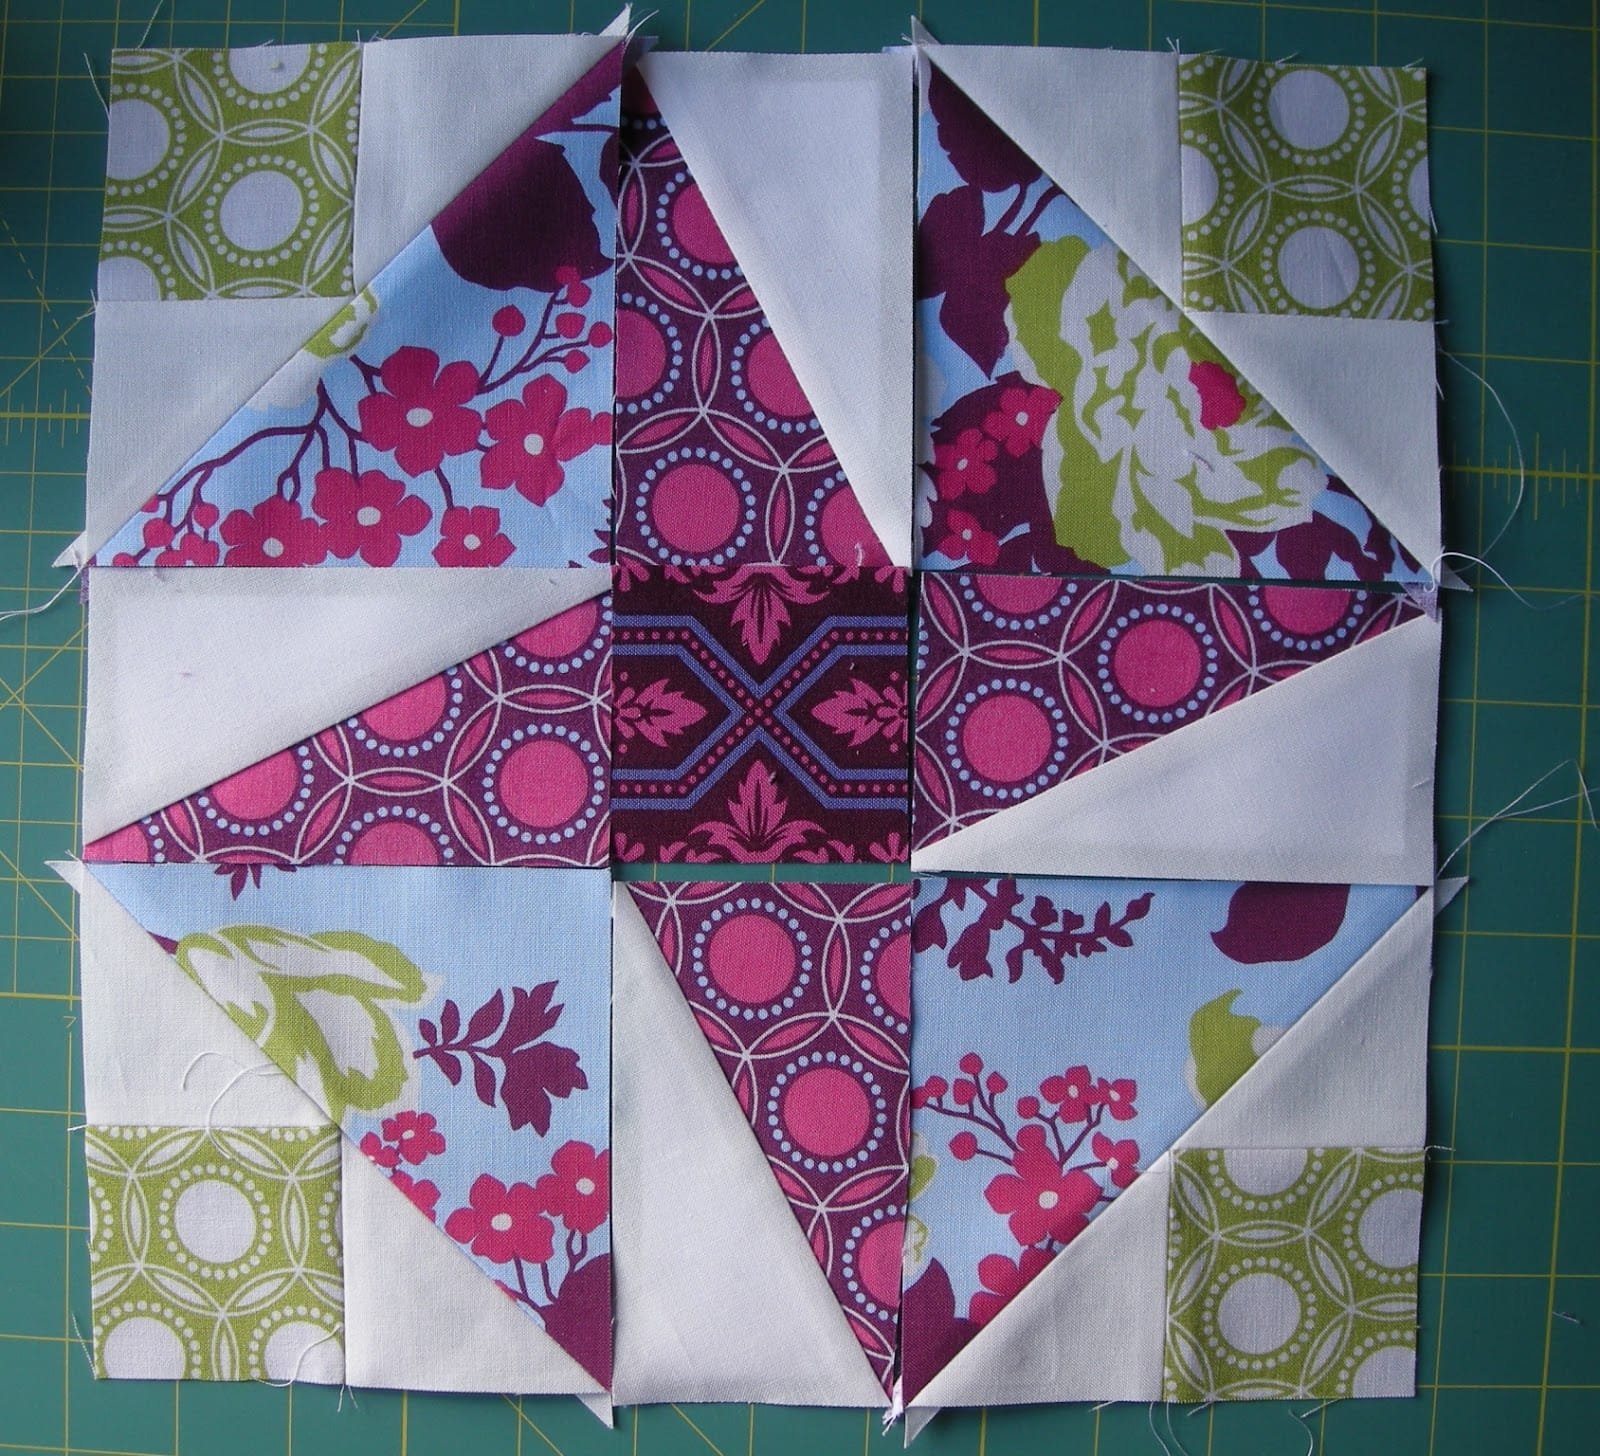
Begin by selecting a layout for your block. The Crazy Ann block often features a star-like design, but feel free to experiment with different configurations. Lay out your triangles on a flat surface before sewing to visualize your design.
Once you’re satisfied with the layout, start pinning the triangles together. Begin by pairing two triangles, right sides together, and pin them along the edge.
Sew a quarter-inch seam along the pinned edge, and then press the seam open with your iron. This will help your block lay flat and give it a professional finish.
Continue this process by joining more triangles together to form larger sections of the block. Take your time to ensure each seam is straight and accurate.
Once all sections are sewn together, assemble the final pieces of your Crazy Ann block. Pin and sew these sections together, then press the final seams.
Finally, trim any excess fabric from the edges of your block to ensure it’s even and neat.
4. Finishing Touches and Tips for the Crazy Ann Block
Congratulations! You’ve successfully assembled your Crazy Ann block. Now, let’s focus on some finishing touches and tips to elevate your quilting project.
First, take the time to give your block a good press. Use a steam iron to press all seams flat. This step not only enhances the appearance of your block but also makes it easier to sew into larger quilts.
Next, consider adding a border to your Crazy Ann block. A contrasting fabric can frame your block beautifully, giving it a polished look. Measure and cut your border pieces, then sew them onto your block.
If you’re making multiple Crazy Ann blocks, try varying the colors and patterns to create a dynamic quilt. This variation will keep your project interesting and visually appealing.
Another great tip is to use a quilting template. Templates can help you achieve uniform shapes and sizes, ensuring that all your blocks match perfectly.
Finally, don’t forget to take breaks! Quilting can be a lengthy process, and stepping away can help you come back with fresh eyes and new ideas.
Now that your Crazy Ann block is complete, you’re ready to incorporate it into a larger quilt or display it proudly as a standalone piece.
FAQ about the Crazy Ann Block
Q1: What is a Crazy Ann block?
A Crazy Ann block is a traditional quilt block design known for its geometric shapes and vibrant colors. It often features triangles arranged in a star-like pattern, allowing for creativity in color choices and arrangements.
Q2: Can I use different fabric types for the Crazy Ann block?
Yes! While cotton is the most common choice for quilting, you can experiment with other fabric types. Just be mindful of how different fabrics may affect the overall look and feel of your quilt.
Q3: How do I ensure my seams are accurate?
To ensure accurate seams, use a quarter-inch foot on your sewing machine, and always measure twice before cutting. Practice on scrap fabric if you’re unsure about your seam allowances.
Q4: How many Crazy Ann blocks do I need for a quilt?
The number of blocks needed depends on the size of your quilt. For a lap quilt, you might need around 20-30 blocks, while a larger quilt will require more.
Q5: What are some good color combinations for the Crazy Ann block?
Popular color combinations include contrasting colors like blue and orange or classic patterns like floral paired with solids. Consider your overall quilt theme when selecting colors.
Q6: Can I modify the size of the Crazy Ann block?
Absolutely! You can adjust the size of the squares and triangles to create a larger or smaller block. Just remember to maintain consistent measurements throughout your project.
Join our VIP broadcast list and gain access to exclusive patterns, all for free. As a VIP member, you’ll receive the best patterns daily, delivered directly to your device. ✨📱 It’s a unique opportunity to stay up-to-date with the latest trends and designs, curated just for you. Don’t miss out on enhancing your projects and discovering new inspirations with the best patterns every day! 🎨🔝
Conclusion
In this tutorial, we’ve explored how to create a Crazy Ann block, from gathering materials to assembling and finishing your quilt block. The Crazy Ann block is a delightful addition to any quilting project, allowing for creativity and personalization. We hope this guide has inspired you to try your hand at this fun design.
We encourage you to share your thoughts and suggestions as you embark on your quilting journey. Your feedback is invaluable in helping us improve our tutorials. Happy quilting!

