If you’re looking to add a handmade touch to your holiday décor this season, look no further than the Christmas Spin Table Runner tutorial by Sharon Burgess.
This festive and beautifully designed table runner is perfect for bringing some Christmas spirit into your home. Sharon Burgess, known for her creative quilting patterns, has outdone herself with this fun and approachable project.
Whether you’re a seasoned quilter or a beginner, this tutorial will walk you through the process of creating a stunning table runner that is both practical and decorative.
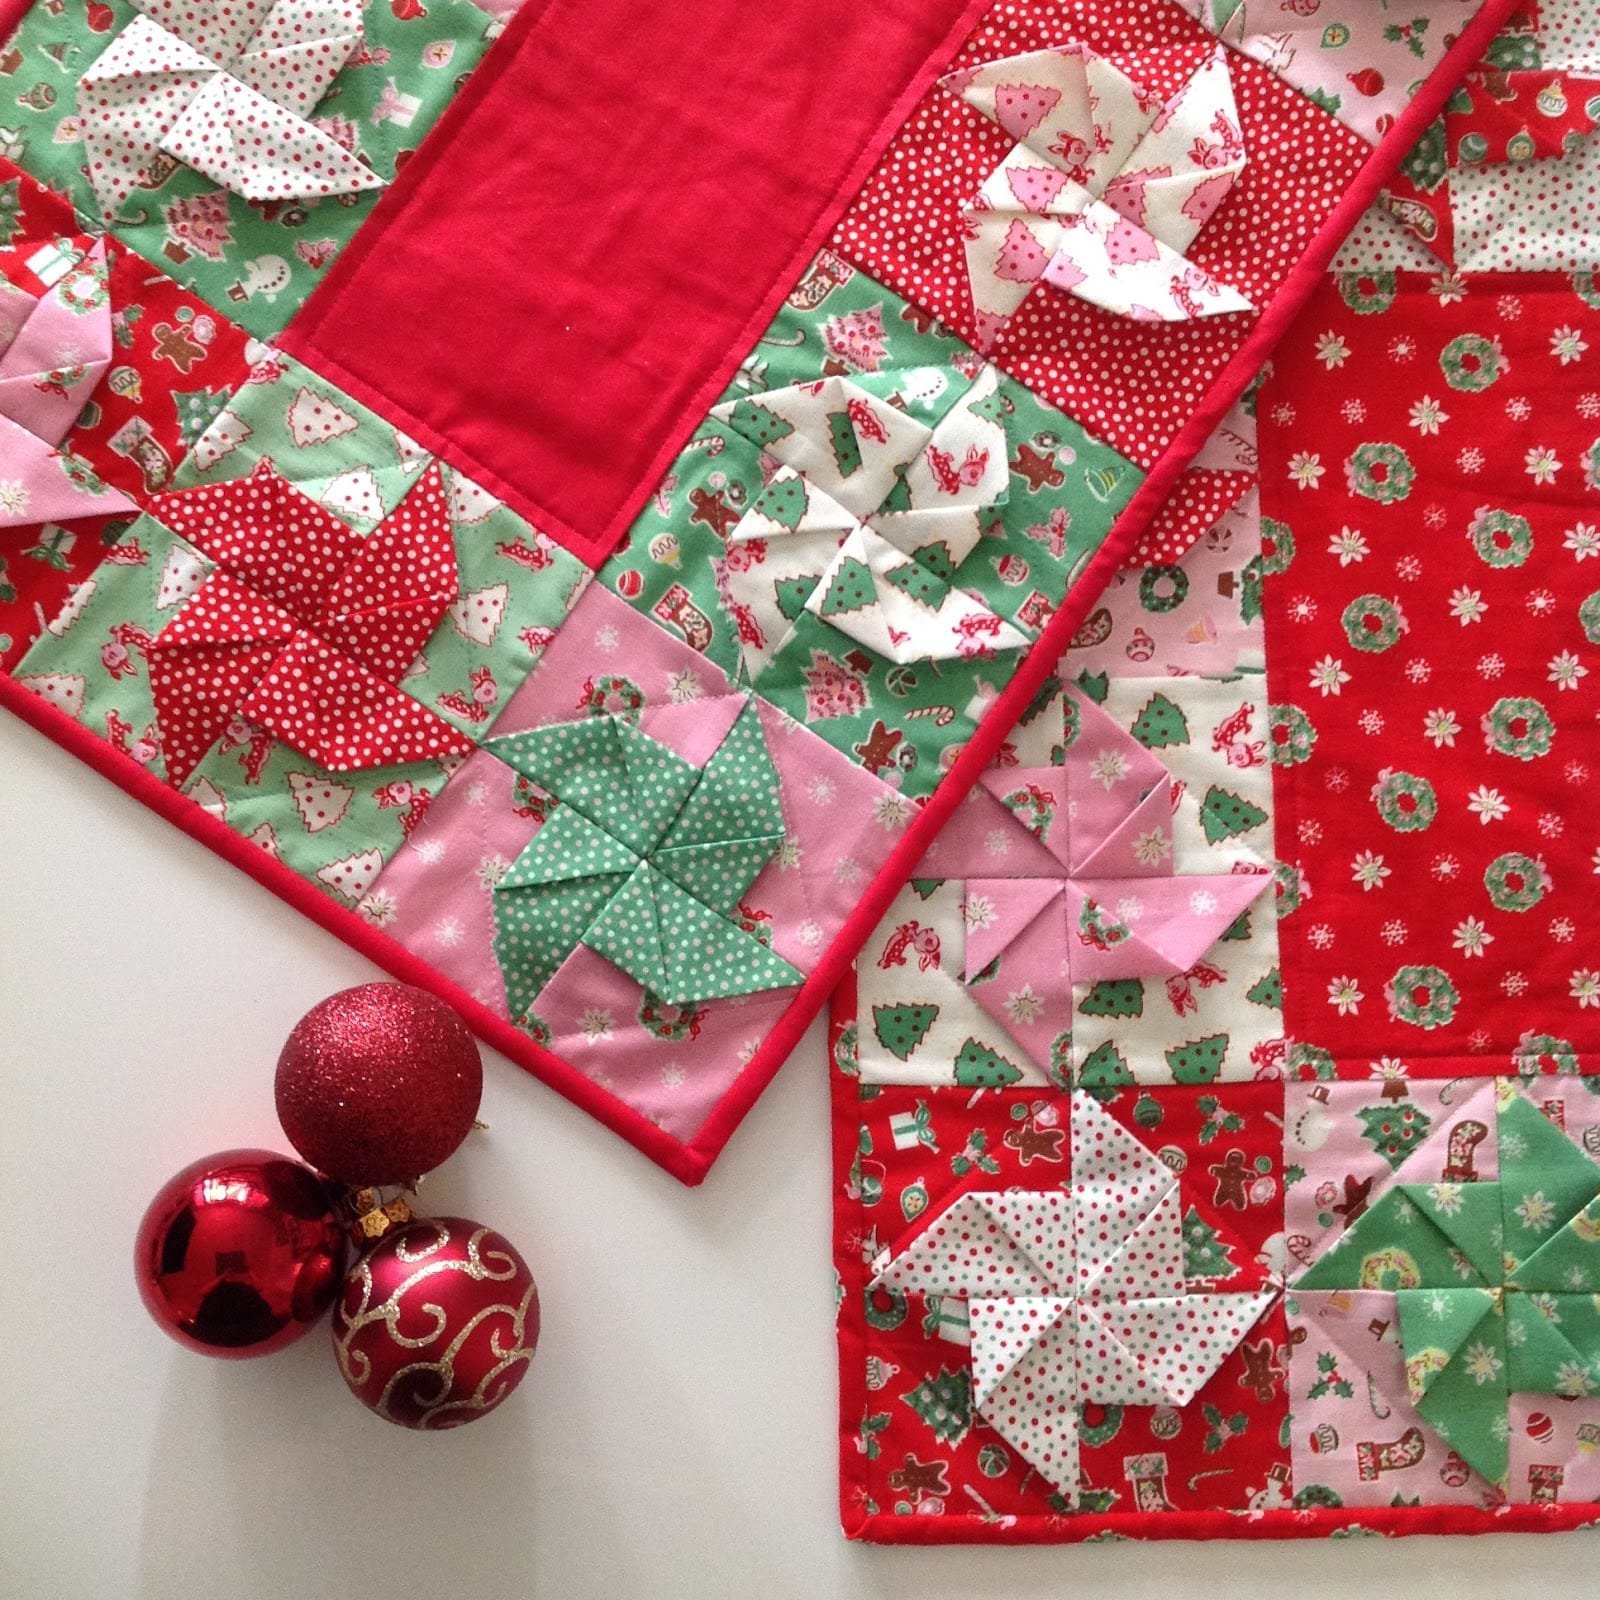
The Christmas Spin Table Runner tutorial by Sharon Burgess combines traditional quilting techniques with a festive flair, featuring bright colors, sharp lines, and a dynamic pattern that will catch everyone’s eye.
The runner’s unique spinning design not only adds movement and visual interest but also evokes the joyful energy of the holiday season.
In this blog post, we’ll go over each step of the tutorial in detail, ensuring that you have all the guidance you need to complete your own Christmas Spin Table Runner with ease.
By following the Christmas Spin Table Runner tutorial by Sharon Burgess, you’ll have the opportunity to work with holiday-themed fabrics, experiment with various quilting techniques, and create a piece that will be the centerpiece of your table during Christmas meals and gatherings. Let’s dive in!
1. Gathering Your Materials and Preparing Fabrics
Before you can dive into the Christmas Spin Table Runner tutorial by Sharon Burgess, you’ll need to gather all your materials and prepare your fabrics. Sharon’s design calls for a variety of festive prints, so you can have fun selecting the perfect holiday fabrics to suit your taste.
First, you’ll need to choose your fabrics. Look for holiday-themed fabrics in rich reds, greens, and whites with accents of gold or silver. Fabrics featuring stars, snowflakes, or poinsettias will work beautifully for this project. You’ll need a selection of fabrics for the main body of the runner as well as coordinating fabric for the borders and binding.
Second, ensure that your fabrics are pre-washed and pressed before starting. Pre-washing your fabric is important to prevent any shrinkage or color bleeding after your runner is completed. Pressing the fabrics helps to remove any wrinkles and ensures a smooth and easy cutting process.
Third, gather all of your quilting tools. You’ll need a rotary cutter, a cutting mat, and a quilting ruler for precise cuts. These tools are essential for cutting your fabric into the correct shapes for the spinning pattern featured in the Christmas Spin Table Runner tutorial by Sharon Burgess.
Next, choose a batting that is suitable for table runners. Lightweight cotton or polyester batting works well for this project, as it provides structure without adding too much bulk. You can also opt for heat-resistant batting if you plan to place hot dishes on your table runner.
Fifth, select matching thread for piecing and quilting. A neutral-colored thread will blend well with most holiday fabrics, but you can also use metallic or festive-colored threads to add a little extra sparkle to your project.
Finally, prepare your sewing machine for quilting. Ensure that you have a sharp needle installed and that your machine is threaded correctly. If you have a walking foot, it will be helpful for quilting through multiple layers of fabric and batting smoothly.
2. Cutting the Pieces for Your Christmas Spin Table Runner
Now that you have your materials ready, the next step in the Christmas Spin Table Runner tutorial by Sharon Burgess is cutting your fabric pieces. Accuracy is key when cutting your fabric for this project, as the precise measurements will ensure that the spinning pattern comes together seamlessly.
First, follow Sharon’s instructions for cutting the main squares. The base of the table runner consists of multiple squares that will be pieced together to create the spinning effect. Use your rotary cutter and ruler to cut out the required number of squares from your main fabrics.
Second, cut the triangles. These triangles will form the spinning points of the design. You’ll need to cut these triangles from contrasting fabrics so that the design stands out. Take your time with this step to ensure that the angles of your triangles are accurate, as this will impact the overall look of the finished runner.
Third, cut the borders and binding strips. The borders will frame your table runner, adding a clean edge to the design, while the binding will finish the edges of the quilted runner. Measure and cut these pieces from your coordinating fabric, making sure to account for any seam allowances.
Next, consider using fabric starch to stiffen the pieces slightly. This will make piecing the triangles and squares together easier, as the fabric will hold its shape better during sewing.
Fifth, lay out your cut pieces on a flat surface. Arrange them in the order specified in the Christmas Spin Table Runner tutorial by Sharon Burgess. This will give you a preview of what the finished runner will look like and allow you to make any adjustments to the color placement before sewing.
Finally, mark any sewing lines as necessary. If you’re using a complex layout, marking the seam allowances with a fabric marker can help guide you through the piecing process, ensuring that your pieces come together perfectly.
3. Assembling the Christmas Spin Table Runner
With your pieces cut and ready, it’s time to start assembling the Christmas Spin Table Runner. This part of the Christmas Spin Table Runner tutorial by Sharon Burgess involves sewing the pieces together to create the iconic spinning pattern.
First, start by piecing together the squares. Use a quarter-inch seam allowance to sew the squares together in rows, following the pattern laid out by Sharon. Press the seams open or to one side as you go to reduce bulk and keep your runner flat.
Second, add the triangles to each square. The triangles are what create the spinning effect, so it’s important to sew them with care. Attach the triangles to the corners of the squares, aligning the edges precisely. Sew with a quarter-inch seam allowance and press the seams toward the triangles.
Third, continue assembling the rows of squares and triangles. Once you’ve sewn all the rows, piece them together to form the main body of the table runner. At this point, the spinning pattern should start to take shape, with the triangles creating a swirling effect across the surface of the runner.
Next, add the borders. Sew the border strips to the edges of the table runner, starting with the shorter sides and then attaching the longer strips. Press the seams toward the borders to create a clean, framed look.
Fifth, prepare the quilt sandwich. Lay your backing fabric right-side down, place the batting on top, and then lay the pieced table runner on top, right-side up. Smooth out any wrinkles and baste the layers together using pins or basting spray.
Finally, quilt the table runner. Sharon’s tutorial suggests simple straight-line quilting to complement the geometric design, but you can also get creative with free-motion quilting or add decorative stitches to enhance the festive feel.
4. Binding and Finishing Your Table Runner
Once you’ve quilted your Christmas Spin Table Runner, it’s time to add the binding and give it a polished, finished look. This step of the Christmas Spin Table Runner tutorial by Sharon Burgess ensures that your runner is durable and ready to be displayed on your holiday table.
First, prepare your binding strips. Cut long strips of fabric that are 2.5 inches wide and long enough to go around the entire edge of the runner. You may need to sew several strips together to create one continuous piece of binding.
Second, attach the binding to the front of the table runner. Align the raw edges of the binding with the raw edges of the runner, and sew the binding to the front, using a quarter-inch seam allowance. Be sure to miter the corners for a clean, professional look.
Third, fold the binding over to the back of the runner and hand-stitch it in place. Use a slip stitch to secure the binding to the back, making sure that the stitches are invisible from the front of the runner. This will give your project a neat, finished appearance.
Next, give your table runner a final press. Use a warm iron to press the edges of the binding flat and ensure that the entire runner lies flat.
Fifth, trim any loose threads. Carefully go over your runner and snip any loose threads to give it a tidy, finished look.
Finally, display your finished Christmas Spin Table Runner proudly on your holiday table. Your handmade table runner will not only serve as a beautiful focal point but will also be a conversation starter for holiday gatherings.
FAQ
Q: What fabrics work best for the Christmas Spin Table Runner?
A: Sharon Burgess recommends using holiday-themed fabrics in reds, greens, and whites. Cotton quilting fabric works best for this project as it holds its shape well and is easy to quilt.
Q: Can beginners make this table runner?
A: Yes! While the Christmas Spin Table Runner tutorial by Sharon Burgess involves some piecing, the steps are easy to follow, making it a great project for quilters of all skill levels.
Q: How long does it take to complete the table runner?
A: Depending on your experience level and the amount of time you dedicate to the project, it can take anywhere from a few hours to a couple of days to complete the runner.
Q: Can I use non-traditional colors for the table runner?
A: Absolutely! While the tutorial suggests holiday-themed fabrics, you can customize your table runner with any colors or patterns that match your home décor.
Q: What type of batting should I use?
A: A lightweight cotton or polyester batting is ideal for table runners. If you plan to place hot dishes on the runner, consider using heat-resistant batting.
Q: Can I make this table runner larger or smaller?
A: Yes! You can easily adjust the size of the table runner by adding or subtracting squares and triangles from the pattern.
Join our VIP broadcast list and gain access to exclusive patterns, all for free. As a VIP member, you’ll receive the best patterns daily, delivered directly to your device. ✨📱 It’s a unique opportunity to stay up-to-date with the latest trends and designs, curated just for you. Don’t miss out on enhancing your projects and discovering new inspirations with the best patterns every day! 🎨🔝
The Christmas Spin Table Runner tutorial by Sharon Burgess is an excellent way to enhance your holiday decor with a beautiful handmade piece. Throughout this article, we covered everything from gathering materials to cutting, assembling, quilting, and finishing your runner. This project not only allows you to express your creativity but also gives you a practical item to showcase during the festive season.
PATTERN HERE
We hope you found this tutorial informative and inspiring. If you have any suggestions or feedback, please leave a comment below. We’d love to hear about your experiences and see how your Christmas Spin Table Runner turned out! Happy quilting!

