Welcome to the Candy Heart Block – Quilt Tutorial, where we’ll guide you step-by-step in creating a charming and delightful quilt block perfect for Valentine’s Day or any time you want to spread some love.
This Candy Heart Block is a fun and colorful design that can be customized with various fabric choices, making it a unique and personal quilting project. Whether you’re a beginner or an experienced quilter, this tutorial will show you how to make this beautiful quilt block, adding a sweet touch to your quilt collection.
The Candy Heart Block is a versatile pattern that works well with both solids and prints, allowing you to experiment with different fabrics and color combinations.
Its heart-shaped design is simple yet impactful, making it a great addition to quilts, pillows, or even wall hangings. As you follow this Candy Heart Block – Quilt Tutorial, you’ll learn how to cut, sew, and assemble this block with ease.
Before we dive into the steps, it’s important to remember that quilting is a creative journey. While the tutorial provides guidelines, don’t hesitate to add your personal touch to the project.
Whether it’s through the choice of fabrics or small design adjustments, the Candy Heart Block can be as unique as you are. So, let’s get started and create something beautiful!
1. Materials Needed for the Candy Heart Block
To begin your Candy Heart Block – Quilt Tutorial, gather all the necessary materials to ensure a smooth and enjoyable quilting experience.
First, select your fabrics. The Candy Heart Block design calls for three main fabric types: one for the heart, one for the background, and one for the border (if you choose to include one). For the heart, choose a vibrant fabric that stands out. Bright reds, pinks, or pastels work wonderfully for this design. For the background, a neutral or contrasting color like white, cream, or soft gray will make the heart pop. Finally, if you add a border, choose a fabric that complements both the heart and the background fabrics.
In addition to fabric, you will need basic quilting tools. A rotary cutter, cutting mat, and clear ruler are essential for accurate measurements and cuts. A sewing machine is also necessary for assembling the block. Make sure your machine is in good working order and that you have a suitable needle for quilting fabrics.
Don’t forget your thread! A high-quality cotton thread in a neutral color is ideal, as it blends well and ensures that your stitches are durable. If you prefer your thread to stand out, you can opt for a color that contrasts with your fabric.
Templates or measurements for cutting your heart and background pieces are also required. These will help ensure that your block pieces are consistent and fit together seamlessly. If you don’t have pre-made templates, you can create your own using cardboard or plastic.
Finally, you’ll need pins, fabric scissors, and an iron to press your seams. These tools will help keep everything in place and give your finished block a professional look. Once you have all your materials gathered, you’re ready to move on to cutting your fabric pieces.
2. Cutting and Preparing the Fabric
Once you’ve gathered all your materials, the next step in the Candy Heart Block – Quilt Tutorial is to cut and prepare your fabric pieces. This part of the process is critical to ensuring that your block comes together smoothly.
Start by cutting your heart fabric. For the Candy Heart Block, you’ll need two heart-shaped pieces. You can either use a heart template or freehand cut a heart shape that fits within the dimensions of your block. Make sure to cut the heart shapes carefully, as any uneven edges can affect the final appearance of your quilt block.
Next, cut the background fabric. Depending on the size of your Candy Heart Block, you’ll need two or four pieces of background fabric to frame the heart. These pieces should be rectangular or square, depending on the overall layout of your block. Accurate cutting is essential here, as the background fabric will need to match the heart’s edges.
If you plan to add a border around your Candy Heart Block, now is the time to cut those pieces. The border fabric should be cut into strips that are slightly longer than the block’s edges. Once the block is assembled, you’ll trim the border to the correct size.
With your fabric pieces cut, it’s time to press them. Use a hot iron to remove any wrinkles from your fabric, ensuring that the pieces lie flat. This step is essential, as it will make sewing the pieces together much easier.
Before you begin sewing, it’s also a good idea to lay out your pieces to ensure everything fits together as planned. This will give you a clear visual of how your Candy Heart Block will look once assembled. Once you’re satisfied with the layout, you can move on to the sewing process.
3. Assembling the Candy Heart Block
With your fabric pieces cut and prepared, the next step in the Candy Heart Block – Quilt Tutorial is assembling the block. This is where your quilt block starts to take shape, and you’ll see your fabric choices come together beautifully.
Begin by sewing the heart pieces to the background fabric. Take one heart piece and place it on top of one of your background fabric pieces, aligning the edges carefully. Pin the fabric in place to prevent it from shifting while sewing.
Using a quarter-inch seam allowance, sew the heart to the background fabric. Start at the top of the heart and work your way around the edges, being careful to sew smoothly along the curved parts. Once you’ve sewn one heart piece, repeat the process for the second heart.
After sewing the heart pieces, press the seams with an iron. This will help flatten the fabric and give your block a neat, professional appearance. Make sure to press the seams toward the background fabric to create a smooth finish.
Next, sew the background pieces together. If you have four background pieces, sew them together to form a frame around the heart. If you have only two background pieces, sew them to the top and bottom of the heart, depending on the layout of your block.
Once all the pieces are sewn together, press the entire block one final time to ensure all seams are flat. With the block assembled, you’re ready to add any finishing touches or move on to quilting your block.
4. Quilting and Finishing Your Candy Heart Block
The final stage of the Candy Heart Block – Quilt Tutorial is quilting and finishing the block. This step adds texture and secures the layers of your block, bringing your project to completion.
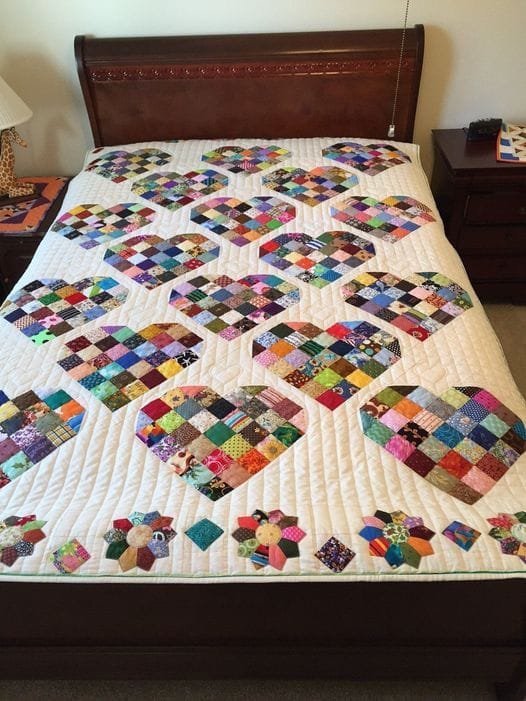
If you’re creating a larger quilt with multiple Candy Heart Blocks, you’ll need to assemble the blocks first before quilting. Lay out your blocks in the desired arrangement, making sure the heart designs are evenly distributed.
Once your blocks are assembled, create a quilt sandwich by layering the quilt top (your assembled blocks), batting, and backing fabric. Smooth out any wrinkles in the layers to ensure a flat surface.
Baste the layers together using safety pins or basting spray. This will hold the layers in place while you quilt. If you’re new to quilting, start with simple straight lines or stitch-in-the-ditch techniques. More experienced quilters can try free-motion quilting to add a more decorative touch to the Candy Heart Block.
After quilting, trim any excess batting and backing fabric, and finish the edges with binding. Choose a binding fabric that complements your Candy Heart Block design. Sew the binding to the edges of your quilt to give it a neat, polished finish.
Your Candy Heart Block quilt is now complete! Whether you’ve made a small quilt or a larger one with multiple blocks, this project is sure to bring warmth and joy to any space.
FAQ
1. What is a Candy Heart Block?
A Candy Heart Block is a quilt block design featuring a heart-shaped motif, perfect for creating quilts with a romantic or festive theme.
2. What materials do I need to make a Candy Heart Block?
You’ll need fabrics for the heart, background, and border (optional), as well as basic quilting tools like a rotary cutter, ruler, sewing machine, and thread.
3. Can I use different fabrics for the heart and background?
Yes! The Candy Heart Block is versatile and looks great with various fabric choices, allowing for creative customization.
4. How do I sew the heart pieces to the background?
Pin the heart pieces to the background fabric, then sew along the edges using a quarter-inch seam allowance, pressing the seams afterward.
5. Can I quilt my Candy Heart Block by hand?
Yes, you can quilt by hand if you prefer. Use small, even stitches to quilt around the heart and along the block’s seams.
6. How do I finish the edges of my Candy Heart Block quilt?
Once the quilting is complete, trim the edges of the quilt and sew binding around the edges for a neat, finished look.
Join our VIP broadcast list and gain access to exclusive patterns, all for free. As a VIP member, you’ll receive the best patterns daily, delivered directly to your device. ✨📱 It’s a unique opportunity to stay up-to-date with the latest trends and designs, curated just for you. Don’t miss out on enhancing your projects and discovering new inspirations with the best patterns every day! 🎨🔝
Conclusion
In this Candy Heart Block – Quilt Tutorial, we’ve covered everything from gathering materials to cutting fabric, assembling the block, and quilting it to perfection. Whether you’re making a single block or an entire quilt, the Candy Heart Block is a sweet and versatile addition to any quilting project.
We hope this tutorial has inspired you to get creative with your quilting and try your hand at making this adorable block. If you have any thoughts, suggestions, or feedback, please feel free to leave a comment below. We’d love to hear your opinions and see your creations!

