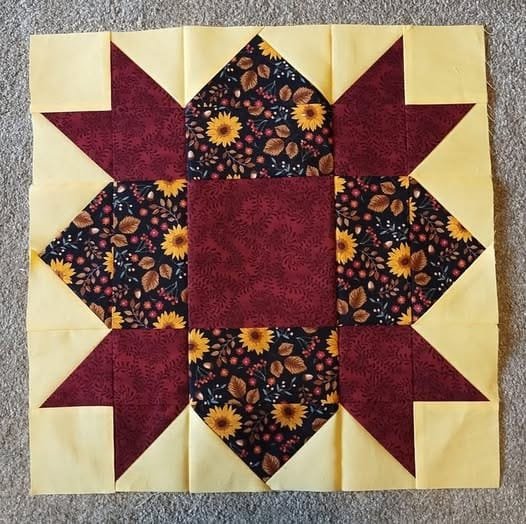
When it comes to creating eye-catching quilt designs, the Bright Star Block Pattern stands out as a timeless favorite among quilting enthusiasts. The Bright Star Block Pattern is known for its bold geometric shapes and the way it draws the eye toward the center, creating a stunning focal point on any quilt. Whether you are a beginner or an experienced quilter, incorporating the Bright Star Block Pattern into your projects can bring both elegance and charm.
The beauty of the Bright Star Block Pattern lies in its versatility. You can play with colors, fabrics, and layouts to make the design truly your own. The crisp lines of the star combined with contrasting fabrics can turn a simple quilt into a masterpiece. Many quilters find joy in experimenting with the Bright Star Block Pattern, as it offers endless possibilities for personalization.
Another reason why the Bright Star Block Pattern has become so popular is its ability to blend traditional and modern quilting styles. It can be used to create both vintage-inspired quilts and contemporary pieces, depending on your fabric choices and color schemes. This makes it a valuable addition to any quilter’s repertoire.
How to Get Started with the Bright Star Block Pattern
The first step to creating a Bright Star Block Pattern quilt is selecting your fabrics. Choosing high-contrast fabrics will help highlight the star shape and make your quilt pop. Many quilters like to use a solid background fabric paired with vibrant prints for the star. This combination ensures that the Bright Star Block Pattern remains the centerpiece of your design.
Next, focus on accurate cutting and piecing. Precision is key when working with the Bright Star Block Pattern because the sharp points and angles of the star require careful alignment. Take your time with each piece and use tools like a rotary cutter and quilting ruler to ensure clean, straight cuts.
When piecing together your Bright Star Block Pattern, start from the center and work outward. This helps maintain symmetry and keeps the block balanced. Remember to press your seams as you go, either to the side or open, depending on your preference. A well-pressed block will lie flat and look polished.
One tip that many quilters find helpful is to create a test block before starting on the full quilt. This allows you to practice the Bright Star Block Pattern and make any necessary adjustments. It can save time and fabric in the long run, especially if you are trying a new layout or color combination.
Another important aspect is deciding on the size of your blocks. The Bright Star Block Pattern can be scaled to fit various quilt sizes, from small wall hangings to large bed quilts. Make sure to plan your dimensions in advance so that your quilt top comes together smoothly.
Finally, think about how you will quilt your finished project. Simple straight-line quilting can emphasize the clean lines of the Bright Star Block Pattern, while more intricate quilting designs can add texture and interest. Whatever you choose, let the star be the highlight of your quilt.
Bright Star Block Pattern Design Ideas
One of the most exciting parts of working with the Bright Star Block Pattern is coming up with design ideas. You can stick to classic color combinations, such as red, white, and blue, for a traditional look. This is a popular choice for patriotic quilts or heirloom projects that pay homage to quilting history.
For a more modern approach, try using a monochromatic palette. Shades of a single color, like various tones of blue or green, can create a sophisticated and cohesive quilt. The Bright Star Block Pattern works beautifully with subtle variations in color to produce a striking effect.
Another creative idea is to use scraps from previous projects. The Bright Star Block Pattern is a great way to use up leftover fabric pieces while creating something new and beautiful. This not only reduces waste but also adds sentimental value to your quilt as each piece tells a story.
You might also consider using gradient fabrics or ombré prints. These can give your Bright Star Block Pattern a unique and dynamic look as the colors gradually shift across the quilt top. This style is especially effective when you want to draw attention to the star’s points.
If you enjoy experimenting with layouts, consider alternating the orientation of your Bright Star Block Pattern blocks. Rotating some blocks can create a secondary pattern across the quilt top, adding complexity and visual interest. This approach is perfect for advanced quilters looking to challenge themselves.
Lastly, don’t be afraid to mix in other block styles. Combining the Bright Star Block Pattern with complementary quilt blocks can result in a truly original design. Whether you add sashing or join the blocks directly, the possibilities are endless.
Tips for Sewing the Bright Star Block Pattern
Sewing the Bright Star Block Pattern requires some planning, but the results are well worth the effort. Begin by ensuring your sewing machine is properly set up. A consistent stitch length and accurate ¼-inch seam allowance are essential for clean, precise piecing.
Organization is another key factor. Lay out your fabric pieces in the order you plan to sew them. This will help you keep track of your design and avoid mixing up similar-looking pieces. Many quilters use small trays or labeled containers to keep pieces separated.
Pinning carefully before sewing can help you achieve those sharp points that the Bright Star Block Pattern is known for. Place pins at crucial intersections to keep seams aligned as you sew. Some quilters also like to use clips for added stability.
As you sew, take your time and check your alignment frequently. It’s much easier to correct a small misalignment early on than to try and fix it later in the process. The Bright Star Block Pattern relies on precision to look its best, so don’t rush.
Pressing is just as important as sewing. A good press with a hot iron after each seam will help your Bright Star Block Pattern blocks lie flat and fit together neatly. Whether you prefer steam or a dry iron, consistent pressing will improve the overall appearance of your quilt.
Finally, be patient with yourself. The Bright Star Block Pattern can be challenging at first, but with practice, you’ll find it easier to achieve those crisp, clean lines. Each block you make brings you closer to mastering this beautiful design.
Finishing Your Bright Star Block Pattern Quilt
Once your Bright Star Block Pattern blocks are complete, it’s time to assemble the quilt top. Lay out your blocks on a design wall or large surface so you can see how they fit together. This is your chance to rearrange blocks if needed before sewing them into rows.
When joining your rows, be mindful of how your seams align. The points of your Bright Star Block Pattern should match up where blocks meet, creating a seamless design across the quilt top. Take your time pinning and sewing these seams for the best results.
Next comes the border. Adding a border to your Bright Star Block Pattern quilt can frame your design and make the star blocks stand out even more. Choose a border fabric that complements your star colors without overpowering them.
Quilting your finished top is where you can let your creativity shine. The Bright Star Block Pattern lends itself well to both simple and complex quilting designs. You might choose echo quilting to follow the star shapes or a free-motion design for added texture.
After quilting, trim your edges and prepare to bind your quilt. The binding is the final touch that holds everything together and gives your quilt a polished look. Many quilters choose a binding fabric that picks up one of the star colors for a cohesive finish.
Lastly, don’t forget to label your quilt. Include details like the date, your name, and the occasion if it’s a gift. The Bright Star Block Pattern quilts are often cherished keepsakes, so it’s nice to leave a personal mark on your work.
FAQ
What is the Bright Star Block Pattern best used for?
The Bright Star Block Pattern is ideal for quilts, wall hangings, table runners, and even pillow covers. Its bold design makes it versatile for many projects.
Is the Bright Star Block Pattern suitable for beginners?
Yes, beginners can definitely try the Bright Star Block Pattern, especially if they take their time and practice with a test block first.
What size should my Bright Star Block Pattern be?
The size depends on your project. The Bright Star Block Pattern can be scaled up for bed quilts or kept small for decorative items.
What fabrics work best for the Bright Star Block Pattern?
High-contrast fabrics highlight the design, but you can experiment with prints, solids, and even scraps to personalize your Bright Star Block Pattern quilt.
How long does it take to complete a Bright Star Block Pattern quilt?
The time varies depending on the size and complexity, but with steady work, you can complete a quilt top in a few weeks.
Do I need special tools to make the Bright Star Block Pattern?
Basic quilting tools like a rotary cutter, ruler, and sewing machine are all you need to create the Bright Star Block Pattern.
Conclusion
In this article, we explored the Bright Star Block Pattern, from its timeless appeal to practical tips for sewing and finishing your quilt. We looked at fabric choices, layout ideas, and techniques to help you succeed with this beautiful pattern. The Bright Star Block Pattern offers endless opportunities for creativity, and with patience and care, you can create a quilt that will be treasured for years.

