If you’re passionate about quilting and love creating intricate patterns, you’re in the right place! In this Blazing Arrows Quilt Tutorial, we will guide you through each step of crafting this stunning design.
Whether you’re a beginner or an experienced quilter, this project offers the perfect combination of beauty and technique. Quilts are a time-honored tradition, and the Blazing Arrows Quilt is no exception, offering bold shapes and dynamic lines that will stand out in any collection.
Before diving into the process, it’s essential to understand what makes the Blazing Arrows Quilt so unique. This pattern is celebrated for its sharp, arrow-like shapes that come together in a radiant burst.
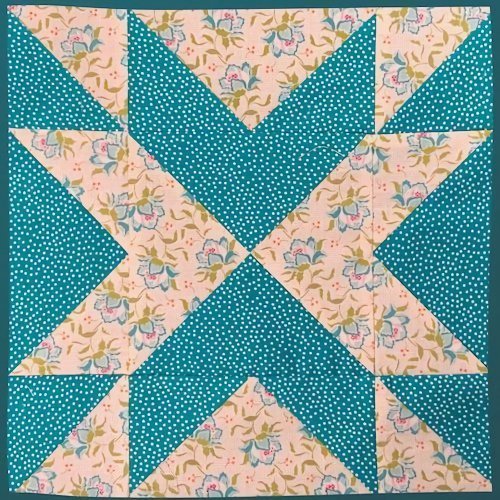
The quilt’s geometric structure makes it visually striking, while its layout remains relatively simple to construct. With our Blazing Arrows Quilt Tutorial, you’ll learn how to piece together this quilt block by block, resulting in a beautiful finished product that reflects both precision and creativity.
So, grab your materials, set up your sewing machine, and let’s get started on this wonderful quilting journey. This tutorial is divided into easy-to-follow sections, ensuring you don’t miss a thing. Follow along, and by the end, you’ll have a masterpiece of your own!
1. Materials Needed for the Blazing Arrows Quilt
When starting any quilting project, gathering the right materials is crucial. For the Blazing Arrows Quilt, you’ll need a variety of fabrics, cutting tools, and other essentials to ensure the quilt comes together perfectly.
- Fabric Selection: Choose fabrics that complement each other in terms of color and pattern. You’ll need fabric for the arrows, background, and borders. Bold colors work best for the arrows, while a neutral background fabric can make the arrows stand out more.
- Rotary Cutter and Mat: A sharp rotary cutter and a self-healing cutting mat are essential for cutting your fabric with precision. These tools ensure that your fabric pieces are even and ready to be sewn together.
- Ruler: A quilting ruler helps with accurate measurements and cutting. The Blazing Arrows Quilt requires precise cuts, especially when cutting triangles for the arrows.
- Sewing Machine: Make sure your sewing machine is ready for quilting, with the correct needle and thread. For this project, a 1/4-inch seam allowance is key to ensuring all pieces fit together correctly.
- Pins and Clips: To hold your pieces in place while sewing, pins and fabric clips are essential. They will help prevent fabric from shifting and ensure your seams are straight.
- Iron and Pressing Board: Pressing your fabric pieces between steps helps keep your quilt blocks crisp and flat. This will result in a more professional-looking finished product.
By preparing these materials ahead of time, you’ll set yourself up for a smooth and enjoyable quilting experience. Now that you’re all set, it’s time to move on to the fun part—assembling your quilt!
2. Cutting and Preparing Your Fabric
With your materials ready, the next step in the Blazing Arrows Quilt Tutorial is cutting and prepping your fabric. Precision is key to making sure your quilt blocks fit together perfectly.
- Cut the Arrows: Start by cutting your chosen fabric for the arrows into triangles. The Blazing Arrows Quilt uses triangles to create the sharp arrow shapes. Ensure that each triangle is the same size for consistent blocks.
- Prepare the Background Fabric: Cut your background fabric into squares. These will be paired with the arrow triangles to create each quilt block. For this pattern, make sure your background squares are slightly larger than the arrow pieces to accommodate seam allowances.
- Lay Out the Pieces: Before you begin sewing, lay out all your pieces to visualize how the quilt will come together. The arrows should radiate outward, creating a dynamic, eye-catching design. Adjust as needed to ensure a balanced look.
- Mark Seam Lines: If you’re new to quilting or want to ensure accuracy, lightly mark your seam lines with a fabric-safe pen. This helps guide your sewing, especially when dealing with intricate shapes like triangles.
- Double-Check Your Cuts: Double-check that all your fabric pieces are cut accurately. Uneven cuts can throw off the entire design, so it’s worth taking a moment to ensure everything is aligned.
- Organize Your Fabric: Keep your cut pieces organized in labeled piles. This helps you stay on track and prevents any confusion as you sew your quilt together.
By taking your time with these preparation steps, you’ll make the actual sewing process much easier and more enjoyable. Precision here leads to a beautiful Blazing Arrows Quilt later.
3. Piecing the Blazing Arrows Quilt Blocks
Now that your fabric is prepped, it’s time to start piecing the quilt blocks together. The Blazing Arrows Quilt is constructed by creating individual blocks that are later sewn together to form the larger quilt.
- Sew the Arrows to the Background: Begin by sewing the arrow triangles to the background squares. Use a 1/4-inch seam allowance for all seams. Press the seams open or to one side, depending on your preference.
- Chain Piecing: If you’re comfortable, you can use chain piecing, where you sew multiple blocks at once without cutting the thread between them. This speeds up the process and ensures consistency in your blocks.
- Square Up the Blocks: After sewing, square up each block to ensure they’re the same size. This is a crucial step for the Blazing Arrows Quilt, as uneven blocks can result in a misaligned quilt.
- Assemble Rows: Once your blocks are pieced, start assembling them into rows. Make sure the arrows are aligned correctly, radiating outward in the desired pattern.
- Pin and Sew: Pin the blocks together and sew the rows. Again, use a 1/4-inch seam allowance and press the seams flat after sewing.
- Join the Rows: After all the rows are sewn, it’s time to join them together. Pin the rows carefully to ensure the arrows align perfectly. Sew and press the quilt top.
With your blocks and rows assembled, you’re almost there! The Blazing Arrows Quilt is starting to take shape, and soon you’ll have a finished quilt top.
4. Quilting and Finishing the Blazing Arrows Quilt
After piecing your quilt top, the final steps involve quilting and finishing the project. This part adds texture and durability to the Blazing Arrows Quilt.
- Choose a Quilting Design: The quilting pattern you choose can enhance the design of the Blazing Arrows Quilt. You can opt for straight-line quilting, echoing the arrow shapes, or a more intricate free-motion design.
- Layer the Quilt: Layer your quilt top with batting and backing fabric. Smooth out any wrinkles and secure the layers together with quilting pins or spray adhesive.
- Baste the Quilt: Basting helps keep the quilt layers together while you quilt. You can hand-baste with large stitches or use safety pins to hold the layers in place.
- Quilt the Layers: Using your sewing machine or quilting machine, begin quilting the layers together. Take your time to avoid puckers or folds, ensuring a smooth, even finish.
- Trim the Edges: After quilting, trim the edges of your quilt to make them even. This is an essential step before attaching the binding.
- Bind the Quilt: Finish the Blazing Arrows Quilt by attaching the binding. This is the fabric strip that goes around the edges, giving the quilt a polished look. Sew the binding to the front of the quilt, then fold it over and hand-stitch it to the back for a clean finish.
Congratulations! You’ve completed your Blazing Arrows Quilt. Now, let’s address some common questions quilters often have.
FAQ
What size should my Blazing Arrows Quilt be?
The size of the quilt depends on how many blocks you decide to make. A typical throw-sized quilt might use around 20-25 blocks, but you can adjust based on your preference.
Can I make the Blazing Arrows Quilt without a sewing machine?
While it’s possible to hand-sew the quilt, using a sewing machine is much faster and ensures more precise seams, which is important for a pattern like this.
How do I avoid puckers when quilting?
Puckers can be avoided by basting your quilt layers securely and quilting slowly. Make sure your fabric is taut and smooth before quilting.
What is the best fabric for a Blazing Arrows Quilt?
Cotton fabric is the most common choice for quilts. It’s durable, easy to work with, and holds up well through the quilting process.
How long does it take to complete the Blazing Arrows Quilt?
The time it takes depends on your quilting experience and the size of your quilt. On average, it might take a few days to a week to complete.
Can I make this quilt if I’m a beginner?
Yes! While the design may look complex, the Blazing Arrows Quilt Tutorial breaks it down into simple, manageable steps.
Join our VIP broadcast list and gain access to exclusive patterns, all for free. As a VIP member, you’ll receive the best patterns daily, delivered directly to your device. ✨📱 It’s a unique opportunity to stay up-to-date with the latest trends and designs, curated just for you. Don’t miss out on enhancing your projects and discovering new inspirations with the best patterns every day! 🎨🔝
Conclusion
This Blazing Arrows Quilt Tutorial offers a step-by-step guide to help you create a stunning quilt with a bold, geometric design. From cutting and piecing the fabric to quilting and binding, we’ve covered every step you need to follow. Whether you’re a beginner or an experienced quilter, this project is a rewarding challenge.
If you’ve completed your quilt, we’d love to hear your thoughts! Please leave a comment with your experience, tips, or suggestions on how this tutorial helped you. Happy quilting!

