The Big T Quilt Block – Free Tutorial is a comprehensive guide to creating one of the most iconic quilt blocks in the quilting world. This block stands out for its bold design, which forms a prominent “T” shape in the quilt.
Whether you’re new to quilting or a seasoned expert, this tutorial will help you craft a beautiful Big T Quilt Block.
In this tutorial, we will cover everything from fabric selection to piecing and finishing your block. The Big T Quilt Block offers a fantastic opportunity to play with colors, textures, and fabrics to create a stunning, visually impactful design.
This block is both easy to make and highly adaptable, which makes it a perfect addition to any quilting project.
With its timeless appeal, the Big T Quilt Block has been used for generations. It’s simple enough for beginners, yet provides plenty of creative opportunities for advanced quilters looking to experiment with fabric combinations or quilting techniques. Let’s dive into the tutorial and get started on your own Big T Quilt Block!
1. Selecting Fabrics for the Big T Quilt Block
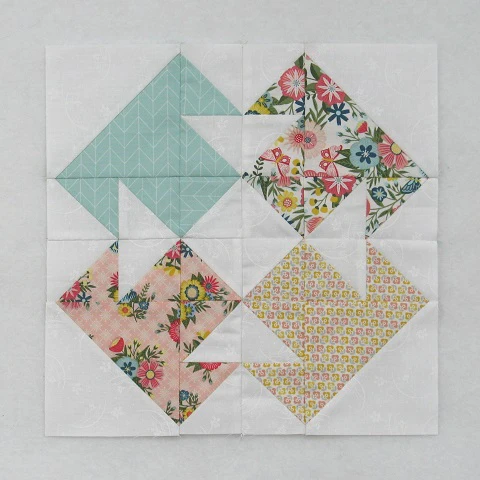
The first step in creating a successful Big T Quilt Block is selecting the right fabrics. The fabrics you choose will have a significant impact on the overall look and feel of your quilt. Since the Big T Quilt Block is defined by its bold “T” shape, it’s essential to choose fabrics that contrast well to highlight the design.
Consider choosing one solid fabric and one patterned fabric. The solid fabric can form the background of the block, while the patterned fabric can be used to create the “T” shape. This contrast will make the Big T Quilt Block visually striking and ensure that the design stands out.
Another approach is to use different shades of the same color family. For example, pairing a light blue with a dark blue can create a sophisticated, monochromatic look while still allowing the “T” shape to be prominent.
It’s also important to think about the scale of the prints on your fabric. Large prints might overwhelm the Big T Quilt Block, while small prints or solids will allow the shape to take center stage. Play with different combinations to see what works best for your project.
Finally, consider the weight and type of fabric. While quilting cotton is the most popular choice for quilts due to its durability and ease of handling, you can experiment with other fabrics like linen or even flannel to add texture and interest to your Big T Quilt Block.
2. Cutting and Preparing Your Fabric
Once you’ve selected your fabrics, it’s time to prepare them for cutting. Before you begin, make sure your fabric is pressed and free of wrinkles. Wrinkles can cause uneven cuts, so it’s essential to start with smooth fabric.
Using a rotary cutter, self-healing mat, and acrylic ruler, cut your fabric into the required shapes for the Big T Quilt Block. This block is made up of a combination of squares, rectangles, and sometimes triangles, depending on the specific variation of the pattern you’re using.
Be sure to follow the measurements provided in the pattern exactly. Accuracy is key when cutting your fabric. Even slight deviations can result in pieces that don’t align properly when you start assembling the block.
For beginners, cutting multiple layers of fabric at once can be helpful. Stack two or three layers of fabric together, making sure they are aligned evenly, and cut them at the same time. This method ensures consistency in size and shape for each piece.
Once your pieces are cut, organize them by size and shape. Keeping your workspace tidy and organized will make the piecing process much smoother. It’s also helpful to label each piece if you’re working on multiple blocks at once.
3. Assembling the Big T Quilt Block
Now that you have all your fabric pieces cut and organized, it’s time to assemble the Big T Quilt Block. Lay out your pieces on a flat surface in the shape of the block before you begin sewing. This step will help you visualize the final design and ensure that all pieces are in the correct position.
Start by sewing the smaller pieces together first. Typically, you will sew the squares and rectangles into larger sections that will eventually form the “T” shape. Be sure to use a quarter-inch seam allowance, as this is the standard for quilting.
As you sew, take your time to align the edges and corners precisely. Using pins can help hold the pieces in place while you sew, especially for sections with multiple layers of fabric.
After sewing the smaller sections, press each seam with an iron to set it. Pressing your seams as you go will make the final assembly of the block much easier and neater.
Once the smaller sections are sewn and pressed, you can start joining them together to complete the Big T Quilt Block. As you sew, make sure the seams are aligned, and use pins to keep everything in place. After sewing each section, give it a final press to ensure the block lies flat.
4. Finishing the Big T Quilt Block
With your Big T Quilt Block fully assembled, it’s time to finish the block and prepare it for use in a quilt. The first step is to trim the block to the correct size. Depending on the pattern you’re following, you may need to trim the edges slightly to ensure that the block is square and the seams are aligned perfectly.
Next, give the block a final press with a hot iron. This will set the seams and ensure that the block lies flat. A flat block is essential for making sure that your quilt top comes together smoothly and without any puckering or distortion.
If you’re making multiple blocks for a quilt, repeat the process for each block. You can streamline the process by cutting and piecing several blocks at once, using assembly-line techniques to save time.
Once all your blocks are completed, you can start assembling the quilt top. The Big T Quilt Block looks fantastic when repeated across a quilt, and you can experiment with different layouts to create a unique design. Whether you choose a traditional grid layout or something more modern and asymmetrical, the Big T Quilt Block will make a bold statement.
Finally, add the batting and backing, and quilt the layers together. Whether you choose to hand-quilt, machine-quilt, or send your quilt to a professional longarm quilter, your finished Big T Quilt Block quilt will be a beautiful and timeless piece.
FAQ
Q1: What is the Big T Quilt Block?
A: The Big T Quilt Block is a bold and simple quilt block that features a prominent “T” shape in the design. It’s popular among quilters for its striking appearance and ease of construction.
Q2: Is the Big T Quilt Block suitable for beginners?
A: Yes! The Big T Quilt Block is an excellent choice for beginners due to its straightforward design and simple piecing process. It’s also versatile, making it a great block for quilters of all skill levels.
Q3: How do I choose fabrics for the Big T Quilt Block?
A: Choose fabrics that contrast well with each other to make the “T” shape stand out. A combination of solids and prints works well, as does pairing light and dark fabrics.
Q4: What size should the Big T Quilt Block be?
A: The size of the Big T Quilt Block can vary depending on the pattern. Standard sizes range from 9 inches to 12 inches square, but you can adjust the size by changing the measurements of the pieces.
Q5: How do I ensure my seams are accurate?
A: Use a quarter-inch seam allowance and press your seams as you go to ensure accuracy. Taking your time to align the edges and using pins can help keep everything in place while sewing.
Q6: Can I make an entire quilt using the Big T Quilt Block?
A: Absolutely! The Big T Quilt Block looks fantastic when repeated across an entire quilt. You can create a traditional grid layout or experiment with more modern designs by varying the placement and orientation of the blocks.
Join our VIP broadcast list and gain access to exclusive patterns, all for free. As a VIP member, you’ll receive the best patterns daily, delivered directly to your device. ✨📱 It’s a unique opportunity to stay up-to-date with the latest trends and designs, curated just for you. Don’t miss out on enhancing your projects and discovering new inspirations with the best patterns every day! 🎨🔝
Conclusion
In this Big T Quilt Block – Free Tutorial, we’ve explored everything from selecting fabrics to cutting, piecing, and finishing your quilt block. The Big T Quilt Block is a bold and versatile pattern that can be used in a variety of quilting projects. Its simplicity makes it an excellent choice for beginners, while its adaptability offers endless possibilities for more experienced quilters.
PATTERN HERE
We hope this tutorial has inspired you to create your own Big T Quilt Block and incorporate it into your next quilt. If you have any questions, feedback, or suggestions, please leave a comment below. We’d love to hear your thoughts and see how your quilt turns out! Happy quilting!

