The Beads Quilt Pattern is a captivating and timeless quilt design that continues to charm both beginners and experienced quilters alike. With its circular and flowing design reminiscent of beads strung together, this pattern offers both visual interest and an excellent opportunity to play with color and texture. Whether you’re exploring quilting for the first time or deepening your creative practice, the Beads Quilt is a beautiful and rewarding project.
Quilting has always held a deep tradition of storytelling and creativity. Patterns like the Beads Quilt Pattern not only serve practical purposes but also express the artistry and heritage of the quilter. From its rounded forms to its balanced symmetry, this design evokes movement, harmony, and grace—ideal for those who appreciate both tradition and innovation.
In this article, you’ll discover everything you need to know about the Beads Quilt Pattern, including its origins, variations, construction techniques, fabric suggestions, and ways to make your project truly unique. Whether you plan to create a bedspread, a wall hanging, or a baby quilt, this guide will help you approach your Beads Quilt project with confidence and inspiration.
Understanding the Beads Quilt Pattern
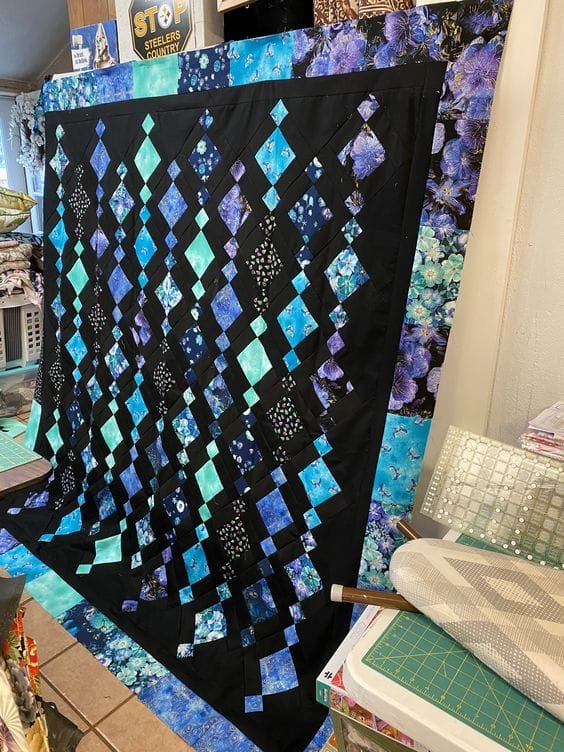
The Beads Quilt Pattern derives its name from the design’s repeating circles or ovals that resemble strands of beads. This eye-catching layout creates a rhythmic flow across the quilt top and allows quilters to experiment with contrast, shading, and scale.
Traditionally, the Beads Quilt uses curved piecing to form the circular motifs. This technique may be more complex than straight-line sewing, but the result is worth the effort. With careful planning and cutting, even beginner quilters can master this skill and produce stunning results.
Another essential element of this pattern is color choice. Because of its bold and repetitive shapes, the Beads Quilt Pattern thrives on high-contrast fabrics or gradient tones. Using bright prints against neutral backgrounds can really make the bead design pop and draw attention.
This pattern also offers the opportunity to tell a story through fabric. Each “bead” can be a different color, print, or even a symbolic fabric choice, such as upcycled clothing or heirloom materials. That makes every quilt unique and personal.
Some quilters choose to applique the bead shapes rather than piece them, which simplifies the process while still maintaining the design integrity. This is a good option for those new to curved sewing or looking for a faster finish.
No matter the technique, the Beads Quilt allows endless possibilities for customization, making it a perennial favorite among quilting communities.
Materials and Fabric Selection Tips
When starting your Beads Quilt Pattern, selecting the right materials is crucial. The first step is choosing quality fabric that is both visually appealing and easy to work with. Cotton is the most common choice for quilts, especially for those new to quilting.
Opt for pre-washed and ironed cotton fabrics to prevent shrinking and bleeding. For the bead sections, consider bold solids or patterned prints that will stand out against the background. The background itself should ideally be light or neutral to highlight the bead shapes.
Batiks also work well for this pattern because of their unique color variations and tight weave. Their durability makes them ideal for curved piecing, and their vibrant dyes bring the bead motif to life.
A high-quality rotary cutter, cutting mat, and acrylic templates (especially circular or oval templates) are essential tools when working with the Beads Quilt Pattern. Accurate cutting is vital to ensure your curves fit together seamlessly.
You’ll also need thread that matches or contrasts, depending on your desired visual effect. For invisible stitching, use a color close to your fabric. For a bold, decorative touch, select a contrasting thread.
Finally, don’t forget your batting and backing fabric. The Beads Quilt often looks best with a medium loft batting to give subtle dimension and softness to the rounded bead design.
Techniques for Piecing and Assembly
Constructing a Beads Quilt requires precision, especially with curved piecing. While it may seem intimidating at first, following a few key techniques can make the process manageable and enjoyable.
Start by preparing all your bead pieces. Use templates to trace and cut out accurate shapes. Most Beads Quilt Patterns are made of half-circles or full circles, and maintaining consistency will ensure a smooth assembly process.
When sewing curves, use many pins or clips to secure the pieces together before stitching. Pinning at the edges and center helps prevent distortion and ensures alignment.
Pressing is also crucial in curved piecing. Press seams gently to one side or open, depending on your layout. A good pressing job gives a crisp, professional finish and reduces puckering.
Some quilters prefer to use freezer paper or foundation paper piecing methods for added stability while sewing curves. These methods can help maintain the pattern’s symmetry and reduce stretching.
Appliqué is another alternative to traditional curved piecing. You can cut the bead shapes and sew them directly onto a background block using a zigzag or satin stitch. This is particularly helpful for quilters seeking a faster or more relaxed approach.
Once your blocks are assembled, plan your layout carefully. Alternate the direction of beads for movement or keep them aligned for a clean, geometric look. Sew the blocks into rows, then join the rows to complete your quilt top.
Design Variations and Creative Options
One of the most enjoyable aspects of the Beads Quilt Pattern is its flexibility. You can adapt it to match your personal style, room decor, or occasion. Whether you prefer minimalist designs or bold statements, there’s room for experimentation.
Vary the size of your beads to create a dynamic layout. Larger beads can serve as focal points, while smaller ones can be used to fill spaces or add rhythm to the pattern.
You might try using ombré fabrics that gradually change in color to create a gradient effect across your quilt. This technique works beautifully with the Beads Quilt because of its repetitive shapes and natural flow.
Monochromatic versions are another option. Choose one color in various shades to keep the design elegant and sophisticated. This can work well for modern interiors or as a gift for someone with a minimalist taste.
Adding embroidery, hand quilting, or embellishments to each bead brings extra texture and visual interest. Use metallic thread, beads, or simple hand stitches to elevate your quilt’s uniqueness.
The Beads Quilt Pattern can also be adapted into smaller projects, such as table runners, tote bags, or cushion covers. These are great for practicing the pattern before committing to a full quilt.
Seasonal variations also work beautifully. Use red, green, and gold fabrics for a holiday theme, or pastels for a springtime baby quilt. The pattern lends itself to endless storytelling through fabric.
Finishing Your Beads Quilt
Once your quilt top is completed, the finishing steps are just as important for a polished result. Basting, quilting, and binding bring your Beads Quilt Pattern project together.
Start by layering your quilt top, batting, and backing. Smooth out wrinkles and baste the layers using safety pins, basting spray, or hand stitches. This step ensures your layers won’t shift during quilting.
When it comes to quilting, consider echo quilting around the bead shapes to enhance their definition. Alternatively, free-motion quilting inside the beads can add texture and creativity.
If you prefer simplicity, straight-line quilting through the rows or diagonally across the quilt can also work well and offer a modern look. Choose a method that complements your overall design.
Trim the edges evenly before adding binding. A contrasting binding can frame your Beads Quilt nicely, while a matching one will keep the focus on the center design.
Hand-stitching the binding gives a neat finish, though machine binding can be faster and more durable, especially for quilts that will be washed frequently.
Finally, label your quilt with the date and your name. This personal touch turns your Beads Quilt Pattern creation into a lasting heirloom.
Frequently Asked Questions (FAQ)
What is a Beads Quilt Pattern?
The Beads Quilt Pattern features a series of circular or oval shapes that resemble a string of beads. It’s known for its flowing, rhythmic design and offers endless possibilities for color and fabric combinations.
Is the Beads Quilt Pattern suitable for beginners?
Yes, but it’s helpful to start with simpler versions or use appliqué methods before attempting curved piecing. With practice, even novice quilters can master the pattern.
What fabrics are best for a Beads Quilt?
High-quality cotton, especially batiks and solids with bold colors, work well. Pre-washed fabrics are recommended to avoid shrinking or color bleeding.
How do I sew curved quilt pieces?
Use templates for accurate cutting, pin carefully, and sew slowly. Press seams well and consider practicing on scraps before assembling your full quilt blocks.
Can I make a Beads Quilt using appliqué?
Absolutely. Appliqué is a great option for those who want to avoid curved piecing. It’s also quicker and can be equally beautiful.
What size should a Beads Quilt be?
There’s no fixed size. You can create anything from a small wall hanging to a large bedspread. Adjust your bead block size based on your intended final dimensions.
Conclusion
The Beads Quilt Pattern is more than just a charming design—it’s a creative journey filled with color, texture, and storytelling. Whether you choose traditional piecing or modern appliqué, this pattern offers a rewarding and fulfilling experience for any quilter. From fabric selection to finishing touches, every step allows you to add your unique flair.

