The Astrodelic Quilt – Free Pattern is a vibrant, celestial-inspired design that has become a favorite among quilters who love bold colors and unique geometric shapes. With starry motifs and psychedelic patterns, this quilt combines both traditional and modern elements, making it a stunning centerpiece for any space.
Whether you’re a beginner or an experienced quilter, this free pattern provides a clear and enjoyable path to creating your very own Astrodelic Quilt.
This quilt pattern is versatile, allowing you to personalize it with your choice of colors, fabrics, and stitching styles. The Astrodelic Quilt works well as a large, cozy throw or as a statement piece on a bed.
The step-by-step instructions in this guide are designed to make the process as easy as possible, while also leaving room for creative expression.
In the following sections, we’ll go over everything you need to make the Astrodelic Quilt – Free Pattern come to life. From choosing your materials to assembling the final pieces, this guide has everything you need to create a quilt that’s truly out of this world.
1. Choosing Materials and Preparing the Fabric
Selecting the right materials for your Astrodelic Quilt is essential to achieve the vibrant, eye-catching look that defines this pattern. The color palette and fabric quality will greatly impact the final outcome, so consider these elements carefully.
Fabric Selection
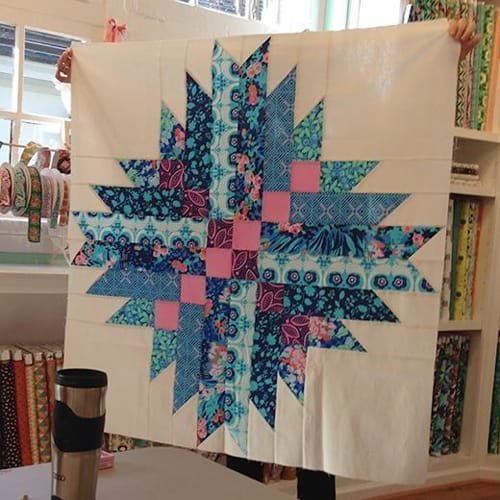
To create the Astrodelic Quilt, choose fabrics in a range of bold colors. Opt for a combination of solids and patterned fabrics to add depth and interest to the quilt. Colors like deep blues, purples, bright pinks, and metallic golds work beautifully to capture the cosmic feel of the design. High-quality cotton fabric is ideal for quilting, as it’s durable and easy to work with.
Color Coordination
When choosing colors, think about creating contrast. Bright colors will stand out against dark backgrounds, mimicking the starry night sky effect of the Astrodelic Quilt. You may also want to experiment with gradients and ombre effects to add a sense of movement and dimension.
Cutting the Fabric
After selecting your fabrics, it’s time to cut them to the required sizes. Use a rotary cutter and cutting mat for precise cuts, ensuring that each piece is accurate. Follow the free pattern instructions for specific dimensions, as any deviations can affect the overall design alignment. Cutting each piece with precision will make it easier to assemble later.
Pre-washing and Pressing
Pre-wash your fabric to prevent any shrinkage after the quilt is completed. After washing, press each piece with an iron to remove any wrinkles. This step will ensure that your fabric pieces lie flat when you start piecing the quilt together.
Backing and Binding Fabric
Choose a fabric for the quilt backing that complements the front design. You might consider using a single, bold color or a patterned fabric that echoes the colors in the main quilt. For the binding, select a fabric that will create a strong edge finish around the quilt, ideally in a contrasting or darker shade to frame the entire design.
2. Assembling the Quilt Blocks
The Astrodelic Quilt – Free Pattern features unique quilt blocks with celestial-inspired shapes and motifs. This section will guide you through creating these blocks and arranging them to achieve the desired effect.
Cutting and Layout
Refer to the Astrodelic Quilt – Free Pattern to see the dimensions and shapes for each block. Each block will likely consist of squares, triangles, and rectangles arranged in a way that mimics the starry patterns of the night sky. Lay out your pieces in the order they will appear in the final block to visualize the design.
Piecing the Blocks
Start piecing the blocks by sewing smaller pieces together. Use a ¼ inch seam allowance for all seams, as this is standard in quilting. It’s helpful to press each seam open or to the side after sewing to create a flatter, neater block. Make sure all edges line up perfectly to avoid any misalignments.
Adding Star Motifs
Many Astrodelic Quilt designs feature star shapes. To achieve these, you may use half-square triangles (HSTs), which are two triangles sewn together to form a square. Arrange these HSTs in a star pattern within each block. This star motif is central to the quilt’s celestial theme, so ensure each one is centered and evenly spaced.
Combining Colors and Patterns
As you work on each block, experiment with different color combinations within each star. You might want to alternate light and dark shades to make the stars stand out more prominently. This contrast is a key aspect of the Astrodelic Quilt, as it gives the quilt a cosmic, radiant look.
Checking Consistency
As you piece the blocks, it’s essential to check for consistency in size. Each block should match the dimensions provided in the pattern. Consistent block sizes will make assembling the entire quilt much easier and result in a polished final product.
3. Sewing the Quilt Top Together
After finishing each block, you can begin assembling them to form the quilt top. This step brings the entire Astrodelic Quilt design together, and it’s crucial to align each block precisely.
Arranging the Blocks
Lay out the completed blocks in the order they’ll appear on the quilt top. You can experiment with different arrangements if you’d like to add a personal touch. Make sure to space out colors and patterns evenly so the design looks balanced.
Joining Rows
Once you’re satisfied with the arrangement, start joining the blocks to form rows. Sew each block together with a ¼ inch seam allowance, making sure to align the corners precisely. Press the seams in each row flat before moving on to the next step.
Joining the Rows
After you have all rows assembled, it’s time to sew the rows together to complete the quilt top. Pay careful attention to the alignment of the block edges and corners to maintain a cohesive pattern across the quilt.
Pressing the Quilt Top
Once all the rows are joined, press the entire quilt top to ensure it lies flat. This step will make it easier to add the batting and backing and will prevent any uneven spots in the quilt.
Final Check
Lay the quilt top out flat and inspect it for any loose threads or misaligned seams. This final check allows you to make any small adjustments before moving on to the quilting stage.
4. Quilting and Finishing the Astrodelic Quilt
With the quilt top completed, it’s time to move on to quilting and finishing your Astrodelic Quilt – Free Pattern. This is the stage where your quilt takes on its final form and texture.
Layering the Quilt
Start by layering the backing, batting, and quilt top. Place the backing fabric on a flat surface, followed by the batting, and then the quilt top. Smooth out any wrinkles in each layer, as these can affect the final look.
Basting the Quilt
To hold the layers in place, use basting pins or spray adhesive. Start from the center and work outward to ensure each layer is securely attached. Proper basting will make the quilting process easier and prevent any shifting.
Quilting Patterns
The Astrodelic Quilt can be quilted in various ways. Straight-line quilting will create a modern look, while free-motion quilting allows you to create more intricate, cosmic-inspired designs. Consider quilting around each star shape to make them pop, adding a dimensional effect.
Trimming the Quilt
After quilting, trim any excess batting and backing fabric from the edges. This step will give the quilt a clean edge, ready for binding.
Binding the Edges
Use your binding fabric to finish the edges of the quilt. Binding helps protect the edges and gives the quilt a polished look. Attach the binding by sewing it to the front of the quilt, folding it over the edge, and then stitching it to the back.
Final Touches
Once the binding is in place, your Astrodelic Quilt is complete! Give it one last press and inspect for any loose threads or adjustments.
FAQ
Q1: How long does it take to complete the Astrodelic Quilt?
A1: The time needed varies depending on your experience level. For beginners, it may take a few weeks, while experienced quilters might complete it in a week.
Q2: Can I adjust the pattern size?
A2: Yes, you can adjust the size by adding or removing blocks to create a larger or smaller quilt.
Q3: What type of batting is best for this quilt?
A3: Cotton or polyester batting works well for the Astrodelic Quilt. Cotton provides warmth, while polyester adds a lightweight feel.
Q4: Can I make this quilt with leftover fabric?
A4: Absolutely! The pattern is flexible and can be adapted to use scraps or leftover fabric pieces.
Q5: How should I care for my finished quilt?
A5: Machine wash on a gentle cycle with mild detergent. Lay flat or tumble dry on low heat to prevent shrinking.
Join our VIP broadcast list and gain access to exclusive patterns, all for free. As a VIP member, you’ll receive the best patterns daily, delivered directly to your device. ✨📱 It’s a unique opportunity to stay up-to-date with the latest trends and designs, curated just for you. Don’t miss out on enhancing your projects and discovering new inspirations with the best patterns every day! 🎨🔝
Conclusion
The Astrodelic Quilt – Free Pattern is a wonderful project that combines creativity and skill, resulting in a quilt that’s both eye-catching and functional. This guide has covered each step from material selection to the final binding, providing everything you need to create a unique, celestial-inspired quilt.
We hope you enjoy making this quilt as much as you enjoy using it. Feel free to share your thoughts, suggestions, or questions in the comments below. Happy quilting!

