The Adventure Star block Quilt is a stunning and versatile quilt pattern that brings a dynamic twist to traditional star designs. Whether you’re a seasoned quilter or a beginner, this tutorial will guide you step-by-step through the process of creating this vibrant block.
With its sharp points and captivating symmetry, the Adventure Star block will surely add a spark to any quilt project. In this tutorial, we’ll explore how to craft this beautiful block while offering tips on fabric selection, cutting techniques, and sewing tricks to make the process as smooth as possible.
Creating an Adventure Star block Quilt isn’t just about following a pattern; it’s an adventure in itself. Each step, from choosing the fabric to piecing together the star points, allows for creative expression.
This block stands out not only because of its intricate design but also because it opens the door to countless color combinations and layout possibilities. The bold, geometric shapes that form the star create a mesmerizing effect that catches the eye and adds depth to the overall quilt.
In this Adventure Star block Quilt – Tutorial, we’ll dive into the essentials of quilting this particular block. From understanding the structure of the block to mastering the sewing techniques, you’ll learn how to bring this dazzling design to life.
Follow along, and by the end of the article, you’ll feel confident in crafting your very own Adventure Star block Quilt!
1. Understanding the Adventure Star Block Design
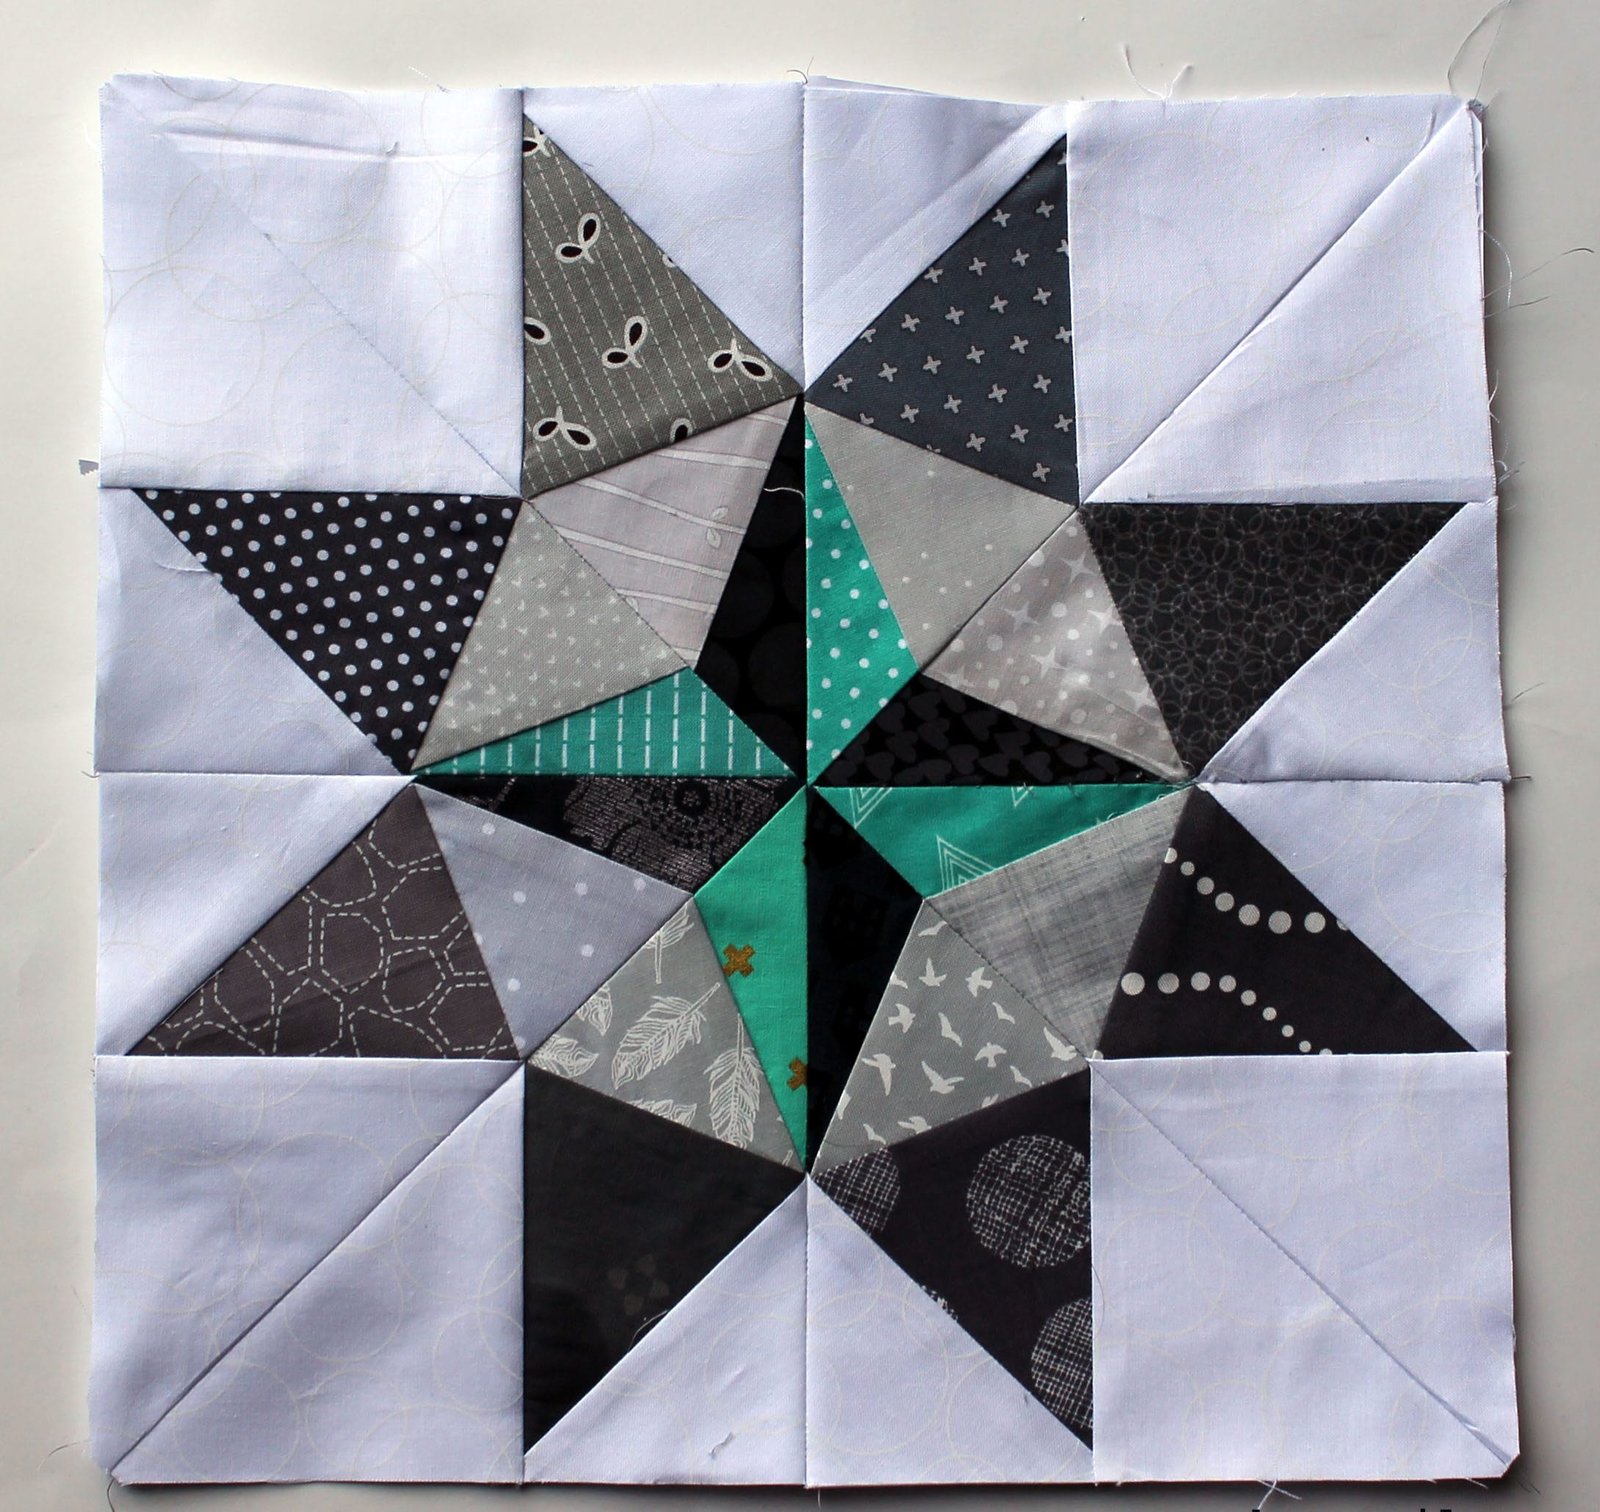
The Adventure Star block is a quilt block pattern characterized by its radiant star shape and sharp points. To achieve its dynamic look, precise cutting and careful piecing are essential. This block typically consists of triangles and squares, which come together to form the star’s vibrant points.
- The Adventure Star block Quilt is often created using a combination of contrasting fabrics to highlight the star’s design. Light and dark shades work well to make the star stand out.
- Precision is key when cutting your fabric pieces. Each triangle and square needs to be measured accurately to ensure a seamless fit when piecing the block together.
- When sewing the block, use a quarter-inch seam allowance for all seams. This is the standard in quilting and helps maintain the integrity of the block’s size.
- Once the block is sewn, press your seams carefully. Pressing the seams to one side, rather than open, can help reduce bulk and make the block easier to work with when joining multiple blocks together.
- The Adventure Star block Quilt can be arranged in a variety of layouts, allowing for creative freedom in how you position each block in the overall quilt.
- Experiment with different color schemes and patterns to make your Adventure Star block unique. Whether you prefer bright, bold fabrics or a more subdued palette, this block will shine in any combination.
2. Cutting Fabric for the Adventure Star Block Quilt
Proper cutting is essential for the Adventure Star block Quilt, as it sets the foundation for the entire project. Here’s a guide to help you cut your fabric pieces efficiently and accurately.
- Before cutting, prepare your fabric by washing, drying, and ironing it. This step helps prevent any shrinkage or distortion that could affect the block’s size.
- Use a rotary cutter and a cutting mat for precision. A rotary cutter ensures clean, straight edges, which are crucial for the Adventure Star block Quilt.
- To create the star points, you’ll need to cut triangles from your chosen fabrics. Be sure to cut carefully along the grain of the fabric to prevent any stretching or warping.
- Label your fabric pieces after cutting to avoid confusion during assembly. Keeping everything organized will speed up the process and minimize errors.
- Consider using fabric scraps for smaller pieces in the Adventure Star block Quilt. This is a great way to add variety and texture to your quilt while making use of leftover materials.
- Always double-check your measurements before cutting, especially when working with multiple blocks. Accurate cutting is key to ensuring that all your blocks fit together seamlessly.
3. Piecing the Adventure Star Block Quilt
Once your fabric is cut, it’s time to piece together the Adventure Star block Quilt. Follow these steps for a smooth and successful assembly.
- Start by laying out all the pieces of your Adventure Star block Quilt to get a sense of how they will fit together. This will help you visualize the final design and make any necessary adjustments.
- Begin by sewing the triangles together to form the star points. Sew carefully to ensure sharp points, which are a defining feature of the Adventure Star block.
- After sewing the star points, join them with the squares to complete the block. Pinning your pieces before sewing can help keep everything aligned.
- Press your seams as you go. This will help keep the block flat and prevent any unwanted puckering or bulk.
- When piecing multiple blocks for a larger quilt, consider chain piecing. This technique allows you to sew multiple seams at once, speeding up the process.
- As you complete each block, square it up to ensure that all your blocks are the same size. This is important when joining them together in the final quilt assembly.
4. Assembling and Quilting the Adventure Star Quilt
Once your blocks are pieced together, it’s time to assemble the quilt top and begin the quilting process. Here’s how to complete your Adventure Star block Quilt.
- Lay out your completed Adventure Star blocks to decide on the final arrangement. Play around with different layouts to find the one that suits your style.
- Once you’ve decided on the layout, sew the blocks together in rows, and then sew the rows together to complete the quilt top.
- Add a border if desired. Borders can frame your Adventure Star block Quilt and give it a polished look.
- Choose a backing fabric that complements the quilt top. A solid color or a subtle print works well to highlight the intricate design of the Adventure Star block.
- Sandwich your quilt top, batting, and backing together, and secure them with quilting pins or basting spray.
- Quilting can be done by hand or with a machine. For the Adventure Star block Quilt, straight-line quilting or free-motion quilting are popular options that highlight the star’s geometric design.
- Finally, bind the edges of the quilt to finish it off. Choose a binding fabric that ties the quilt together for a cohesive look.
FAQ
What fabrics work best for the Adventure Star block Quilt?
Cotton fabrics are ideal for quilting as they are easy to work with and durable. Consider using a mix of light and dark fabrics to make the star design pop.
How do I ensure my star points are sharp?
Accuracy in cutting and sewing is key. Make sure your fabric pieces are cut precisely, and take your time when sewing the star points together.
Can I make this block in different sizes?
Yes! The Adventure Star block Quilt can be scaled up or down depending on your preference. Just adjust the size of your fabric pieces accordingly.
Is this block suitable for beginners?
While the Adventure Star block requires precision, beginners can successfully complete it with careful attention to detail and following step-by-step instructions.
Can I use scraps for this block?
Absolutely! The Adventure Star block Quilt is a great project for using up fabric scraps, especially for the smaller triangle pieces that form the star points.
What quilting technique works best for this block?
Straight-line quilting or free-motion quilting are both great options. The geometric nature of the Adventure Star block lends itself well to either technique.
Join our VIP broadcast list and gain access to exclusive patterns, all for free. As a VIP member, you’ll receive the best patterns daily, delivered directly to your device. ✨📱 It’s a unique opportunity to stay up-to-date with the latest trends and designs, curated just for you. Don’t miss out on enhancing your projects and discovering new inspirations with the best patterns every day! 🎨🔝
Conclusion
In this Adventure Star block Quilt – Tutorial, we covered everything from understanding the block’s design to cutting fabric, piecing, and assembling your quilt. By following these steps, you’ll be able to create a stunning quilt that showcases the dynamic star pattern.
We hope this tutorial has inspired you to start your own Adventure Star block Quilt project. Please share your thoughts, opinions, and suggestions in the comments below—your feedback is always appreciated!

