The Adventure Star Block 2 – Tutorial is designed to guide quilters, from beginners to experts, through the exciting process of creating a vibrant and unique quilt block.
The Adventure Star Block 2 is known for its sharp geometric shapes, allowing for bold and intricate designs that can elevate any quilting project. Whether you’re making a full-sized quilt or just a decorative piece, this block offers versatility and creative potential.
In this tutorial, you’ll learn step-by-step how to construct the Adventure Star Block 2, from fabric selection to cutting and piecing it together. The precision in cutting and sewing makes this block stand out, but don’t worry—this guide will break it down into simple, manageable steps.
Even if you’re relatively new to quilting, you’ll be able to create something beautiful by following this Adventure Star Block 2 – Tutorial.
Let’s get started with the materials and basics before diving into the detailed steps of making this stunning block.
1. Fabric Selection and Preparation for the Adventure Star Block 2
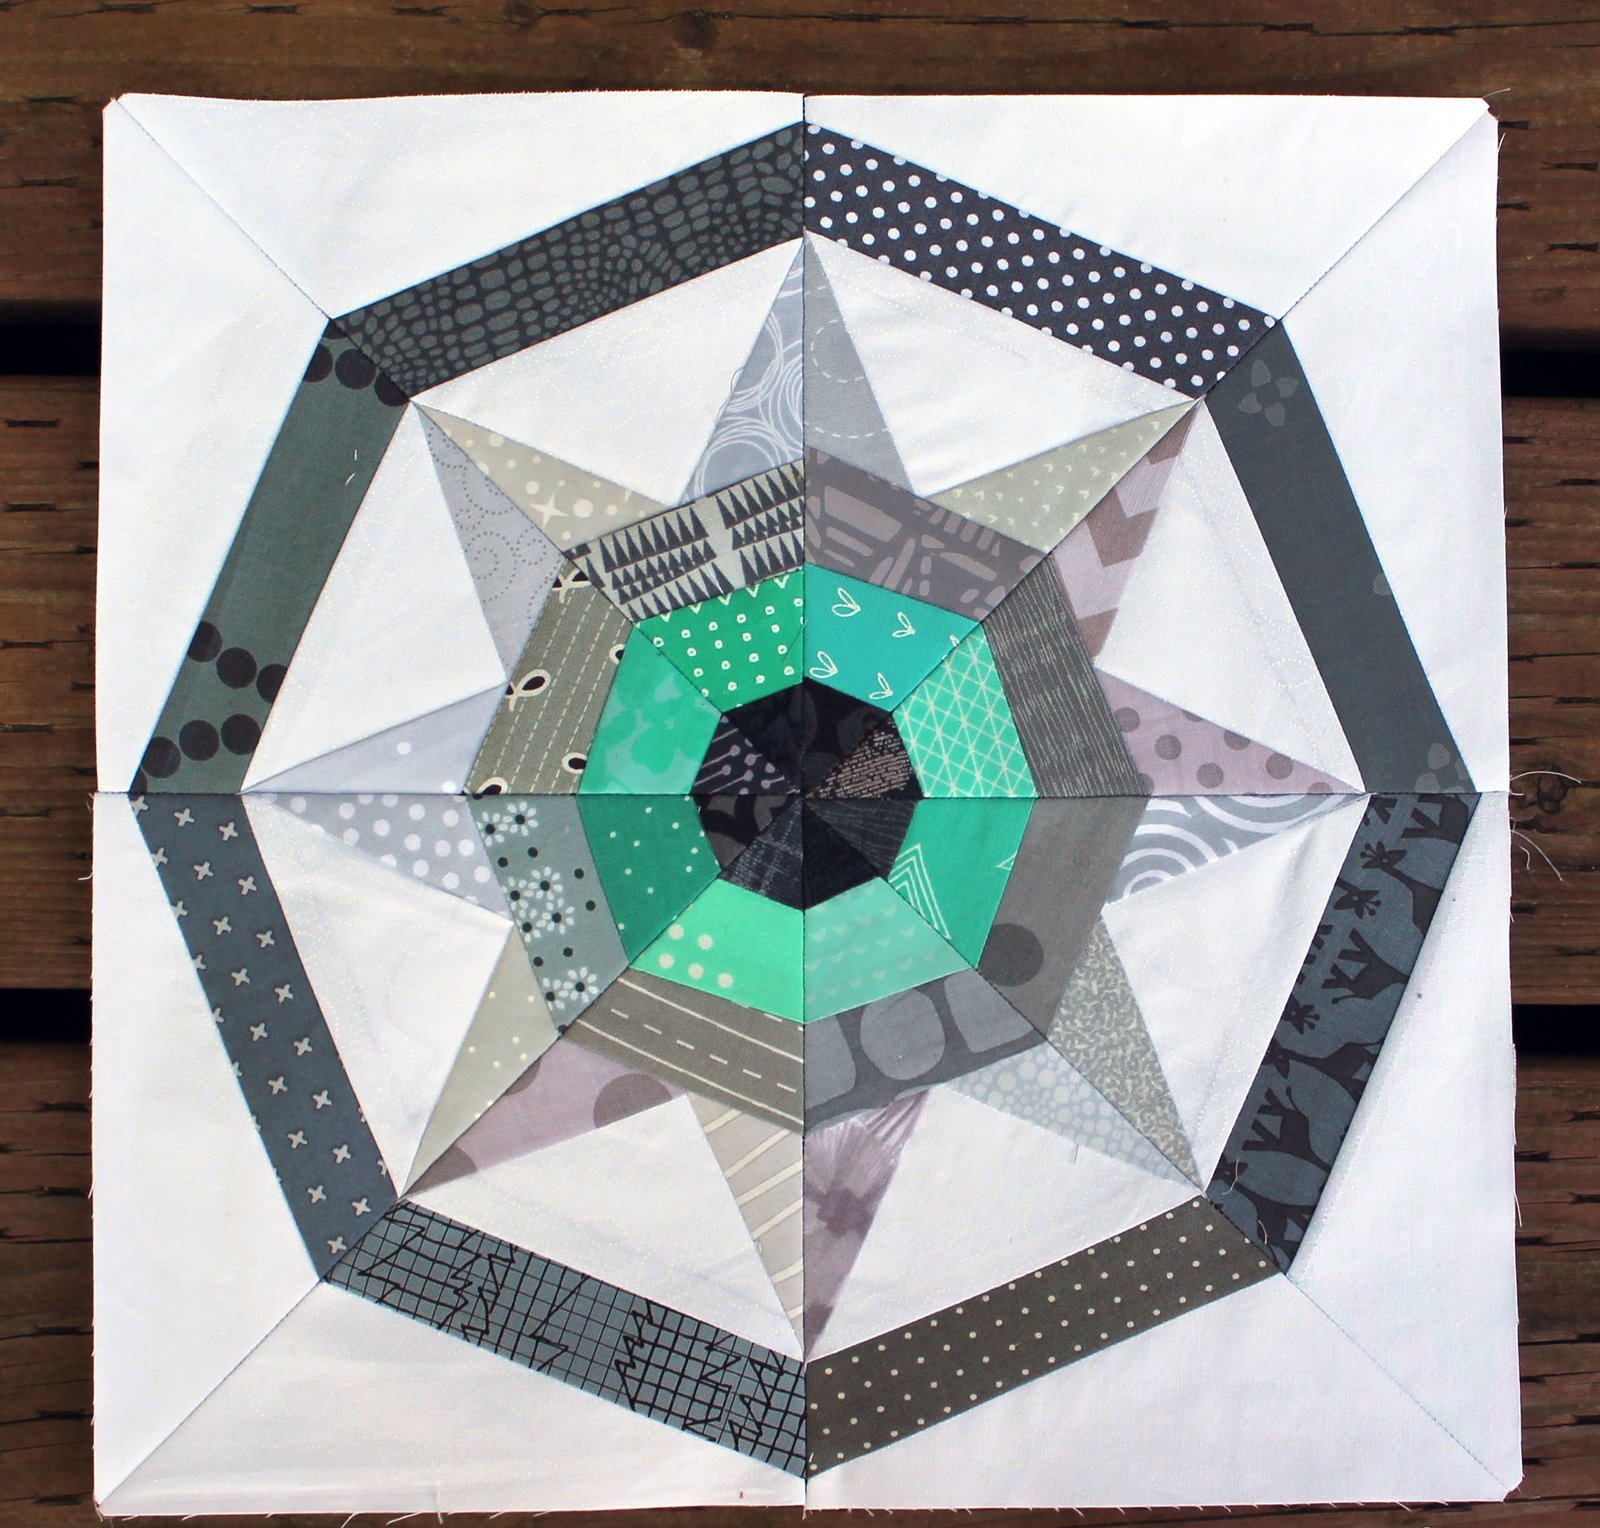
Selecting the right fabrics is crucial for any quilting project, and the Adventure Star Block 2 is no exception. This block shines when made with contrasting colors or bold patterns that highlight its geometric features.
- First, decide on your color scheme. The Adventure Star Block 2 works best with at least two contrasting colors—one for the star and one for the background. For added complexity, you can even choose different fabrics for each section of the star.
- Solid fabrics or subtle patterns are ideal for the Adventure Star Block 2, as they allow the design to take center stage. Busy patterns can sometimes overpower the intricate geometry of the block.
- Once you have chosen your fabrics, prewash and iron them to ensure they’re smooth and ready to cut. This will help ensure precise measurements and a crisp finished block.
- For cutting, use a rotary cutter and quilting ruler to ensure clean, straight edges. Accuracy is key for making the sharp lines in the Adventure Star Block 2 come together perfectly.
- Be sure to cut all your pieces before you start sewing. This will make the assembly process smoother and more efficient.
- As always, double-check your measurements before you make any cuts. Even small mistakes in fabric cutting can throw off the entire block’s alignment.
2. Cutting and Piecing the Adventure Star Block 2
Now that you’ve prepared your fabric, it’s time to move on to cutting and piecing the Adventure Star Block 2.
- Start by cutting out all the necessary pieces. For the Adventure Star Block 2, you’ll typically need squares, rectangles, and triangles in various sizes depending on the size of the block you are making. Most patterns for this block provide exact measurements, but always measure twice and cut once to ensure accuracy.
- Next, lay out your cut pieces in the shape of the block before you begin sewing. This will give you a visual guide and help prevent mistakes during the piecing process.
- Begin sewing the smaller pieces together, starting with the star points. Use a ¼-inch seam allowance for all your seams. Press the seams open or to one side, depending on your preference and the instructions of your specific pattern.
- After assembling the star points, move on to sewing them into larger sections of the block. This will often involve sewing triangles and squares together to form the star’s signature shape.
- Be mindful of keeping your seams straight and your points sharp. The Adventure Star Block 2 relies on precision, so take your time with each seam.
- Once all the pieces have been sewn together, press the entire block flat, ensuring that the seams lie smoothly.
3. Assembling Multiple Adventure Star Block 2 Blocks
After you’ve mastered the creation of a single Adventure Star Block 2, you can move on to assembling multiple blocks for a larger project, such as a quilt.
- When creating multiple blocks, ensure that each Adventure Star Block 2 is consistent in size. This will make assembling the quilt top easier and more uniform.
- Lay out all your blocks to visualize how they will come together. This is especially helpful if you are using different colors or fabrics for each block, as you can arrange them in a way that creates a cohesive design.
- When sewing the blocks together, pin them carefully to ensure the seams and points align perfectly. The symmetry of the Adventure Star Block 2 will really shine when the blocks are pieced together with precision.
- Continue pressing the seams as you go, keeping the quilt top flat and neat.
- Once all your blocks are assembled, you can add borders or sashing if desired, which will help frame the Adventure Star Block 2 and make it stand out even more in your finished quilt.
4. Finishing the Adventure Star Block 2 Quilt
Now that you’ve sewn all your blocks together, it’s time to finish your Adventure Star Block 2 quilt.
- First, square up your quilt top, ensuring that all edges are straight and even. This is an important step for getting a professional-looking finish.
- Next, prepare the quilt sandwich by layering the quilt top, batting, and backing fabric. Baste the layers together to prevent them from shifting during quilting.
- When quilting your Adventure Star Block 2 quilt, consider using a pattern that complements the sharp lines of the block. Straight-line quilting or echoing the star shapes can enhance the block’s geometric design.
- Once the quilting is complete, trim the edges of the quilt and prepare to bind it. Choose a binding fabric that coordinates with the colors of your quilt and follow standard binding techniques to finish the edges.
- Finally, give your quilt a good press and admire the finished result. The Adventure Star Block 2 will be the star of your quilting project, bringing both beauty and complexity to your design.
FAQ: Adventure Star Block 2 – Tutorial
1. What is the best fabric to use for the Adventure Star Block 2?
The best fabric for the Adventure Star Block 2 is solid or subtly patterned quilting cotton. This allows the geometric lines and star design to really pop.
2. How difficult is the Adventure Star Block 2 to make?
The Adventure Star Block 2 is moderately difficult. Beginners can make it with careful attention to detail, while experienced quilters will find it a fun challenge.
3. Can I make the Adventure Star Block 2 in different sizes?
Yes! The Adventure Star Block 2 can be made in various sizes by adjusting the measurements of the fabric pieces. Be sure to scale the block components proportionally.
4. Do I need special tools for this block?
You will need basic quilting tools such as a rotary cutter, quilting ruler, and sewing machine. Accurate measurements and sharp cutting tools are key for this block.
5. How many Adventure Star Block 2 blocks do I need for a full quilt?
The number of blocks depends on the size of the quilt you want to make. For a lap quilt, you might need around 20 blocks, while a bed-sized quilt may require 40 or more.
6. Can I mix and match colors in the Adventure Star Block 2?
Absolutely! The Adventure Star Block 2 looks great with contrasting colors. Feel free to experiment with different color combinations to suit your project.
Join our VIP broadcast list and gain access to exclusive patterns, all for free. As a VIP member, you’ll receive the best patterns daily, delivered directly to your device. ✨📱 It’s a unique opportunity to stay up-to-date with the latest trends and designs, curated just for you. Don’t miss out on enhancing your projects and discovering new inspirations with the best patterns every day! 🎨🔝
Conclusion
In this Adventure Star Block 2 – Tutorial, we covered everything you need to know to create this dynamic and striking block. From fabric selection to the final quilt assembly, each step is designed to help you master the Adventure Star Block 2 with ease and confidence.
Now that you’ve completed this block, we’d love to hear your thoughts! Feel free to leave a comment with your opinions, suggestions, or any additional tips you’ve discovered along the way. Happy quilting!

