Starting a new crochet project? A Tote Bag with Two Colors Pattern might just be your next favorite! This crochet project combines style, function, and the joy of handmade creation. Whether you’re crafting for yourself or preparing a thoughtful gift, this two-tone crochet tote offers both beauty and practicality.
Crocheting a Tote Bag with Two Colors Pattern is an excellent way to use your creativity. You can play with color combinations, textures, and stitch variations to achieve a unique and personalized bag that matches your taste. It’s not only a satisfying project but also a sustainable alternative to plastic bags.
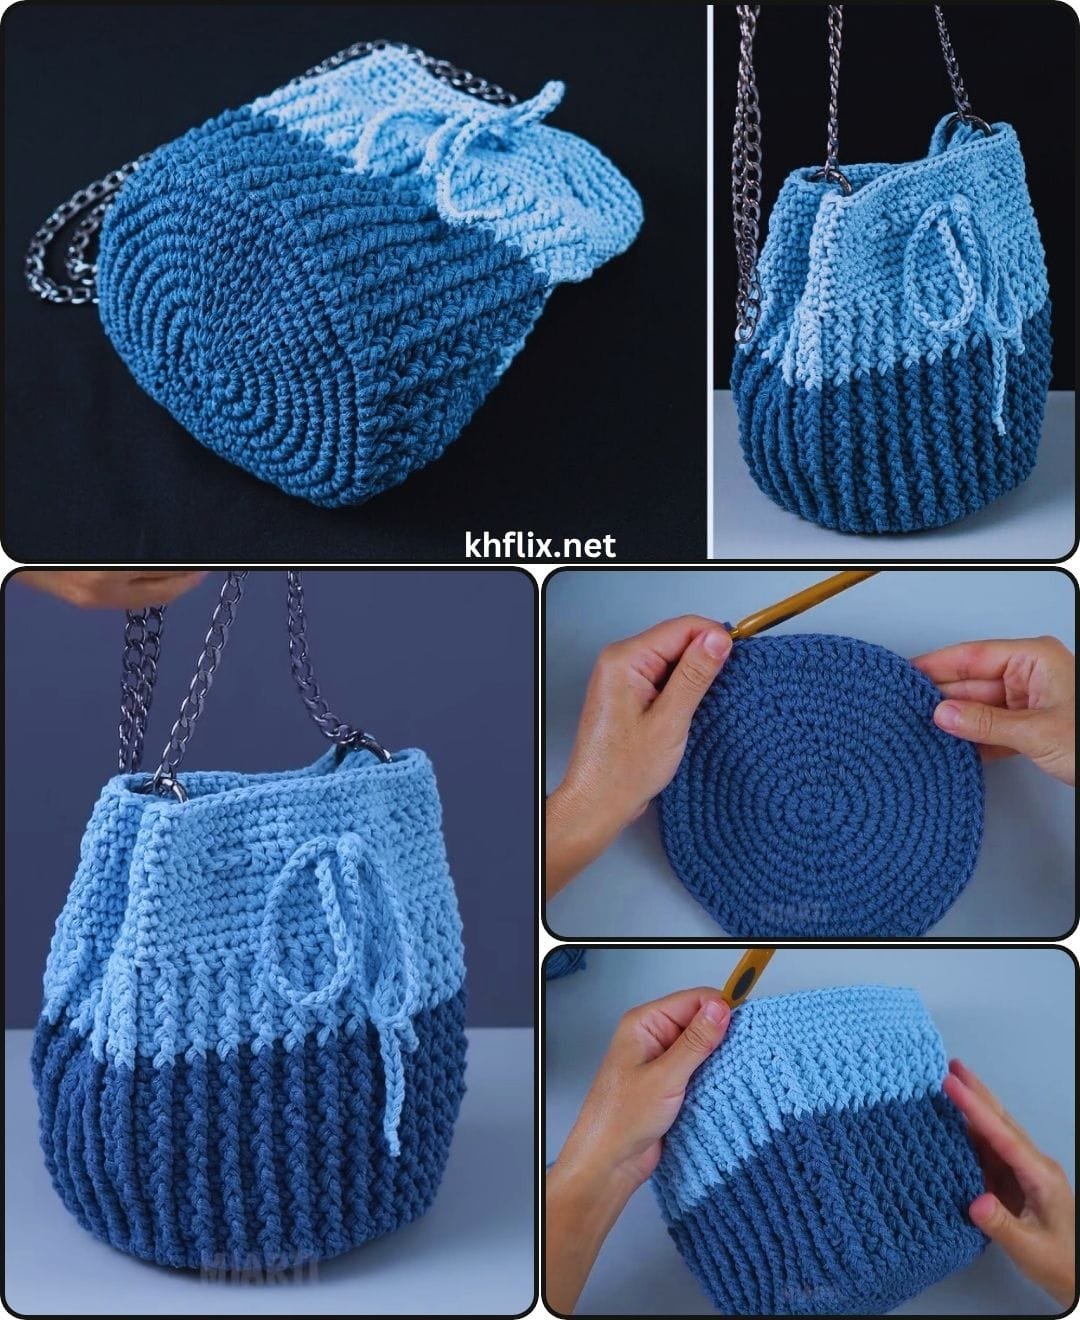
In this complete guide, you’ll learn how to crochet a Tote Bag with Two Colors Pattern step by step. We’ll explore materials, color pairing ideas, crochet techniques, and finishing tips. Whether you’re a beginner or an experienced crocheter, this pattern will bring joy from the first stitch to the final handle.
Choosing the Best Yarn and Colors
The first and most exciting step when starting your Tote Bag with Two Colors Pattern is selecting the yarn. For bags, sturdiness is key. Choose a medium to bulky weight yarn that holds shape well. Cotton yarn is highly recommended due to its durability and clean stitch definition.
When choosing your two colors, think about contrast and harmony. High-contrast color pairs like black and white, or navy and yellow, give a bold, modern look. Softer combinations like beige and rose or sky blue and cream offer a more delicate, vintage feel.
Don’t be afraid to mix solid colors with variegated yarns. A neutral base with a multicolor top can create a stunning effect. You can also reverse the colors for the front and back panels for a playful design twist.
Consider your wardrobe and where you’ll use your tote. Do you want it to stand out or match your everyday outfits? Let the function guide the color palette, and always test how the two colors look side by side before starting.
Another tip is to consider the yarn’s washability. Since totes are often used on the go, washable yarn will ensure your crochet tote stays clean and fresh over time.
Lastly, make sure both yarns are of the same type and weight. Mixing different yarn types may result in uneven tension and an unbalanced finished tote bag.
Tools and Stitches You’ll Need
Creating a Tote Bag with Two Colors Pattern doesn’t require a large toolbox. You’ll need a crochet hook (usually 4.5mm to 6mm depending on the yarn weight), scissors, a tapestry needle, and stitch markers if you want to keep track of your rounds or rows.
The bag can be worked in the round (bottom-up) or in flat panels that are joined later. For beginners, a flat-panel tote using single crochet and half-double crochet stitches is easier to manage and assemble.
For structure and texture, you might want to use the waistcoat stitch, grit stitch, or even moss stitch. These stitches create dense fabric that’s perfect for bags and hold shape well even without lining.
The base of the tote can be an oval or rectangle, depending on your preference. Some crocheters even use a solid granny square base before moving on to the body of the bag.
Handles are typically created using chain stitches reinforced with single crochet or slip stitches. For a stronger hold, consider crocheting the handles as separate pieces and sewing them securely onto the bag.
Adding a lining to your crochet tote is optional but recommended if you plan to carry heavier items. It adds strength and prevents stretching. You can hand-sew a simple fabric lining or even repurpose an old pillowcase.
Step-by-Step Pattern Structure
To begin your Tote Bag with Two Colors Pattern, start with the base. Chain a length that matches the desired width of the bag. Turn and work single crochet stitches down the chain, then continue around both sides to create an oval base.
Increase stitches evenly at each end to build a sturdy, flat bottom. Continue working in the round (or rows if you prefer panels) until the base reaches your preferred size.
Once the base is complete, switch to the main body of the bag. This is where the two colors will shine. You can alternate them in stripes, create a color-blocked effect, or even use tapestry crochet to form a pattern.
For a clean color transition, always change colors in the last yarn-over of the previous stitch. Carry the unused yarn inside the stitches to avoid cutting and weaving too many ends.
Work the body to the desired height—typically 12 to 14 inches is a great size. If you want a deeper bag, just add more rounds or rows.
Before finishing the top edge, make sure the bag is symmetrical and both color sections are even. Add a few rounds of single crochet in one of the colors to give a clean and polished top border.
For the handles, mark two spots equidistant from each side and attach yarn to crochet sturdy straps. They can be short for a handbag or long for a shoulder tote.
Once your handles are attached, weave in all the ends securely. Block your bag if needed to help it hold its shape. You can steam it or dampen it and let it dry flat.
Customization Ideas for a Personal Touch
One of the joys of crocheting a Tote Bag with Two Colors Pattern is how easy it is to make it your own. The options for personalization are endless!
Add tassels or pom-poms in one of the colors for a fun, boho vibe. You can attach them to the corners or even to the handle base.
Consider using surface crochet or embroidery to add initials, flowers, or geometric designs over the color blocks. This adds texture and detail without needing advanced crochet skills.
Another option is to include a flap and a button or magnetic closure. It gives the tote a bit more security and a polished look. You can crochet the flap in one of the two colors for added contrast.
Add a small pocket inside or outside the tote using leftover yarn. A front pocket in a contrasting color can make the bag more functional and stylish.
If you love texture, consider adding a row or two of puff stitches or bobble stitches as a design accent between the color transition.
Finally, attach a crochet label with your initials or brand if you’re selling your tote. It’s a small touch, but it gives a handmade item a professional finish.
FAQ – Tote Bag with Two Colors Pattern
Can I make this tote bag as a beginner?
Yes! This project is very beginner-friendly, especially if you stick to basic stitches like single crochet and half-double crochet. You can adjust the complexity to your skill level.
How long does it take to finish a crochet tote bag?
Depending on the size and your speed, it usually takes 6–10 hours spread over a few days. Using thicker yarn and a larger hook can speed up the process.
Do I need to line the crochet tote bag?
No, but lining is useful if you plan to carry heavy or small items. It prevents stretching and makes the bag more durable.
What yarn is best for a tote bag?
100% cotton yarn is the best choice. It’s strong, washable, and creates a clean, structured look. Blended yarns with acrylic can also work if they have a good hold.
Can I wash the crochet tote bag?
Yes, as long as the yarn is washable. Hand wash with cold water and mild detergent, then reshape and air dry flat for best results.
How do I prevent the bag from stretching?
Using tight stitches, cotton yarn, and possibly adding a lining will help your Tote Bag with Two Colors Pattern maintain its shape over time.
Conclusion
Creating a Tote Bag with Two Colors Pattern in crochet is a fulfilling project that allows you to express creativity while crafting something beautiful and useful. From choosing the perfect color combination to adding personalized touches, every step in the process makes this project special.
Whether you’re making it for yourself, gifting it to someone special, or even selling it, a crochet tote bag with two colors is always a hit. It’s stylish, eco-friendly, and always unique.
We hope this guide helped you understand every aspect of making your own crochet Tote Bag with Two Colors Pattern. If you enjoyed this tutorial, please leave a sincere opinion below and feel free to share your suggestions or finished project ideas. We’d love to hear from you!

