Learning how to make a crochet striped bag is not only a creative journey but also a fun and practical way to express your personal style. Whether you’re a seasoned crocheter or just starting out, creating a striped bag can be an enjoyable project that enhances your skills. The mix of colors and textures in stripes gives your bag personality and charm, making it a perfect handmade accessory or a thoughtful gift.
When you explore how to make a crochet striped bag, you’ll discover that it doesn’t require advanced techniques. All you need is basic crochet knowledge, a few materials, and a little patience. The simplicity of the project makes it ideal for beginners, while the variety of stripe combinations keeps it exciting for experienced crafters.
The best part is that your crochet striped bag can be customized endlessly. From selecting yarn colors to choosing the shape and size, you’re in control. This guide will walk you through everything you need to know to complete a beautiful, functional, and stylish striped bag using tried-and-true crochet methods.
Choosing the Right Yarn and Hook Size
When learning how to make a crochet striped bag, one of the first things to consider is your yarn. For a sturdy, long-lasting bag, cotton yarn is usually the best option. It holds its shape well, is easy to clean, and offers crisp stitch definition.
Think about the color scheme you want to follow. Bright and bold stripes can make a cheerful bag, while neutral tones give a more classic look. Select two or more yarn colors that complement each other, or use leftover yarn to make a multicolored masterpiece.
Next comes the hook size. Check the yarn label for recommendations, but don’t be afraid to go down a size if you want a tighter, more durable fabric. A smaller hook will create denser stitches, which is ideal for bags that will carry heavier items.
Gauge swatching is a smart idea, even for bags. Crochet a small test square with your chosen yarn and hook to see how the fabric behaves. This step ensures that the bag won’t be too flimsy or stiff.
Stitch type also matters. Simple stitches like single crochet or half double crochet are perfect for stripe patterns because they create a tight, neat texture. Plus, they allow the colors to pop in clean, even lines.
Finally, keep in mind that your yarn should be colorfast. Since the bag may get wet or be exposed to sunlight, you don’t want the colors to fade or bleed over time.
Creating the Base of the Bag
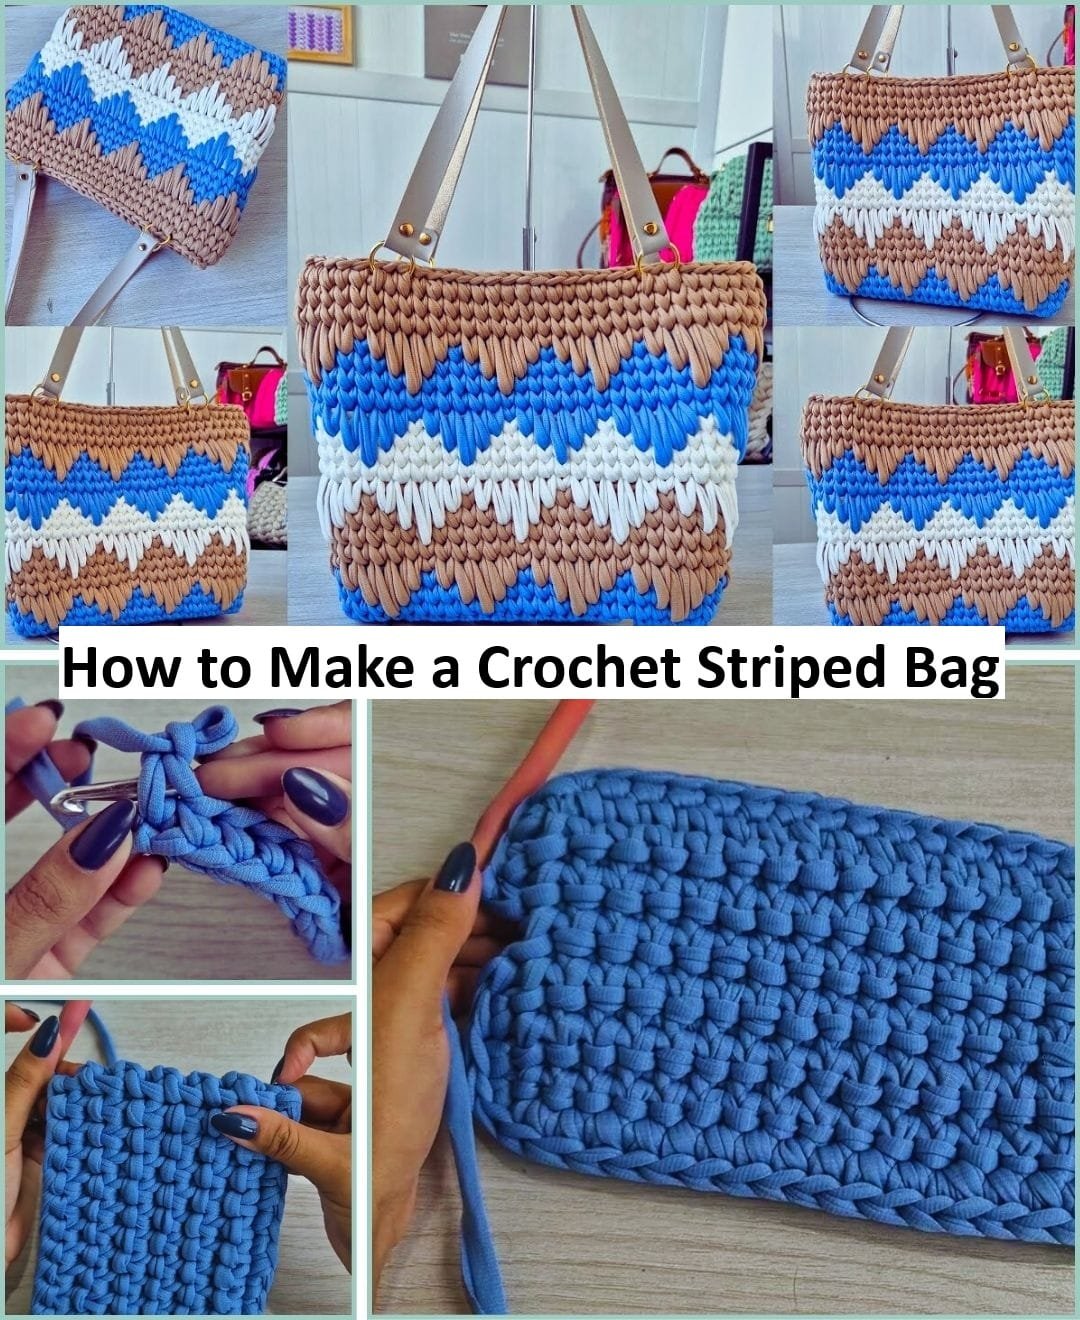
Now that you’ve chosen your materials, it’s time to begin your project. The base of the bag is the foundation of your crochet striped bag, and it sets the tone for the entire design. A rectangular or oval base is commonly used, depending on the style you want.
Start by chaining the required number of stitches for the length of your bag. This chain will serve as the bottom edge. Once you’ve completed the chain, work your first row in single crochet or your chosen stitch.
As you progress row by row, continue to build up the base evenly. If you’re creating an oval base, you’ll need to increase at both ends of the chain in each round. This helps form a gentle curve and prevents the base from curling.
Measure your base frequently to ensure it’s the right size. If it’s too small, your bag won’t hold much; if it’s too large, it may lose structure. Aim for balance according to your needs—whether it’s a small purse or a larger tote.
When you’re satisfied with the base, begin building up the sides of the bag without increasing stitches. This creates the body of your bag and gives it height. From here, you’ll start introducing your stripe pattern.
Keep your color changes neat by finishing the last stitch of a row with the new color. This creates clean transitions between stripes and a polished overall look. Remember to carry your yarn up the sides or weave in ends as you go to reduce finishing work later.
Don’t rush this stage. A strong base will support everything else that follows. Take your time and enjoy seeing the structure come together as you master how to make a crochet striped bag.
Working the Stripes
Adding stripes is where your creativity really comes alive. With your base ready, begin crocheting the body of the bag, alternating yarn colors according to your stripe design. This is the most exciting step when learning how to make a crochet striped bag.
You can create wide stripes by changing color every 5–7 rows or opt for narrow stripes by switching every 1–2 rows. It’s entirely up to you. Planning the color sequence beforehand can save time and avoid clashing patterns.
To switch colors cleanly, complete the last yarn-over of the final stitch in the row with your new color. This method helps maintain the stripe pattern and keeps the edges looking crisp.
Try using the carrying method if you don’t want to cut your yarn between stripes. Simply run the unused yarn along the inside of the bag and pick it back up when needed. This technique reduces the number of ends to weave in.
Play around with textures too. For example, use single crochet for one stripe and half double crochet for the next. This adds dimension and makes the bag more visually interesting.
When working with more than two colors, make sure you’re consistent with the order and spacing of your stripes. Repeating patterns look tidy, while random stripes create a fun, playful look.
Count your rows carefully so the stripes are even on both sides. Uneven rows may not be noticeable at first but can make the bag look off-balance when finished. Patience and precision are key to nailing this step of how to make a crochet striped bag.
Adding Finishing Touches
Once the body of the bag is complete, it’s time to move on to the finishing details. These are the touches that turn a simple project into a polished masterpiece. Every step here contributes to the final quality of your crochet striped bag.
First, decide how you want to close your bag. You can leave it open for a casual tote or add a zipper, button, or drawstring for extra security. If you choose a zipper, make sure it matches the bag’s colors and is sewn in evenly.
Handles are another essential part. You can crochet handles separately and attach them or work them directly into the upper edge of the bag. Consider using single crochet stitches for strength and durability.
Lining the bag is optional but highly recommended, especially if you plan to carry small items. A fabric lining adds structure and prevents your crochet stitches from stretching out over time. Choose a fabric that complements your yarn and sew it in carefully.
For a cleaner edge, finish the top of the bag with a round of slip stitches or reverse single crochet (also known as the crab stitch). This gives a professional appearance and strengthens the opening.
Add embellishments like tassels, buttons, or even a small charm to give your bag a personal touch. These little extras make your crochet striped bag truly one of a kind.
Finally, give your finished bag a gentle block or steam if needed. This helps even out the stitches and enhances the overall shape, making it look crisp and ready to use.
FAQ: How to Make a Crochet Striped Bag
Q: What is the best yarn for making a crochet striped bag?
A: Cotton yarn is ideal because it is strong, washable, and holds shape well. Acrylic yarn is also a good alternative for beginners.
Q: How many colors do I need for stripes?
A: You can use as few as two colors or as many as you like. Three to five colors usually provide a nice contrast without being overwhelming.
Q: Do I need to use a pattern to make the bag?
A: While patterns help, this tutorial teaches you how to make a crochet striped bag from scratch without needing one. Customizing is encouraged!
Q: Can I wash the striped crochet bag in a machine?
A: Yes, if you use colorfast cotton yarn and line the bag, it can usually be washed gently in a machine. Hand washing is safest.
Q: What if my stripes look uneven?
A: Count your rows carefully, and always switch colors the same way. Blocking the bag can also help even out minor inconsistencies.
Q: How long does it take to complete a striped bag?
A: Depending on your skill level and the size of the bag, it can take anywhere from a few hours to a couple of days to complete.
Conclusion
In this guide, you’ve learned how to make a crochet striped bag from choosing the right yarn and hook to adding final touches that make it uniquely yours. We explored essential techniques like working the base, switching colors cleanly, and finishing your project with strength and style.
Whether you make it for yourself or as a gift, your crochet striped bag is a statement of creativity and craftsmanship. The beauty of this project lies in its simplicity and the joy it brings throughout the process.
If you found this tutorial helpful, please leave your honest opinion and feel free to share suggestions. Your feedback helps improve future guides and supports the crochet community!

