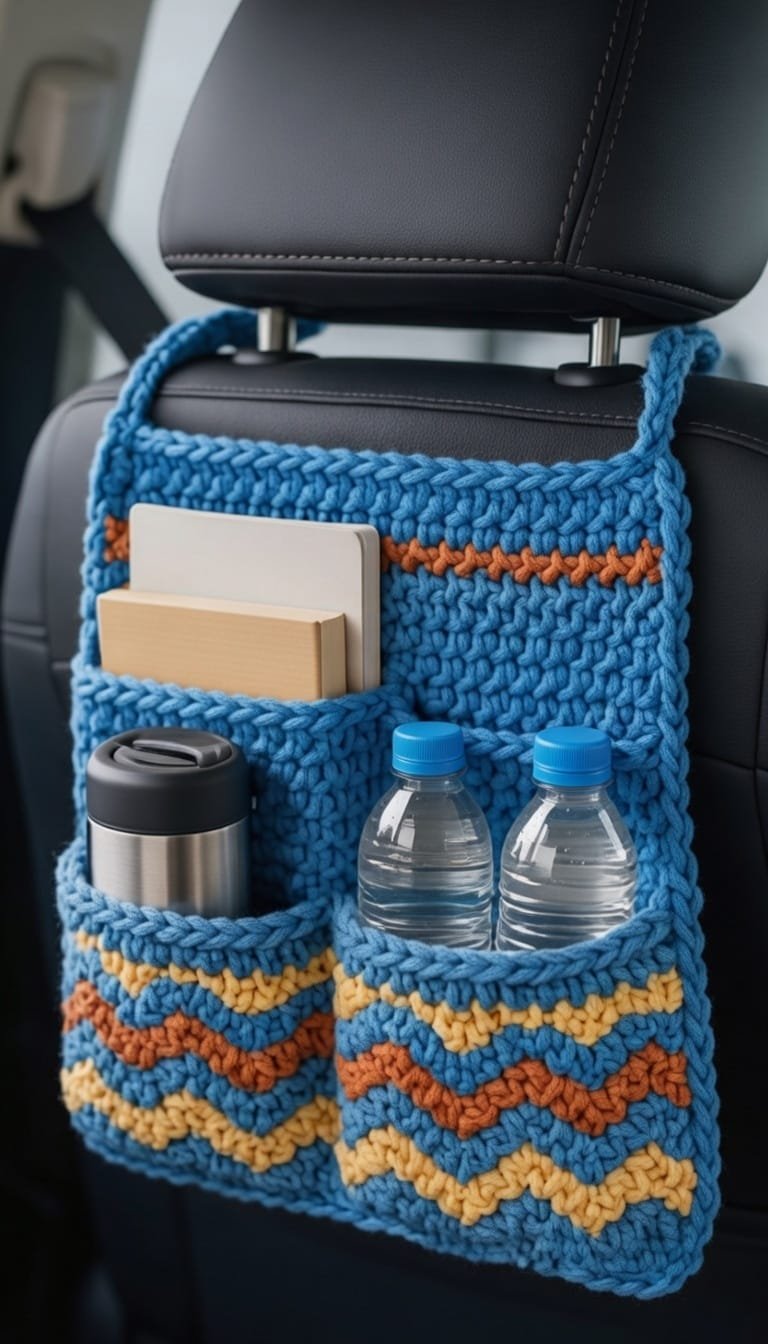
How to make a Crochet Car Organizer Pattern is a topic that many crochet lovers search for when they want to combine creativity with everyday practicality. Learning how to make a Crochet Car Organizer Pattern allows you to transform yarn into a useful storage solution that helps keep your car tidy and organized.
From holding phones and snacks to storing small travel essentials, this handmade organizer can make every trip more comfortable and convenient. Car organization is important, especially for people who travel frequently, drive with children, or simply want to keep their vehicle clutter-free.
A Crochet Car Organizer Pattern offers a flexible and customizable option compared to store-bought organizers. Because it is handmade, you can adjust the pocket sizes, choose your favorite colors, and design it to fit perfectly in your car’s interior.
Another great reason to learn how to make a Crochet Car Organizer Pattern is that it allows crocheters to practice useful techniques such as working in rows, creating sturdy stitches, and shaping pockets.
In this complete guide, you will learn about the materials needed, step-by-step instructions, helpful crochet tips, creative variations, and answers to frequently asked questions so you can successfully create your own crochet car organizer.
Materials Needed for a Crochet Car Organizer Pattern
Before starting how to make a Crochet Car Organizer Pattern, it is important to gather the right materials to ensure durability and functionality.
Choose strong yarn such as cotton or a cotton blend. Cotton yarn is ideal for organizers because it is durable, holds its shape well, and resists stretching over time.
Select a crochet hook appropriate for your yarn weight. Most medium-weight yarns work well with hooks between 4 mm and 5.5 mm. Using the correct hook helps maintain firm stitches that can support items placed in the pockets.
You will also need scissors and a yarn needle to weave in loose ends and secure seams. Proper finishing helps ensure the organizer remains sturdy during daily use.
Optional materials include buttons, wooden rings, or straps that allow the organizer to hang from the back of a car seat or headrest.
Finally, consider using neutral or dark yarn colors that match your vehicle interior and hide minor dirt or wear.
Step-by-Step Instructions for How to Make a Crochet Car Organizer Pattern
Understanding the construction process is essential when learning how to make a Crochet Car Organizer Pattern.
Start by crocheting the main base panel. This rectangular panel forms the back of the organizer and supports the pockets. Use tight stitches such as single crochet to create a firm structure.
Work several rows until the panel reaches the desired length. The panel should be long enough to hang comfortably from the back of a car seat.
Next, crochet separate rectangular pocket pieces. These pockets can vary in size depending on what you want to store, such as phones, water bottles, or small notebooks.
Attach the pockets to the base panel using slip stitches or sewing with a yarn needle. Make sure the top of each pocket remains open while the sides and bottom are securely attached.
Create straps or loops at the top of the panel. These loops allow the organizer to hang from the headrest or hook around seat posts.
Finally, weave in all loose yarn ends and test the pockets by placing small items inside to ensure stability.
Tips for a Durable Crochet Car Organizer Pattern
When mastering how to make a Crochet Car Organizer Pattern, a few practical tips can improve durability and usability.
Use tight, dense stitches so the organizer remains sturdy and does not stretch too much when holding items.
Reinforce pocket edges with an additional row of stitches to prevent sagging over time.
If the organizer will carry heavier items, consider crocheting double-layered pockets for added strength.
Blocking the finished organizer can help flatten the panel and improve its overall shape.
Attach straps securely and test their strength before regular use in the car.
Finally, keep pocket placement balanced so the organizer hangs evenly when filled.
Creative Variations of a Crochet Car Organizer Pattern
Once you understand how to make a Crochet Car Organizer Pattern, you can customize the design in many creative ways.
Use multiple yarn colors to create visually distinct pockets for better organization.
Add extra pockets for items like sunglasses, tissues, or charging cables.
Create a larger organizer for family vehicles where more storage is needed.
Add decorative stitches or textured patterns to give the organizer a unique handmade appearance.
Include a small zippered fabric pocket sewn onto the crochet panel for secure storage of small valuables.
You can also crochet matching accessories such as cup holders or small storage pouches.
FAQ About How to Make a Crochet Car Organizer Pattern
Is this pattern suitable for beginners?
Yes, beginners familiar with basic stitches like chain and single crochet can complete this project.
How long does it take to make the organizer?
Most crocheters can complete it within several hours depending on size and complexity.
What yarn works best?
Cotton yarn is recommended because it provides durability and structure.
Can the crochet organizer be washed?
Yes, most cotton crochet items can be gently hand washed and air dried.
How is the organizer attached to the car seat?
Straps or loops crocheted at the top allow it to hang from the headrest posts.
Can I sell handmade organizers?
Yes, if you create your own design or use a pattern that allows commercial use.
Conclusion
Learning how to make a Crochet Car Organizer Pattern is a practical and creative crochet project that helps keep your car neat while showcasing your crafting skills. From crocheting the sturdy base panel to attaching useful pockets and hanging straps, each step contributes to a functional organizer that makes everyday travel more convenient.
This project also encourages creativity through color choices, pocket arrangements, and decorative stitches. With practice, you can design organizers that perfectly suit your personal needs and vehicle style.
If you enjoyed this guide on how to make a Crochet Car Organizer Pattern, feel free to share your honest opinion and suggestions. Your feedback helps inspire more helpful crochet tutorials and creative craft ideas.
To make your crochet car organizer even more functional, consider adding small design details that improve usability and durability. Reinforce the pocket edges with an extra row of single crochet to prevent stretching over time. You can also include buttoned or zippered pockets to keep smaller items secure while driving. Choosing sturdy yarn, such as cotton or cotton-blend, helps the organizer maintain its shape and withstand frequent use in the car.
Another helpful idea is to personalize the organizer to match your vehicle’s interior. Try using color combinations that complement your car seats or dashboard for a neat and coordinated look. You can also add decorative touches like textured stitches, small appliqués, or simple borders. With thoughtful finishing and creative details, your crochet car organizer becomes both a practical storage solution and a stylish handmade accessory.

