If you’re looking to add texture and dimension to your crochet projects, learning how to crochet the bean stitch is a fantastic choice. This unique stitch creates a dense, puff-like texture that’s perfect for blankets, scarves, and more.
While it may seem complex at first glance, the bean stitch is surprisingly easy to master with the right guidance.
In this article, we’ll walk you through how to crochet the bean stitch, step by step. You’ll also discover tips for incorporating it into your projects, common mistakes to avoid, and answers to frequently asked questions.
Whether you’re a beginner or an experienced crocheter, this guide is designed to help you confidently use the bean stitch in your next project.
Let’s dive in and explore this beautiful crochet technique that’s both functional and decorative.
1. What is the Bean Stitch?
The bean stitch is a textured crochet stitch known for its raised, “puffy” appearance. It’s an excellent option for creating cozy and visually interesting designs.
The stitch involves multiple yarn overs and loops pulled through the same stitch, forming a small cluster. This gives the bean stitch its signature look and plush feel, making it a popular choice for projects like baby blankets, hats, and even home decor.
Using the bean stitch can add both visual and tactile appeal to your projects. It works well with solid-colored yarns, as the texture becomes the main focus, but you can also use multicolored yarn for a vibrant effect.
This stitch is ideal for crafters looking to expand their skills while adding a touch of sophistication to their work. It’s versatile and suitable for both beginners and advanced crocheters.
If you haven’t tried the bean stitch yet, you’re in for a treat. It’s an enjoyable technique that’s as rewarding to create as it is to use in finished projects.
2. Materials Needed to Crochet the Bean Stitch
Before you learn how to crochet the bean stitch, it’s essential to gather the right materials:
First, choose the yarn. Medium-weight yarn is ideal for beginners practicing the bean stitch. It’s easy to work with and highlights the texture of the stitch beautifully.
Select the appropriate crochet hook size based on your yarn. Check the yarn label for guidance or choose a hook slightly larger for a looser, more open texture.
Keep a pair of scissors handy to cut the yarn neatly after finishing your project. Sharp scissors ensure clean ends.
Have a yarn needle ready for weaving in the loose ends. This gives your project a polished finish.
If you’re new to the bean stitch, consider using stitch markers. These can help you keep track of rows or mark specific points in your work.
Having all your materials prepared ensures a smooth and enjoyable crocheting experience. Once everything is ready, you’re set to dive into learning this beautiful stitch.
3. Step-by-Step Guide: How to Crochet the Bean Stitch
Follow these steps to master the bean stitch:
Start with a foundation chain of any even number. This provides the base for your stitch pattern.
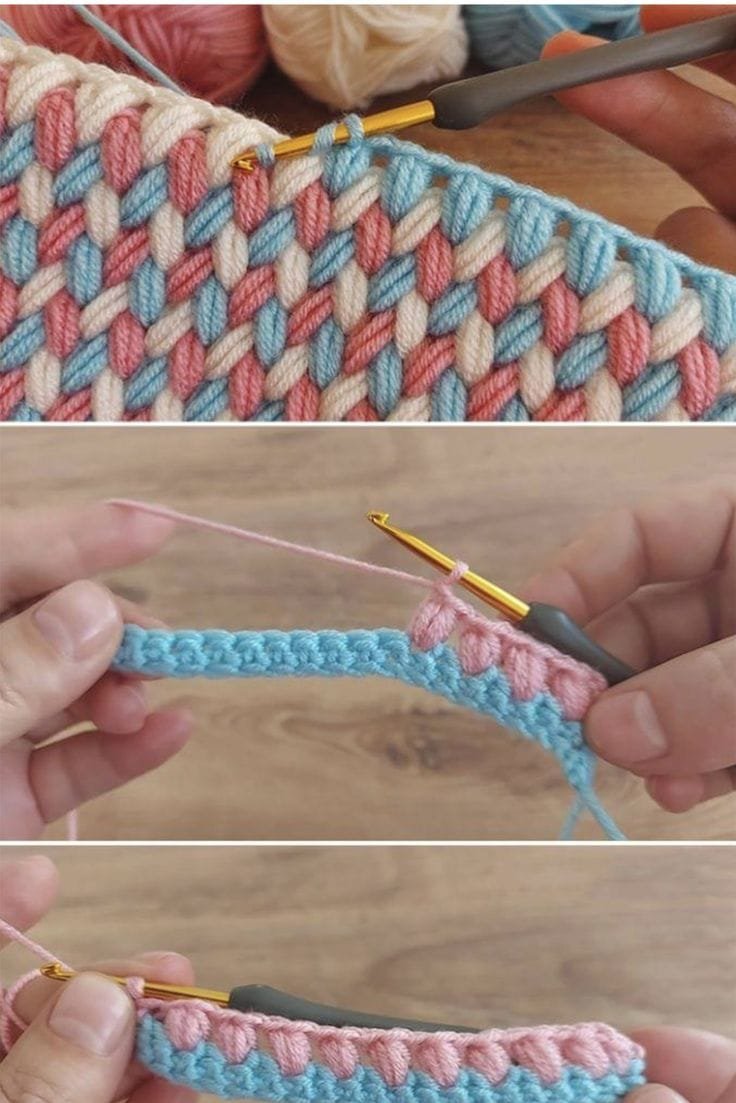
In the second chain from the hook, insert your hook and pull up a loop. Yarn over and insert the hook into the same chain again, pulling up another loop. Repeat this process one more time. You should now have six loops on your hook.
Yarn over and pull through all six loops. Chain one to secure the bean stitch. This is the critical step that creates the stitch’s puffy texture.
Skip the next chain, and repeat the process in the following chain. Continue this pattern across the row.
When you reach the end of the row, turn your work. Chain one to start the next row, and work the bean stitch into each chain-one space from the previous row.
Repeat this process for as many rows as needed. As you practice, you’ll notice the bean stitch creates a dense, luxurious fabric with a lot of texture.
Remember to keep your tension consistent throughout the project. This helps maintain an even appearance across your work.
4. Creative Uses for the Bean Stitch
The bean stitch is incredibly versatile and works well for various projects:
Blankets are a popular choice. The dense texture adds warmth, making the stitch perfect for cozy throws or baby blankets.
Scarves and cowls made with the bean stitch are not only functional but also stylish. The texture adds depth, making your accessory stand out.
Hats and beanies crafted with this stitch are both warm and visually appealing. The puff-like texture is ideal for creating a unique look.
Home decor items such as cushion covers, table runners, or placemats benefit from the stitch’s thick and structured feel.
The bean stitch can also be used for smaller items like potholders or coasters. The dense fabric provides excellent heat resistance.
Lastly, you can incorporate the stitch into larger garments like sweaters or cardigans, adding texture to specific areas for a modern, chic design.
Experimenting with the bean stitch allows you to unlock endless creative possibilities, whether you’re crafting for yourself or as gifts.
FAQ
Q1: Is the bean stitch suitable for beginners?
Yes, the bean stitch is beginner-friendly. While it may seem intricate at first, it’s simple to learn with practice and guidance.
Q2: What type of yarn works best for the bean stitch?
Medium-weight yarn is ideal as it highlights the stitch’s texture. However, you can experiment with different yarn weights for varied effects.
Q3: Can I use the bean stitch for lightweight projects?
The bean stitch creates a dense fabric, so it’s better suited for warm and cozy items. For lightweight projects, consider using a larger hook for a looser texture.
Q4: How do I fix mistakes in the bean stitch?
If you notice an error, unravel the affected stitches carefully and rework them. Keeping track of your rows can help prevent mistakes.
Q5: Can I combine the bean stitch with other crochet stitches?
Absolutely! The bean stitch pairs well with simpler stitches like single crochet or double crochet to create interesting patterns.
Q6: How do I maintain even tension with the bean stitch?
Practice is key. Focus on keeping your yarn tension consistent and take breaks if your hands feel strained.
Join our VIP broadcast list and gain access to exclusive patterns, all for free. As a VIP member, you’ll receive the best patterns daily, delivered directly to your device. ✨📱 It’s a unique opportunity to stay up-to-date with the latest trends and designs, curated just for you. Don’t miss out on enhancing your projects and discovering new inspirations with the best patterns every day! 🎨🔝
Conclusion
Learning how to crochet the bean stitch is a rewarding experience that adds depth and texture to your crochet projects. Whether you’re creating blankets, accessories, or home decor, the bean stitch offers endless possibilities to showcase your skills and creativity.
VIDEO TUTORIAL
We hope this guide has inspired you to try the bean stitch in your next project. Let us know your thoughts and share any suggestions or tips in the comments below. Your feedback is always appreciated, and we’re excited to hear about your crochet journey! Happy stitching!

