The Granny Square Stocking Pattern is one of the most charming and creative crochet projects you can make, especially when the holiday season approaches. Combining the timeless beauty of granny squares with the festive spirit of Christmas stockings, this project brings warmth, tradition, and a personal touch to your home décor.
Crocheting a stocking using a Granny Square Stocking Pattern is also a rewarding activity for both beginners and experienced crafters. For beginners, it provides an opportunity to learn the fundamentals of granny squares while creating a practical and festive decoration.
Another wonderful aspect of the Granny Square Stocking Pattern is how it can be personalized.
Why Choose a Granny Square Stocking Pattern
The first reason many crocheters fall in love with a Granny Square Stocking Pattern is its simplicity. Granny squares are often one of the first motifs that crafters learn, and they provide a repetitive yet relaxing process. You can create multiple squares in your free time and later assemble them into the shape of a stocking. This makes it easy to break the project into smaller steps, perfect for busy schedules.
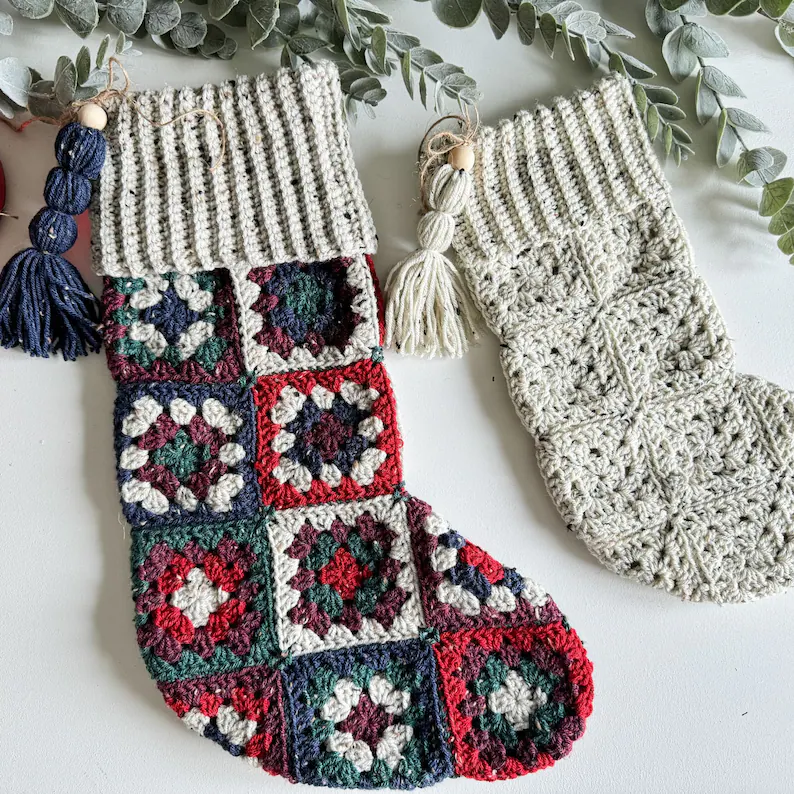
A second reason is the adaptability of the pattern. With granny squares, you can mix and match colors and stitches to achieve countless designs. For example, some people choose to use a traditional granny square, while others might opt for floral or starburst variations. The end result is always unique, showcasing your creativity and style.
Thirdly, stockings made with this method are durable. When crocheted with high-quality yarn, the sturdy construction of granny squares ensures that the stocking can hold small gifts, candies, or decorations without losing its shape. Unlike mass-produced stockings, your handmade stocking becomes a lasting piece that can be reused year after year.
Another benefit of the Granny Square Stocking Pattern is its eco-friendly nature. Instead of buying new decorations every season, you can use leftover yarn from other projects to create a colorful stocking. This reduces waste while giving you a sustainable way to celebrate the holidays. Plus, it adds a touch of nostalgia when each square reminds you of past crochet creations.
The pattern is also a wonderful opportunity to connect with loved ones. Many families enjoy crafting together, and making stockings can become a cherished holiday tradition. Each family member can choose their own colors and help in stitching, making the final set of stockings a true collective work of art.
Lastly, using a Granny Square Stocking Pattern allows you to express your individuality. Handmade decorations always stand out compared to store-bought items. A personalized crochet stocking instantly adds warmth and authenticity to your holiday décor, creating an inviting atmosphere for guests and loved ones.
Materials and Preparation for Granny Square Stocking Pattern
Before starting your Granny Square Stocking Pattern, it is essential to gather the right materials. The most common choice is medium-weight yarn, often in cotton or acrylic, which provides both durability and softness. Red, green, and white are classic choices for the holidays, but you can select any colors that suit your home’s theme.
Equally important is choosing the right crochet hook. Most patterns recommend sizes ranging from 4 mm to 5.5 mm, depending on your yarn. The correct hook size ensures that your stitches are even and that the granny squares join smoothly without leaving gaps. Always check the yarn label for recommendations before starting.
Next, you will need basic crochet supplies such as scissors, a yarn needle for weaving in ends, and stitch markers if you like extra guidance. Keeping your materials organized will save time and make the project more enjoyable.
When preparing, it’s also helpful to plan how many squares you will need. Most Granny Square Stocking Patterns require around 12 to 16 small squares, depending on the desired size. Arranging the squares on a flat surface before joining them helps you visualize the final stocking and make adjustments to the color placement.
Blocking the squares is another important step that many crocheters overlook. Blocking ensures that each square has the same size and shape, making it easier to join them neatly. Simply pin the squares to a board and lightly steam or dampen them, allowing them to dry in perfect alignment.
Finally, consider adding embellishments. Many people like to sew on buttons, ribbons, or pom-poms to personalize the finished stocking. Planning these details in advance ensures that your final product is not only functional but also beautifully decorated.
Step-by-Step Process of a Granny Square Stocking Pattern
The first step in creating a Granny Square Stocking Pattern is to crochet your squares. Start with a slip knot, chain four, and join into a ring. Then, work your first round with clusters of double crochet stitches, separated by chain spaces. Continue expanding outward in rounds until the square reaches the desired size.
After making enough squares, the next step is joining them. The whip stitch and slip stitch join methods are popular choices, depending on your preference for visibility of seams. Align the squares carefully to maintain symmetry, since this will define the shape of your stocking.
Once the squares are joined into a stocking outline, crochet around the edges to add reinforcement. This step not only strengthens the structure but also creates a polished look. Many crafters choose to add a decorative border with contrasting yarn for extra flair.
The toe and heel of the stocking often require shaping. Some Granny Square Stocking Patterns include half-squares or triangular motifs to create smooth curves. If you’re following a written pattern, carefully check the instructions for these modifications.
After shaping is complete, you’ll want to crochet the top cuff. This part can be simple or elaborate, depending on your preference. A ribbed cuff created with front and back post stitches gives the stocking a cozy and professional appearance.
The final step is adding a hanging loop. Crochet a small chain and secure it firmly to the inside of the stocking. This allows you to hang your beautiful handmade stocking on the mantel, ready to be filled with holiday surprises.
Tips for Perfecting Your Granny Square Stocking Pattern
One helpful tip when working on your Granny Square Stocking Pattern is to maintain consistent tension throughout your work. Uneven stitches can cause the stocking to look misshaped or uneven. Practicing even tension ensures a smooth finish.
Another tip is to weave in ends as you go. Since granny squares often involve multiple color changes, waiting until the end to secure all loose threads can be overwhelming. Taking care of this step gradually makes the process more manageable.
Pay attention to color placement. Arranging your squares before joining them helps prevent color clashes and ensures a harmonious final design. Laying out the squares on a flat surface allows you to visualize the stocking before committing to the join.
Blocking your finished stocking before hanging is also recommended. This gives the fabric a professional finish and ensures that the stocking hangs neatly. Blocking can make a big difference, especially when using different yarn textures.
Experiment with different borders and edges. A scalloped border, picot edging, or simple single crochet edge can transform your stocking from simple to stunning. Small details make a big impact on the final product.
Finally, don’t be afraid to customize. Add appliqués, embroidery, or even small bells to make your Granny Square Stocking Pattern uniquely yours. Handmade items reflect your creativity, so embrace personalization.
FAQ About Granny Square Stocking Pattern
1. Is a Granny Square Stocking Pattern suitable for beginners?
Yes, it is a great beginner-friendly project since it mainly involves simple stitches and joining squares.
2. How many squares do I need for one stocking?
On average, 12 to 16 small squares are needed, but it can vary depending on size.
3. What yarn is best for this project?
Medium-weight acrylic or cotton yarn is ideal because it holds shape well and is durable.
4. Do I need to block my squares before joining?
Blocking is not mandatory, but it helps keep squares uniform and improves the final look.
5. Can I use leftover yarn for this project?
Absolutely! This pattern is perfect for using scrap yarn in creative color combinations.
6. How long does it take to complete a Granny Square Stocking?
Depending on skill level, it can take anywhere from a weekend to a week of casual crocheting.
7. Can I make different sizes of stockings with the same pattern?
Yes, simply adjust the number or size of squares to create larger or smaller stockings.
8. Is it possible to wash crochet stockings?
Yes, most can be hand-washed gently with mild detergent, but always check your yarn’s care instructions.
Conclusion
The Granny Square Stocking Pattern is a delightful project that combines tradition, creativity, and functionality. It allows you to create a unique handmade decoration that can be enjoyed for years to come. From choosing yarn colors to joining squares and adding final touches, every step of the process is filled with creativity and joy.
If you’re looking for a project that celebrates both crochet artistry and holiday spirit, this pattern is an excellent choice. Whether you’re a beginner or an experienced crocheter, you can craft a stocking that brings warmth and cheer to your home.

