Crocheting is a timeless craft, and the Granny Square Leaf Crochet: A Step-by-Step Guide is perfect for both beginners and experienced crocheters looking to add a beautiful nature-inspired design to their projects.
The granny square technique is already a favorite among crochet lovers, and adding a leaf motif brings a fresh and elegant touch to any creation. Whether you want to incorporate it into blankets, shawls, or decorative items, this pattern will elevate your crochet skills.
The Granny Square Leaf Crochet pattern is not only stylish but also highly versatile. Its intricate yet straightforward design makes it ideal for those wanting to experiment with different textures and color combinations.
This guide will walk you through the process, ensuring that even those new to crochet can follow along with ease.
In this tutorial, we will cover everything from selecting the right yarn and hook to mastering the stitches needed to complete this stunning pattern.
Whether you are looking to create a rustic autumn-themed piece or a vibrant spring-inspired project, this Granny Square Leaf Crochet guide has you covered. Let’s dive into the step-by-step process and create something truly unique!
1. Materials and Tools You Need
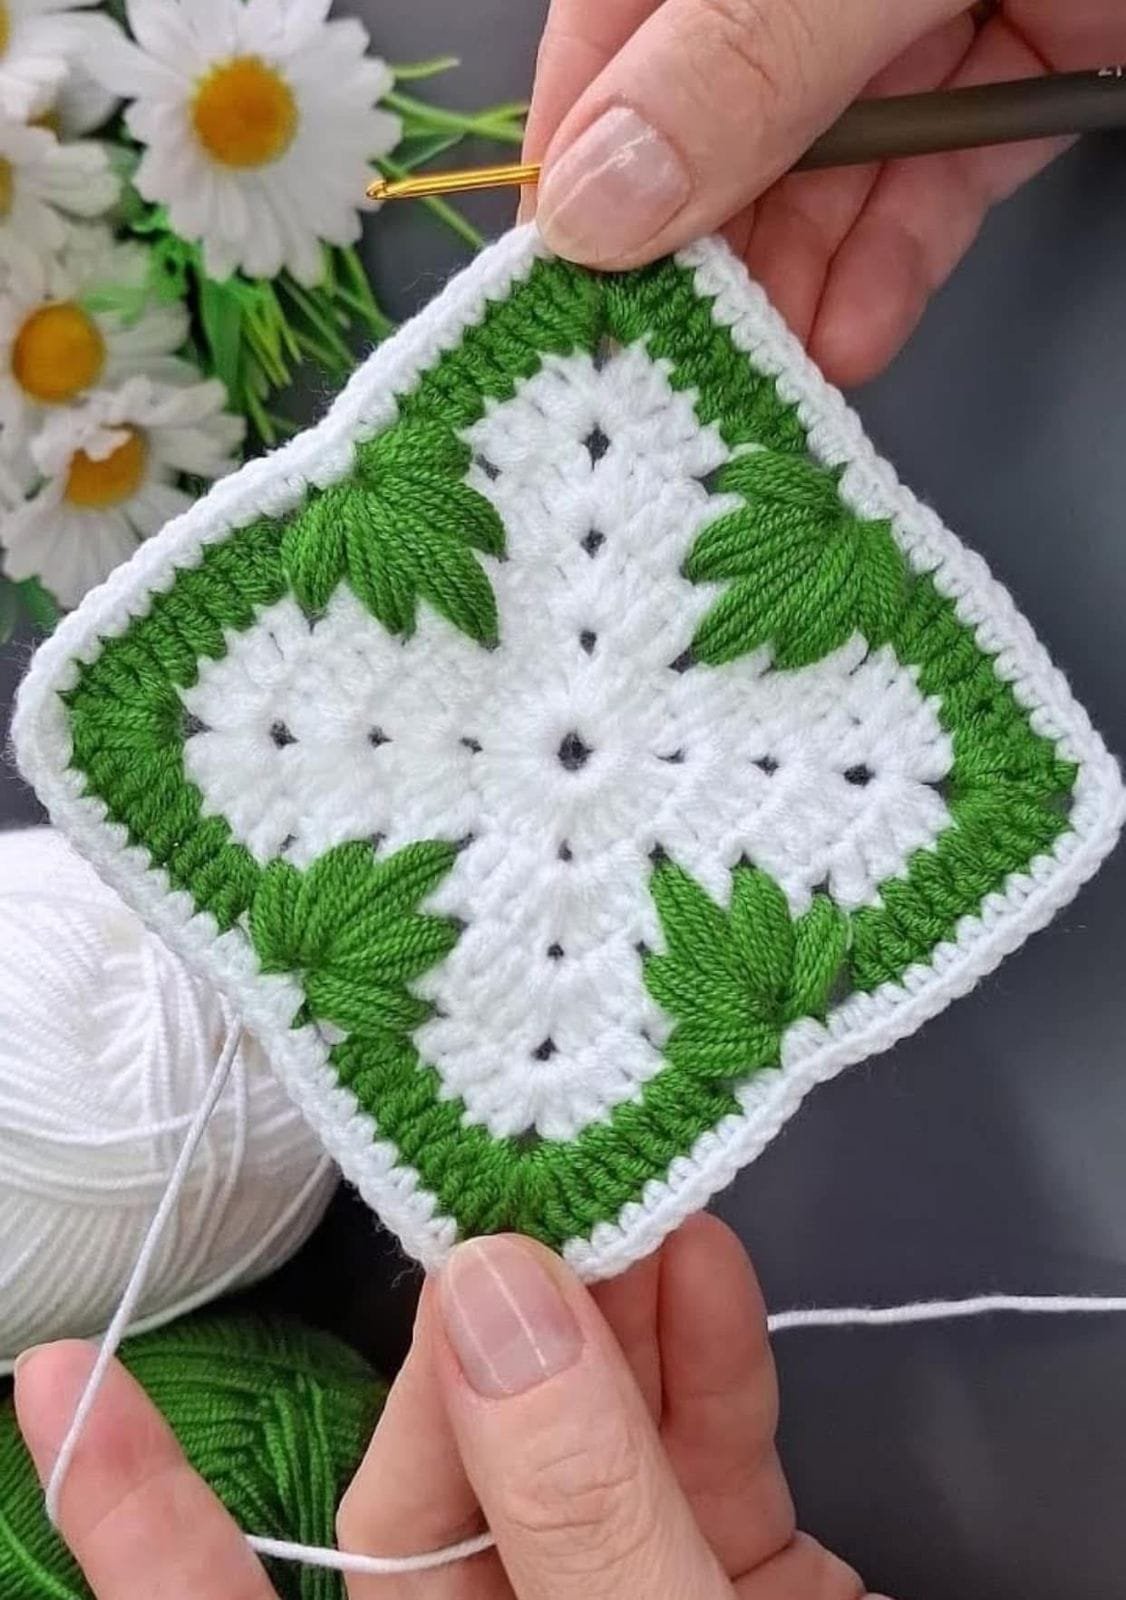
Choosing the right materials is essential for achieving the perfect Granny Square Leaf Crochet. The right yarn and hook will ensure durability and ease of stitching.
- Yarn Selection: Opt for cotton or acrylic yarn in green shades for a realistic leaf effect. If you prefer a modern touch, experiment with pastel colors.
- Crochet Hook: A 4mm or 5mm hook works well for this pattern, depending on your yarn’s weight.
- Scissors: A good pair of scissors is necessary for cutting yarn cleanly.
- Tapestry Needle: Needed for weaving in ends and adding finer details to your work.
- Stitch Markers: Useful for keeping track of rounds, especially if you’re a beginner.
- Blocking Board: Helps in shaping and setting the final piece for a professional look.
2. Step-by-Step Instructions for Granny Square Leaf Crochet
Follow this detailed step-by-step guide to create a perfect Granny Square Leaf Crochet.
- Step 1: Create the Foundation Chain: Start with a magic ring and crochet four chain stitches to form the base.
- Step 2: Form the First Round: Work 12 double crochet stitches into the ring and join with a slip stitch.
- Step 3: Shape the Leaf Motif: Use chain stitches and half-double crochet to begin shaping the leaf’s edges.
- Step 4: Add Texture with Stitches: Introduce front post stitches to give depth and definition to the design.
- Step 5: Strengthen the Structure: Crochet a border around the granny square to enhance durability.
- Step 6: Finish and Weave in Ends: Cut the yarn, secure the final stitch, and weave in the loose ends using a tapestry needle.
3. Creative Uses for Granny Square Leaf Crochet
This crochet pattern is versatile and can be used in numerous ways to enhance your handmade projects.
- Blankets: Combine multiple squares to form a cozy autumn or spring-themed blanket.
- Pillows and Cushion Covers: Sew finished squares onto pillowcases for a nature-inspired home decor.
- Table Runners and Placemats: A great way to add a handmade touch to dining setups.
- Garments: Incorporate granny square leaf motifs into sweaters, scarves, or shawls.
- Wall Hangings: Frame finished pieces for a stunning decorative element.
- Bags and Accessories: Use as part of tote bags or purses for a stylish statement.
4. Tips and Tricks for Perfecting Your Granny Square Leaf Crochet
To achieve the best results, consider these expert tips while working on your Granny Square Leaf Crochet.
- Choose the Right Tension: Maintain a consistent tension to avoid an uneven finish.
- Experiment with Colors: Play around with different shades to create seasonal effects.
- Use Blocking for a Professional Finish: Stretch and pin your work on a blocking board to maintain shape.
- Practice Stitch Techniques: Master basic stitches before attempting complex variations.
- Keep Your Work Clean: Wash and store crochet pieces properly to maintain their look.
- Join Granny Squares Seamlessly: Use slip stitches or whip stitches for a polished join between squares.
FAQ: Common Questions About Granny Square Leaf Crochet
Q1: Is the Granny Square Leaf Crochet pattern suitable for beginners?
A1: Yes! The pattern is beginner-friendly, and the step-by-step guide makes it easy to follow.
Q2: What type of yarn is best for this pattern?
A2: Cotton and acrylic yarns work best, offering durability and structure to the design.
Q3: Can I use different colors for the leaf motif?
A3: Absolutely! Experiment with various shades to match your project’s theme.
Q4: How can I make my granny squares the same size?
A4: Consistent tension, using the same hook size, and blocking the squares can help maintain uniformity.
Q5: What’s the best way to join multiple squares together?
A5: Slip stitching or whip stitching are excellent techniques for seamless joining.
Join our VIP broadcast list and gain access to exclusive patterns, all for free. As a VIP member, you’ll receive the best patterns daily, delivered directly to your device. ✨📱 It’s a unique opportunity to stay up-to-date with the latest trends and designs, curated just for you. Don’t miss out on enhancing your projects and discovering new inspirations with the best patterns every day! 🎨🔝
Conclusion
The Granny Square Leaf Crochet: A Step-by-Step Guide provides a detailed approach to mastering this elegant and versatile pattern.
Whether you’re making blankets, decor pieces, or garments, this guide ensures you have all the knowledge to create beautiful crochet projects.
VIDEO TUTORIAL
Now it’s your turn! Try out this pattern and share your experience in the comments. Let us know your thoughts and any suggestions for future guides!

