If you are looking for a sweet, thoughtful, and practical handmade gift, Easy Baby Crochet Shoes Free Pattern projects are a wonderful choice. These little shoes are not only adorable but also incredibly functional, keeping a baby’s feet warm while adding a unique handmade touch to their outfit. Whether you are a beginner looking for your first project or an experienced crocheter seeking a quick and satisfying make, this guide will help you create beautiful crochet baby shoes with ease.
Making easy baby crochet shoes is a rewarding craft because it combines creativity with love. Each stitch you make is part of something special—a gift for a new baby, a personal project for your own child, or even a handmade product to sell. With a free pattern, you can follow simple instructions without worrying about complex techniques, making it perfect for crocheters at any level.
In this article, we will walk through the essentials of creating your own easy baby crochet shoes free pattern project. We’ll discuss the materials you’ll need, the basic steps, creative variations, and tips for making the shoes fit perfectly. By the end, you’ll feel confident to start your own pair, and you might just get hooked on making them for every baby you know.
Choosing the Right Materials for Easy Baby Crochet Shoes
The first step in making any easy baby crochet shoes project is selecting the right materials. The yarn you choose will determine the comfort, durability, and overall look of the shoes. For babies, soft, skin-friendly yarns are essential, as their skin is delicate and sensitive.
When it comes to yarn fiber, cotton and bamboo blends are excellent choices. They are breathable, lightweight, and comfortable, ensuring that the shoes feel good on the baby’s feet. You can also choose a lightweight acrylic yarn, which is durable and easy to wash, making it practical for everyday use.
Color selection is another important aspect. While pastel tones are classic for baby projects, bold and modern colors are becoming increasingly popular. You can even combine two or three colors to create stripes or patterns that give your easy baby crochet shoes free pattern a unique personality.
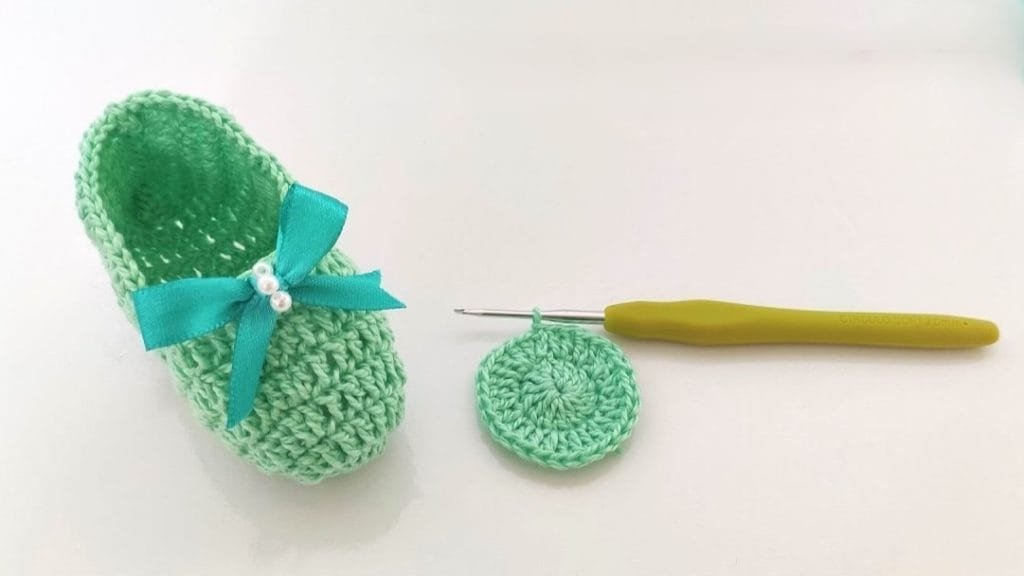
In addition to yarn, the crochet hook size will affect the final size and texture of the shoes. A smaller hook will create a tighter fabric, which is perfect for structured shoes, while a slightly larger hook will give a softer, more flexible result. Always check the pattern’s recommendations for hook size.
You’ll also need basic crochet tools such as scissors, a yarn needle for sewing pieces together, and stitch markers to keep track of your work. These small tools make a big difference in keeping your project neat and enjoyable.
Finally, consider any embellishments you might want to add, like small buttons, bows, or decorative flowers. Make sure they are securely attached and safe for babies—avoid small parts that could pose a choking hazard.
Step-by-Step Process for Easy Baby Crochet Shoes
Once you have your materials ready, it’s time to follow the easy baby crochet shoes free pattern step by step. Most baby shoe patterns start with the sole, which forms the base of the shoe. This is typically made by working in rounds or ovals, gradually increasing stitches to achieve the desired size.
The next step is creating the upper part of the shoe. This can be done in continuous rounds or rows, depending on the pattern style. This part determines the shape and style of the shoe—whether it’s a bootie, slipper, or sandal style.
Many patterns will have you work short rows or decrease stitches to shape the toe area, ensuring the shoe fits snugly. This shaping is important for both comfort and appearance.
After the upper is complete, you can add a strap or closure. Some patterns include a simple button strap, while others may use ties or elastic bands to keep the shoe securely on the baby’s foot.
Once the main structure is done, it’s time for finishing touches. This might include crocheted flowers, hearts, or animal faces for a playful look. Keep in mind that safety is key—avoid any loose or sharp decorations.
Before you finish, check your work for even stitches, secure ends, and consistent sizing between the two shoes. A final gentle wash and blocking can help shape the shoes perfectly before gifting or wearing.
Creative Variations for Easy Baby Crochet Shoes
One of the joys of working with an easy baby crochet shoes free pattern is the freedom to customize. Even a simple pattern can be transformed into a completely different style with small changes in color, stitch, or decoration.
You can try using textured stitches, like bobbles or shells, to add dimension to the shoe design. These details can make the shoes look more intricate without adding complexity to the pattern.
Seasonal variations are also popular. For warmer months, you can make open-toe sandals with lightweight yarn, while for winter, you can create cozy boots with a thicker yarn and higher ankle coverage.
Playing with colors is another way to make your shoes unique. You could crochet rainbow stripes, two-tone combinations, or even a gradient effect using ombre yarn. These color variations make each pair one-of-a-kind.
Personalization is another option. You can embroider initials, add appliqué shapes, or crochet matching accessories like hats and mittens to complete the look.
Finally, consider matching your easy baby crochet shoes to a baby blanket or outfit. Coordinated sets are always cherished gifts and make for adorable photos.
Tips for Making the Perfect Fit
Achieving the right fit for easy baby crochet shoes is essential. Babies grow quickly, and their feet can vary in size even at the same age. The pattern may suggest age ranges, but it’s always best to measure the baby’s foot before starting.
If you want the shoes to last longer, consider making them slightly larger and using adjustable straps or ties. This way, the baby can wear them for a few extra months.
Choosing the right yarn weight also impacts the fit. Thicker yarn will make the shoes bigger, while finer yarn will make them smaller. Always match the yarn weight to the pattern instructions for best results.
Gauge is critical in crochet. Before starting, make a small swatch to ensure your stitches match the pattern’s gauge. This will help the shoes come out at the intended size.
Comfort should be a priority. Avoid seams or knots inside the shoe that could rub against the baby’s skin. Soft yarns and smooth joins will ensure a comfortable fit.
Lastly, test the flexibility of the sole. A soft and bendable sole is ideal for newborns and pre-walkers, while a slightly firmer sole can provide more support for older babies starting to stand.
FAQ – Easy Baby Crochet Shoes Free Pattern
1. Are easy baby crochet shoes suitable for beginners?
Yes! Many free patterns are designed for beginners and use simple stitches like single crochet and double crochet. They are a great first project.
2. How long does it take to make a pair of crochet baby shoes?
Depending on your skill level, most pairs can be completed in 2–4 hours, making them a quick and satisfying project.
3. What size should I make for a newborn?
Newborn shoe soles are usually around 3.5 inches (9 cm) long. Always measure the baby’s foot for accuracy.
4. Can I wash crochet baby shoes in the machine?
If you use washable yarn like cotton or acrylic, they can be machine-washed on a gentle cycle. Hand washing is recommended for delicate or decorative designs.
5. Are crochet baby shoes safe for everyday wear?
Yes, if made with baby-friendly yarn and securely attached embellishments. Avoid small parts that could be a choking hazard.
6. Can I sell baby shoes made from a free pattern?
In most cases, yes, but check the pattern’s usage policy. Many designers allow you to sell finished products with credit given to the pattern source.
Conclusion
Creating easy baby crochet shoes free pattern projects is a joyful and rewarding experience. With the right materials, clear instructions, and a touch of creativity, you can make adorable, comfortable shoes for any baby. From soft pastels to vibrant patterns, each pair you create will carry a handmade charm that store-bought items simply can’t match.
Now that you’ve learned how to choose materials, follow a step-by-step process, explore creative variations, and ensure a perfect fit, you are ready to start your own crochet journey. I’d love to hear your thoughts—share your honest opinion about this guide and let me know any suggestions or ideas you have for future crochet projects.

