Creating a Crochet Rose Fairy is a delightful and enchanting project, perfect for those who enjoy making intricate yet beautiful crochet designs.
Whether you’re an experienced crocheter or a beginner looking for a new challenge, this Crochet Rose Fairy – Tutorial will guide you through the steps to craft your very own magical fairy.
This charming little creation makes a lovely decorative piece or a unique gift for someone special, bringing a touch of whimsy into any space.
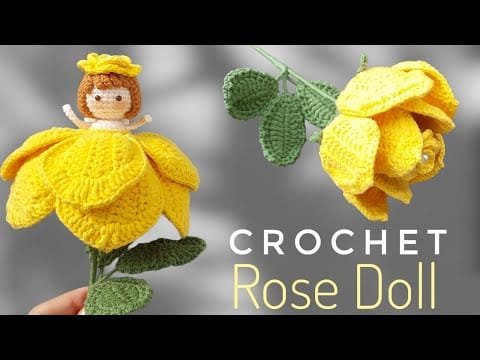
The Crochet Rose Fairy captures the essence of nature with her delicate rose petals and elegant fairy wings.
This project allows for a lot of creativity, from the color of the rose to the type of yarn you choose. With just a few simple materials and basic crochet techniques, you can bring this magical character to life. Let’s explore how to get started on your very own Crochet Rose Fairy.
1. Materials and Preparation
Before you begin crafting your Crochet Rose Fairy, it’s essential to gather all the necessary materials. The right tools and yarn can make a significant difference in how your fairy turns out, so be sure to choose wisely.
Yarn Selection
Choosing the right yarn is key to giving your Crochet Rose Fairy the right texture and look. Soft, lightweight yarns such as cotton or acrylic work well for this project. You can choose a classic pink or red for the rose petals or opt for more unique colors like lavender or white for a different take on the traditional fairy.
Crochet Hook Size
For this tutorial, a smaller crochet hook, such as a 2.5mm or 3mm hook, will work best for creating tight stitches. This will help maintain the shape and structure of your fairy. Be sure to match your hook size with the thickness of your yarn.
Additional Materials
In addition to your yarn and hook, you’ll need a few other materials. Stuffing is essential for giving your fairy body and volume. You may also want a tapestry needle for sewing parts together, and small embellishments like beads or glitter can be used to add extra sparkle to your fairy’s wings or crown.
Understanding the Basic Stitches
The Crochet Rose Fairy – Tutorial uses basic crochet stitches such as single crochet (sc), double crochet (dc), and slip stitches (sl st). These are simple to master, even for beginners, and form the foundation for the entire project. If you’re unfamiliar with these stitches, it’s a good idea to practice before starting.
2. Creating the Rose Petal Skirt
The rose petal skirt is the highlight of the Crochet Rose Fairy. It represents the beauty of nature and adds a unique, flowing element to the design. Here’s how you can create this elegant feature.
Step 1: Starting the Base
To begin, you’ll need to create a magic ring or chain two stitches and work into the first chain to form a small circle. From here, you’ll work single crochets to form the base of the skirt. Increase evenly around to create a flat circular shape.
Step 2: Forming the Petals
Next, you’ll begin shaping the petals. Using double crochets and slip stitches, create scalloped edges to mimic the look of real rose petals. Each petal is made individually, and you’ll gradually add more as you go around the base.
Step 3: Adding Layers
For a fuller skirt, you can add multiple layers of petals. Simply repeat the process of creating petals on top of the existing layer, increasing the size slightly with each round. This will give the skirt a rich, layered look that’s full of dimension.
Step 4: Shaping the Skirt
Once all the petals are in place, you can shape the skirt by gently curling the edges of the petals. This gives the skirt a natural, blooming appearance. Blocking the petals (wetting them and shaping them) can also help them hold their shape.
Step 5: Attaching the Skirt
Finally, you’ll attach the skirt to the body of the fairy. Use a tapestry needle to securely stitch the top edge of the skirt to the base of the body, ensuring that it sits evenly around the waist.
3. Crafting the Fairy Body
The body of the Crochet Rose Fairy is simple but elegant. It provides the framework for the fairy’s shape and is easy to customize depending on your preferences.
Step 1: Starting the Body
Begin by crocheting a small circle, which will serve as the base of the fairy’s body. Work in rounds, gradually increasing the size as you move up. This will create the rounded lower half of the body, which should be slightly wider at the bottom and taper towards the top.
Step 2: Shaping the Upper Body
Once the base is complete, start working straight rounds to create the torso. You can use single crochets to keep the stitches tight and structured. Continue working until the torso reaches the desired height.
Step 3: Creating the Arms
The arms of the Crochet Rose Fairy are created separately and attached later. To create them, work a small chain and then crochet back along the chain to form a slender, tubular shape. You can also add small details like cuffs or hands if desired.
Step 4: Attaching the Arms
Once the arms are complete, use your tapestry needle to sew them onto the sides of the fairy’s body. Position them carefully to ensure they’re evenly spaced and aligned with the rest of the figure.
Step 5: Finishing Touches
Before moving on, be sure to add any extra details to the body. This could include a small belt, a flower crown, or tiny beads to represent buttons or jewelry. These small touches can really bring your fairy to life.
4. Making the Fairy Wings
No Crochet Rose Fairy would be complete without her beautiful wings. These delicate, ethereal wings are surprisingly easy to create and add a magical touch to the design.
Step 1: Wing Shape
To begin, decide on the shape of your wings. You can opt for classic butterfly-style wings or create something more abstract and whimsical. Start by chaining the desired width of your wings and working in rounds to build up the shape.
Step 2: Adding Detail
Once the basic wing shape is formed, you can add detail by working smaller stitches along the edges. Scalloped or picot edges are great for creating the look of intricate, lacy wings. You can also use contrasting yarn to outline the wings for added definition.
Step 3: Stiffening the Wings
To give the wings structure, you can stiffen them using fabric stiffener or glue. Simply apply the stiffener to the wings and shape them while they dry. This will ensure that they stay upright and don’t droop over time.
Step 4: Attaching the Wings
Once the wings are dry, attach them to the back of the fairy’s body using your tapestry needle. Be sure to secure them well so that they don’t come loose.
Step 5: Final Adjustments
After the wings are attached, you can make any final adjustments to the shape and positioning. Fluff up the wings or gently curl the edges to give them a more natural look.
FAQ
What type of yarn is best for making the Crochet Rose Fairy?
Lightweight yarns such as cotton or acrylic work best for this project. They provide a good balance of softness and structure, making them ideal for creating the intricate details of the fairy.
How long does it take to make the Crochet Rose Fairy?
Depending on your skill level and how detailed you want the fairy to be, the project can take anywhere from a few hours to a couple of days.
Can I customize the colors of the Crochet Rose Fairy?
Yes! One of the best parts about crocheting your own fairy is that you can choose any colors you like. From soft pastels to bold, vibrant shades, the choice is yours.
Do I need advanced crochet skills to make the Crochet Rose Fairy?
While the project involves some intricate details, it can be completed by crocheters of all skill levels. Basic stitches are used throughout, and the tutorial is designed to be easy to follow.
Can I add embellishments to my Crochet Rose Fairy?
Absolutely! Adding beads, sequins, or even a touch of glitter can give your fairy an extra sparkle. Feel free to get creative and personalize your fairy with any embellishments you like.
How do I display my Crochet Rose Fairy?
Your Crochet Rose Fairy can be displayed in a variety of ways. She can sit on a shelf, be hung from a window, or even be attached to a wreath or holiday decoration.
Join our VIP broadcast list and gain access to exclusive patterns, all for free. As a VIP member, you’ll receive the best patterns daily, delivered directly to your device. ✨📱 It’s a unique opportunity to stay up-to-date with the latest trends and designs, curated just for you. Don’t miss out on enhancing your projects and discovering new inspirations with the best patterns every day! 🎨🔝
Conclusion
The Crochet Rose Fairy – Tutorial offers a fun and creative way to explore crochet while crafting a beautiful, whimsical piece.
From her delicate rose petal skirt to her magical wings, every detail of this project is designed to inspire and delight. Whether you’re making this fairy as a gift or keeping her for yourself, the result is sure to bring a touch of enchantment to any space.
If you enjoyed this tutorial, please feel free to share your thoughts and suggestions in the comments! Happy crocheting!

