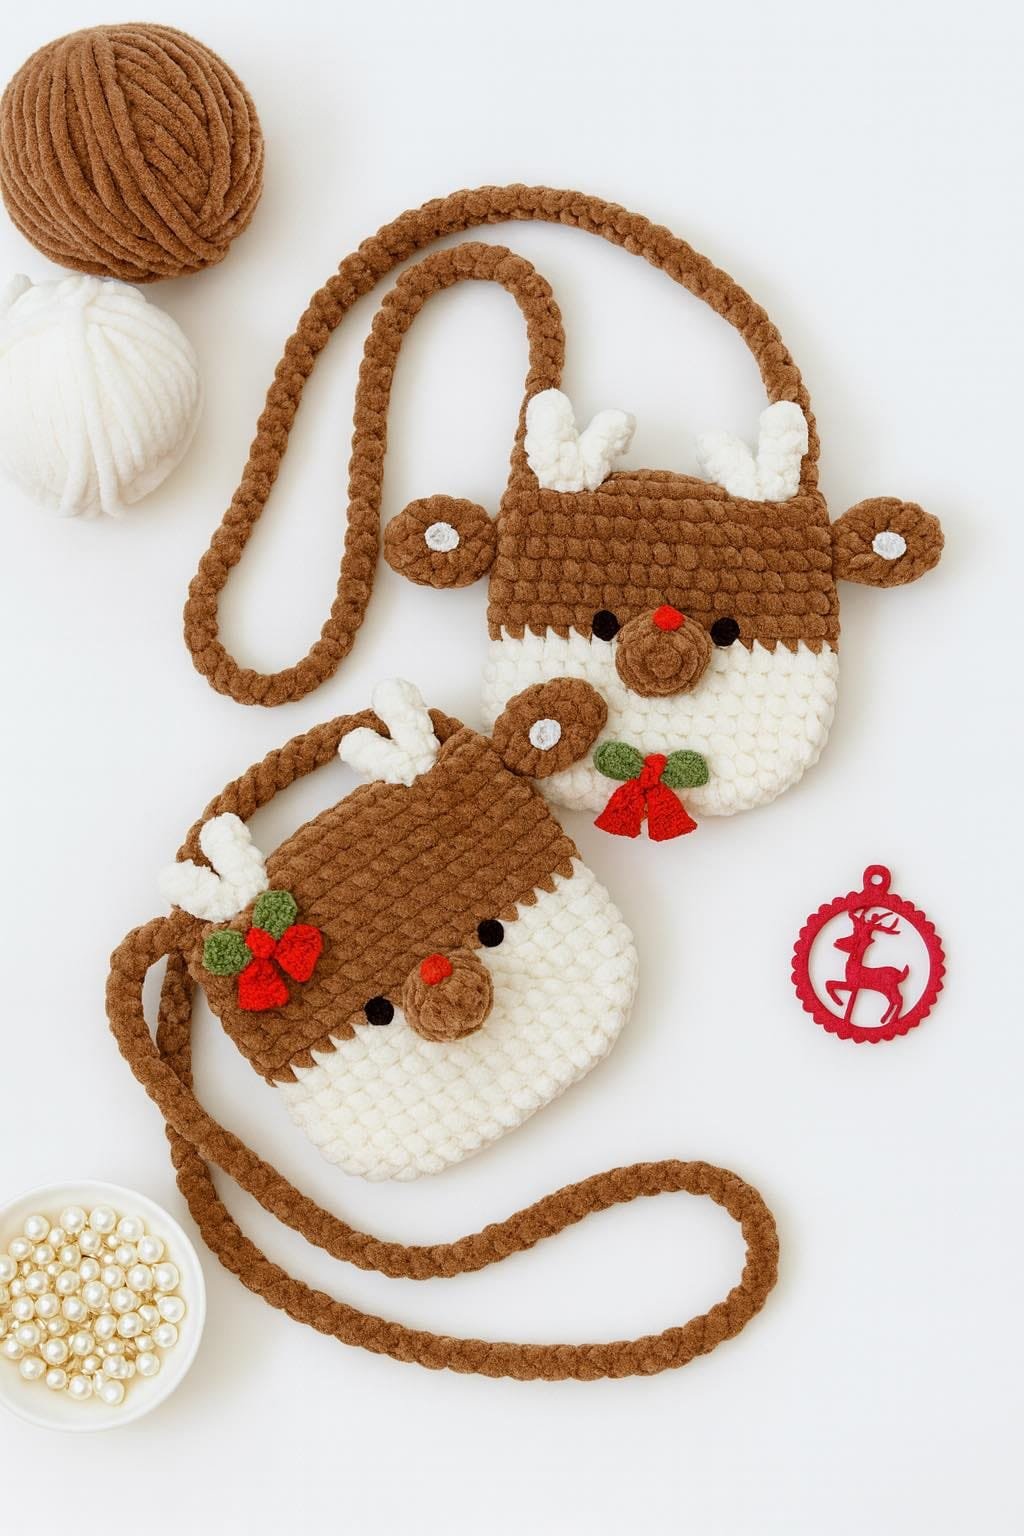
Crochet lovers adore creating festive accessories, and a crochet reindeer bag is one of the cutest holiday projects you can make. Whether for gifting, decorating, or adding a charming touch to your Christmas outfit, this pattern brings joy, fun, and practicality together.
With simple stitches and playful details, anyone—from beginners to seasoned crocheters—can complete this adorable bag.
In this guide, you’ll learn how to crochet a reindeer-themed bag step by step in a clear, humanized, and SEO-friendly format.
Why Make a Crochet Reindeer Bag
A reindeer bag is perfect for holiday outings, gift exchanges, and Christmas parties. It adds festive cheer while serving as a useful accessory to hold small items like candies, cards, or children’s treasures. Handmade crochet bags also make heartfelt gifts, and the reindeer theme makes them extra memorable. This project is small, quick, and customizable, making it ideal for both personal use and handmade market sales.
Materials You Will Need
To create your crochet reindeer bag, prepare medium-weight yarn in brown, beige, red, black, and white. You will also need a 4 mm or 5 mm hook, depending on your yarn thickness, stitch markers, a yarn needle, and optional felt pieces for facial details. Safety eyes or crocheted eyes can be used to complete the charming look. Choose soft acrylic yarn or cotton for a smooth finish and durable results.
Starting the Bag Base
Begin by crocheting the base of the bag using brown yarn. Most reindeer bags start with a circular or oval base made using single crochet stitches. Start with a magic ring and work increases evenly around to expand the bottom. Once you reach the desired width—typically 12 to 15 cm—you can stop increasing and continue working in rounds to build the body. This creates a sturdy and rounded foundation for your adorable reindeer.
Building the Bag Body
To form the bag’s shape, continue crocheting in single crochet rounds without increasing. This makes the walls rise evenly. You can also switch to half double crochet for faster progress. The body height is usually between 14 and 18 cm, depending on how deep you want the bag to be. Keep your stitches consistent to maintain a smooth texture. If you prefer a slightly slouchy look, use a larger hook for the body portion.
Creating the Reindeer Muzzle
The muzzle gives the reindeer its distinct character. Using beige yarn, crochet a small oval or circle to attach to the front of the bag. This piece typically measures around 5–7 cm. After finishing the shape, lightly stuff it with fiberfill to create a soft, rounded look. Stitch it securely to the center lower portion of the bag. This feature adds adorable dimension and enhances the reindeer’s sweet expression.
Adding the Nose
Nothing is more iconic than Rudolph’s bright red nose. Crochet a small red circle or slightly elongated shape using single crochet stitches. Attach it to the top area of the muzzle. For a more subtle design, you can use brown or black instead. Handmade noses give your bag personality, and choosing fun colors can make your piece stand out. Kids especially love the playful pop of color on the nose.
Attaching the Eyes
You can use safety eyes or crochet small black circles to create the reindeer’s face. Position the eyes above the muzzle, leaving enough space between them for expression. If crocheting the eyes, make two tiny circles using black yarn and optionally add a small white stitch for brightness. Felt eyes are also an option. Sew them securely to ensure the bag is safe for young children. Well-placed eyes give your reindeer its cute and friendly look.
Making the Reindeer Ears
Reindeer ears are crocheted separately and sewn onto the top sides of the bag. Create two small ear shapes using brown yarn, usually with short rows or simple triangles. Add a lighter beige color to the inner ear for detail. After shaping the ears, sew them symmetrically to give the reindeer a balanced appearance. Ears add character and help define the overall design of the bag.
Crocheting the Antlers
The antlers are the most charming part of the reindeer. Use darker brown yarn to crochet simple branch-like shapes. These can be made using chains and single crochet stitches, forming small “forks” at the tips. Make two antlers and stuff them lightly so they stand upright. Sew them securely behind the ears. Antlers give your bag height, personality, and an unmistakable Christmas charm.
Creating the Bag Strap
For the strap, decide how long you want the bag to hang. You can crochet a long chain and work single crochet stitches along it for a sturdy strap. Another method is to make an I-cord using a crochet hook for a thicker look. Sew the strap ends to both sides of the bag using strong stitching. Reinforce the area where the strap attaches to make the bag durable and functional for daily use.
Adding a Drawstring or Closure
To keep items inside the bag secure, consider adding a closure. You can crochet a simple drawstring and weave it through the top row of the bag. Tie it into a bow for a cute finish. Alternatively, sew a button and loop closure or attach a zipper if you prefer. Each closure style adds a different look and level of utility to your handmade creation.
Personalizing Your Reindeer Bag
Customization is part of the fun. You can add rosy cheeks using pink felt circles, embroider eyebrows, attach bells to the antlers, or decorate the bag with glitter yarn for a magical touch. If you want a feminine look, add a crocheted bow or flower near one ear. Personal touches make your bag unique and add personality to your creation.
Tips for a Professional Finish
Keep your tension consistent throughout the project to achieve a smooth surface. Use invisible stitching when sewing facial pieces for a clean result. Block the bag lightly if necessary to help it hold its shape. Choosing high-quality yarn also elevates the overall look and ensures the bag lasts through many holiday seasons.
Perfect Gift Idea for the Holidays
A crochet reindeer bag makes a delightful handmade gift for kids, friends, teachers, or anyone who loves festive accessories. It can be used to hold candies, small gifts, or Christmas treats. Pairing it with homemade goodies creates an even more heartfelt present. Handmade gifts bring warmth and joy, especially during the holiday season.
Great Project for Beginners
This pattern is simple enough for beginners yet engaging for experienced crocheters. Most parts involve basic stitches such as single crochet, increases, and simple shaping. Assembling the facial features gives you a chance to practice sewing pieces together and adding decorative elements. It is a rewarding project that helps build confidence in your crochet skills.
Fun Ways to Use Your Reindeer Bag
Beyond the holidays, this adorable bag can be used for pretend play, room décor, or as a cute accessory for winter outfits. Kids love using character-themed bags, and adults appreciate them as novelty pieces. It can also serve as a small gift pouch for holiday parties or family gatherings.
Conclusion
Crocheting a reindeer bag is a joyful craft that blends creativity, charm, and holiday spirit. With simple stitches and playful details, you can create a festive accessory that brings smiles wherever it goes.
This pattern is easy to customize, fun to make, and perfect for gifting or personal use. Celebrate the magic of Christmas with a handmade reindeer bag full of warmth, character, and creativity.

