The Crochet Ornament Trees Pattern is one of the most delightful and creative projects to make during the holiday season.
Combining the joy of crocheting with the charm of Christmas, this pattern allows crafters to design miniature trees that can decorate your home, office, or even be given as handmade gifts.
These little trees are not just decorations; they are pieces of art filled with warmth, love, and the personal touch that only handmade items can provide.
Whether you’re an experienced crocheter or a beginner, this pattern is accessible, fun, and endlessly customizable.
Throughout this guide, we will explore techniques, materials, and ideas to make your crochet ornament trees truly special.
Crocheting these trees offers endless possibilities for creativity. You can play with different yarn textures, add small ornaments, or even integrate lights to bring them to life. Using soft cotton or sparkly yarns gives each tree a unique charm. Plus, you can make them in different sizes — from tiny decorations for the Christmas table to larger ones to hang on the wall or display on shelves. The Crochet Ornament Trees Pattern can easily adapt to any holiday style, whether you prefer something minimalist, traditional, or colorful.
In addition to being a relaxing project, creating crochet ornament trees is a wonderful way to spread joy. They make perfect gifts for friends and family and can even be used as festive tags, keychains, or centerpieces. This tutorial will walk you through everything you need — from materials and stitches to decoration ideas and assembly steps — so that you can confidently create your own collection of crochet Christmas trees this year.
Materials and Tools You’ll Need
To start your Crochet Ornament Trees Pattern, you don’t need much — just a few basic tools and some imagination. Gathering the right materials ensures your project turns out neat, sturdy, and beautiful.
First, you’ll need yarn. Acrylic or cotton yarn works best for this type of project. Cotton provides structure and a clean finish, while acrylic offers softness and a slight sheen. Choose green for a traditional Christmas look, or experiment with gold, silver, or white for a modern twist. Variegated yarns can also create interesting color patterns without having to switch threads.
Next, select the crochet hook size that matches your yarn. Typically, a 3.5 mm to 4 mm hook is ideal for small ornament trees. A smaller hook will produce tighter stitches, giving your tree more structure, while a larger hook results in a softer, more flexible texture.
You’ll also need fiberfill or stuffing if you want your trees to have volume. Alternatively, you can leave them flat if you plan to hang them on the tree or wall. Don’t forget small decorations like mini beads, sequins, ribbons, or tiny stars to personalize each piece. A yarn needle will help you weave in ends neatly and attach details securely.
Finally, having a pair of sharp scissors and optional glue for decorations completes your setup. With these materials ready, you’re all set to start crafting your very own crochet ornament forest.
Step-by-Step Crochet Instructions
Let’s dive into creating your Crochet Ornament Trees Pattern. This step-by-step guide is designed to help even beginners succeed.
Start with a magic ring — this will form the base of your tree. Into this ring, make 3 chain stitches (counts as the first double crochet), followed by 2 double crochets. Then, chain 2 and work 3 double crochets again. Repeat this pattern until you have four sets of 3 double crochets, separated by chain 2 spaces. Join with a slip stitch to the top of the starting chain. This will form the square base of your tree.
For the next round, chain 3 and double crochet in each stitch across, placing 2 double crochets, chain 2, and 2 double crochets in each corner space. This creates a growing triangular shape. Continue this pattern for as many rounds as you’d like to increase the size of your tree.
Once your base size is achieved, begin shaping the tree into a cone. Fold the piece in half and join the edges using slip stitches or a yarn needle, creating a hollow cone. Stuff it lightly with fiberfill if you want a 3D effect.
For the tree trunk, crochet a small cylinder by chaining 6 stitches and joining them into a ring. Work several rounds of single crochet until it reaches the desired height. Attach it to the base of the tree with sewing stitches or glue.
Lastly, add finishing touches like a crocheted star on top, beads as ornaments, or even a small chain to hang your creation. The best part of this project is that you can make multiple trees, each one slightly different, creating a beautiful handmade forest for your Christmas décor.
Creative Variations and Decoration Ideas
One of the greatest joys of the Crochet Ornament Trees Pattern is the freedom to customize. There’s no single way to decorate or style your tree. Each one can tell a story of your creativity and personality.
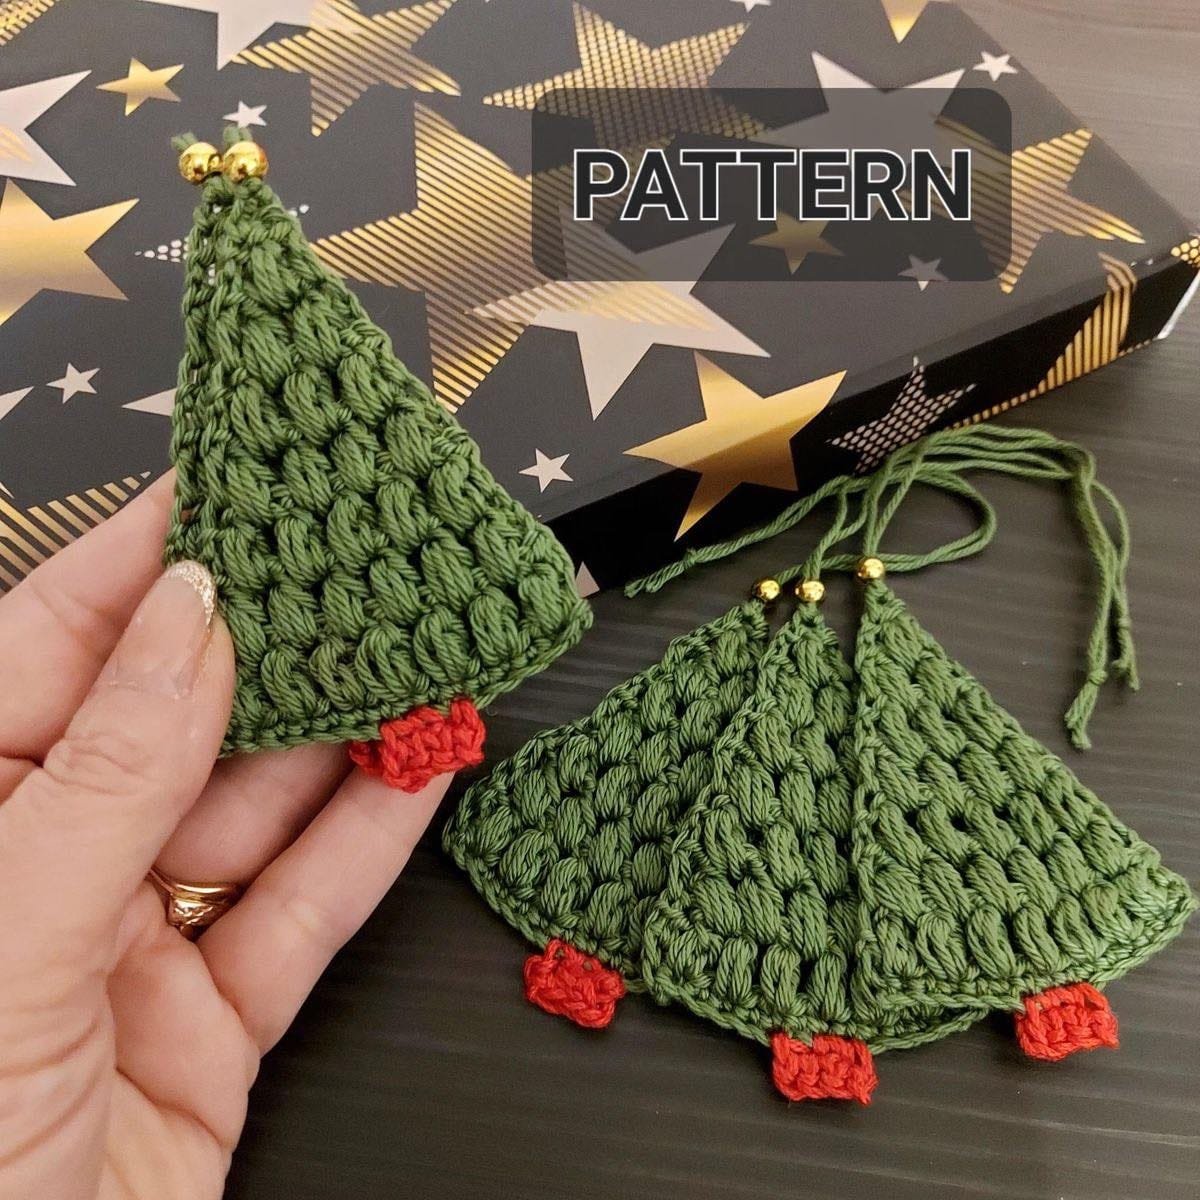
For a classic Christmas look, use traditional green yarn and decorate with tiny red beads or buttons to resemble ornaments. Add a yellow or gold crocheted star on top, and maybe a brown base for the trunk to mimic real pine trees.
If you prefer a modern minimalist style, try white or cream yarn with subtle metallic touches. Use silver thread or small pearls for a snowy, elegant effect. These minimalist trees look beautiful on mantels or dinner tables.
For a whimsical theme, explore bright and pastel colors — pink, blue, lavender, or mint. Add pom-poms, mini bows, or even glitter yarn for extra charm. This approach is especially great for decorating children’s rooms or festive parties.
You can also experiment with different shapes and textures. For example, use puff stitches to create a fluffy appearance or bobble stitches for a textured, pinecone-like look. Adding small tassels or fringe at the bottom can give your tree a rustic, handmade vibe.
If you like eco-friendly crafts, consider making your trees from recycled yarn or leftover scraps from other crochet projects. Mix various textures and colors to create patchwork-style trees that are as sustainable as they are unique.
Whether you make a single standout tree or a whole set in different sizes, your creations will spread warmth and festive cheer wherever they’re displayed.
Tips for Displaying and Gifting
Once your Crochet Ornament Trees Pattern is complete, the fun part is showing them off or giving them as heartfelt gifts. Handmade items always carry a special value, especially during the holidays.
To display your trees, arrange them in clusters on your mantle, windowsill, or coffee table. Grouping them in odd numbers (three or five) creates a visually pleasing setup. You can also place them on a tray with fairy lights or pinecones for a cozy, festive centerpiece.
If you prefer hanging decorations, attach a loop of yarn or ribbon to the top of each tree and use them as Christmas tree ornaments. They add a personal and charming touch to your holiday décor, far more meaningful than store-bought items.
Crochet trees also make perfect gifts. Place one in a small box with tissue paper, and it becomes a thoughtful handmade present for friends, coworkers, or teachers. You can even personalize each tree with initials, themed colors, or mini tags saying “Made with Love.”
Another idea is to use your crochet trees as gift toppers. Tie them onto wrapped presents for an extra layer of beauty and creativity. The recipient can later use it as an ornament, making your gift both decorative and useful.
Finally, don’t forget to take photos of your finished trees to share with your crafting community or keep as inspiration for next year’s projects. Your creativity deserves to be celebrated and shared!
FAQ
Q1: Can beginners make the Crochet Ornament Trees Pattern?
Yes! This project is perfect for beginners. It uses simple stitches like chain, single crochet, and double crochet. Once you understand the basic pattern, you can easily adjust the size and decorations.
Q2: What type of yarn works best for this pattern?
Cotton or acrylic yarn is ideal. Cotton provides structure and clarity in stitches, while acrylic is more flexible and gives a soft finish. Metallic or sparkly yarns can also be used for a festive effect.
Q3: Can I make the trees flat instead of 3D?
Absolutely. Simply skip the stuffing step and block your tree flat. Flat trees are great as ornaments, bookmarks, or gift tags.
Q4: How can I add lights to my crochet trees?
You can gently weave micro LED string lights through the stitches before closing the tree. Battery-operated lights work best for safety and convenience.
Q5: How long does it take to complete one crochet ornament tree?
Depending on your skill level, a small tree can take 1–2 hours. Larger or more detailed designs might take up to 4 hours, especially if you add embellishments.
Q6: Are these trees washable?
Yes, but wash them gently by hand in cold water and let them air dry to keep their shape. Avoid using a dryer or strong detergents.
Conclusion
The Crochet Ornament Trees Pattern brings together creativity, warmth, and the holiday spirit in a single project. It’s a chance to turn simple yarn into charming Christmas decorations that brighten up any space. From materials to creative ideas, this guide has covered everything you need to make beautiful crochet trees that reflect your personal touch.
Whether you’re crafting for fun, for gifts, or to decorate your home, each tree you make will hold a bit of your personality and care. Take your time, enjoy the process, and don’t hesitate to experiment with colors, textures, and embellishments.
If you followed this tutorial, share your experience and thoughts! Leave a sincere opinion and suggestions — your feedback helps make every new creation even better.
Happy crocheting, and may your handmade trees fill your holiday season with joy and light!

