If you’re looking for a fun, creative, and practical craft project, this Crochet Flower Pen Tutorial is the perfect choice. This handmade piece combines the charm of crochet with the everyday utility of a pen, making it a wonderful gift idea or a delightful desk accessory. Whether you’re an experienced crocheter or just beginning, this tutorial will guide you step by step through the process of creating your own crochet flower pen.
One of the best things about the Crochet Flower Pen Tutorial is how versatile and personal the final product can be. You can choose your favorite yarn colors, flower types, and embellishments to match your personality or to make themed gifts for loved ones. Plus, it’s a great way to use up yarn scraps while creating something beautiful and useful.
In this article, you’ll learn how to crochet a flower, attach it securely to a pen, and add those special touches that make your flower pen truly unique. We’ll explore the materials you need, tips for success, and variations you can try. This guide is designed to be beginner-friendly but also includes ideas to inspire more advanced crocheters to take it further.
Materials You Need for a Crochet Flower Pen
To begin your Crochet Flower Pen Tutorial, you’ll need a few basic materials that are easy to find and affordable. This project is budget-friendly, and chances are you already have most of what you need at home.
First, you’ll need a standard ballpoint pen. Choose one with a removable cap or an easy-to-wrap barrel. Thin pens are easier to handle when wrapping them in yarn and attaching the flower.
Next, select your yarn. Acrylic or cotton yarn works best for this kind of project. Medium-weight yarn is preferred, but lighter yarns can be used for more delicate results. Choose bright or pastel colors for a cheerful look.
You’ll also need a crochet hook that matches the weight of your yarn, usually size 3.5mm to 5mm. A yarn needle and scissors will help you finish the project neatly.
To secure your flower to the pen, use hot glue or craft glue. If you prefer a removable option, you can crochet a sleeve that slides onto the pen. This adds a layer of versatility to your creation.
Finally, consider adding embellishments like small buttons, leaves, or beads to enhance the look of your crochet flower. These extras can give your project a professional, detailed finish.
How to Crochet the Flower
The centerpiece of this Crochet Flower Pen Tutorial is the flower itself. There are many flower designs to choose from, but let’s start with a simple five-petal flower that’s easy and quick to make.
Begin with a magic ring and crochet five single crochets into the ring. Slip stitch to join, and you have your center. This creates a tight and neat base for your petals.
To make each petal, chain two, then crochet two double crochets into the same stitch. Chain two again and slip stitch into the next stitch. Repeat this pattern around the ring to form five full petals.
Once all petals are complete, fasten off the yarn and leave a long tail for sewing. Use the yarn needle to weave the tail through the back of the flower and secure it tightly.
You can create a layered effect by making two flowers of different sizes and sewing them together. This gives your pen a fuller and more decorative look.
Try experimenting with different flower patterns like daisies, roses, or sunflowers to match various seasons or themes. The Crochet Flower Pen Tutorial allows room for creativity in every stitch.
When your flower is ready, you’re one step closer to completing your crochet pen. The next step is attaching the flower to the pen securely and decorating the pen barrel.
Attaching the Flower and Wrapping the Pen
Attaching the flower to your pen is a crucial part of this Crochet Flower Pen Tutorial. It ensures that your flower stays in place while maintaining the pen’s usability and aesthetic appeal.
Start by applying a small amount of glue to the top of the pen. Press the back of your crochet flower firmly onto the glue and hold it in place for a few seconds until it’s secure.
For extra support, you can use the yarn tail to stitch the flower onto a crocheted sleeve that wraps around the pen. This method is ideal if you want the option to remove or switch out flowers.
To wrap the pen, begin at the base near the tip. Apply a thin line of glue in sections and start wrapping the yarn tightly around the pen as you move upward.
Keep the yarn even and snug, ensuring no gaps are visible. Take your time during this step, as a smooth wrap will enhance the final look of your crochet flower pen.
Once you reach the top, cut the yarn and secure the end with a dab of glue. Tuck in any loose strands with a yarn needle for a polished finish.
You can also crochet a fitted sleeve in single crochet stitches, creating a more uniform and cushioned grip for the pen. This adds a tactile element to your project.
Creative Variations and Gift Ideas
This Crochet Flower Pen Tutorial is just the beginning—there are countless ways to customize and personalize your flower pens. These pens make charming gifts, party favors, or even fundraising items.
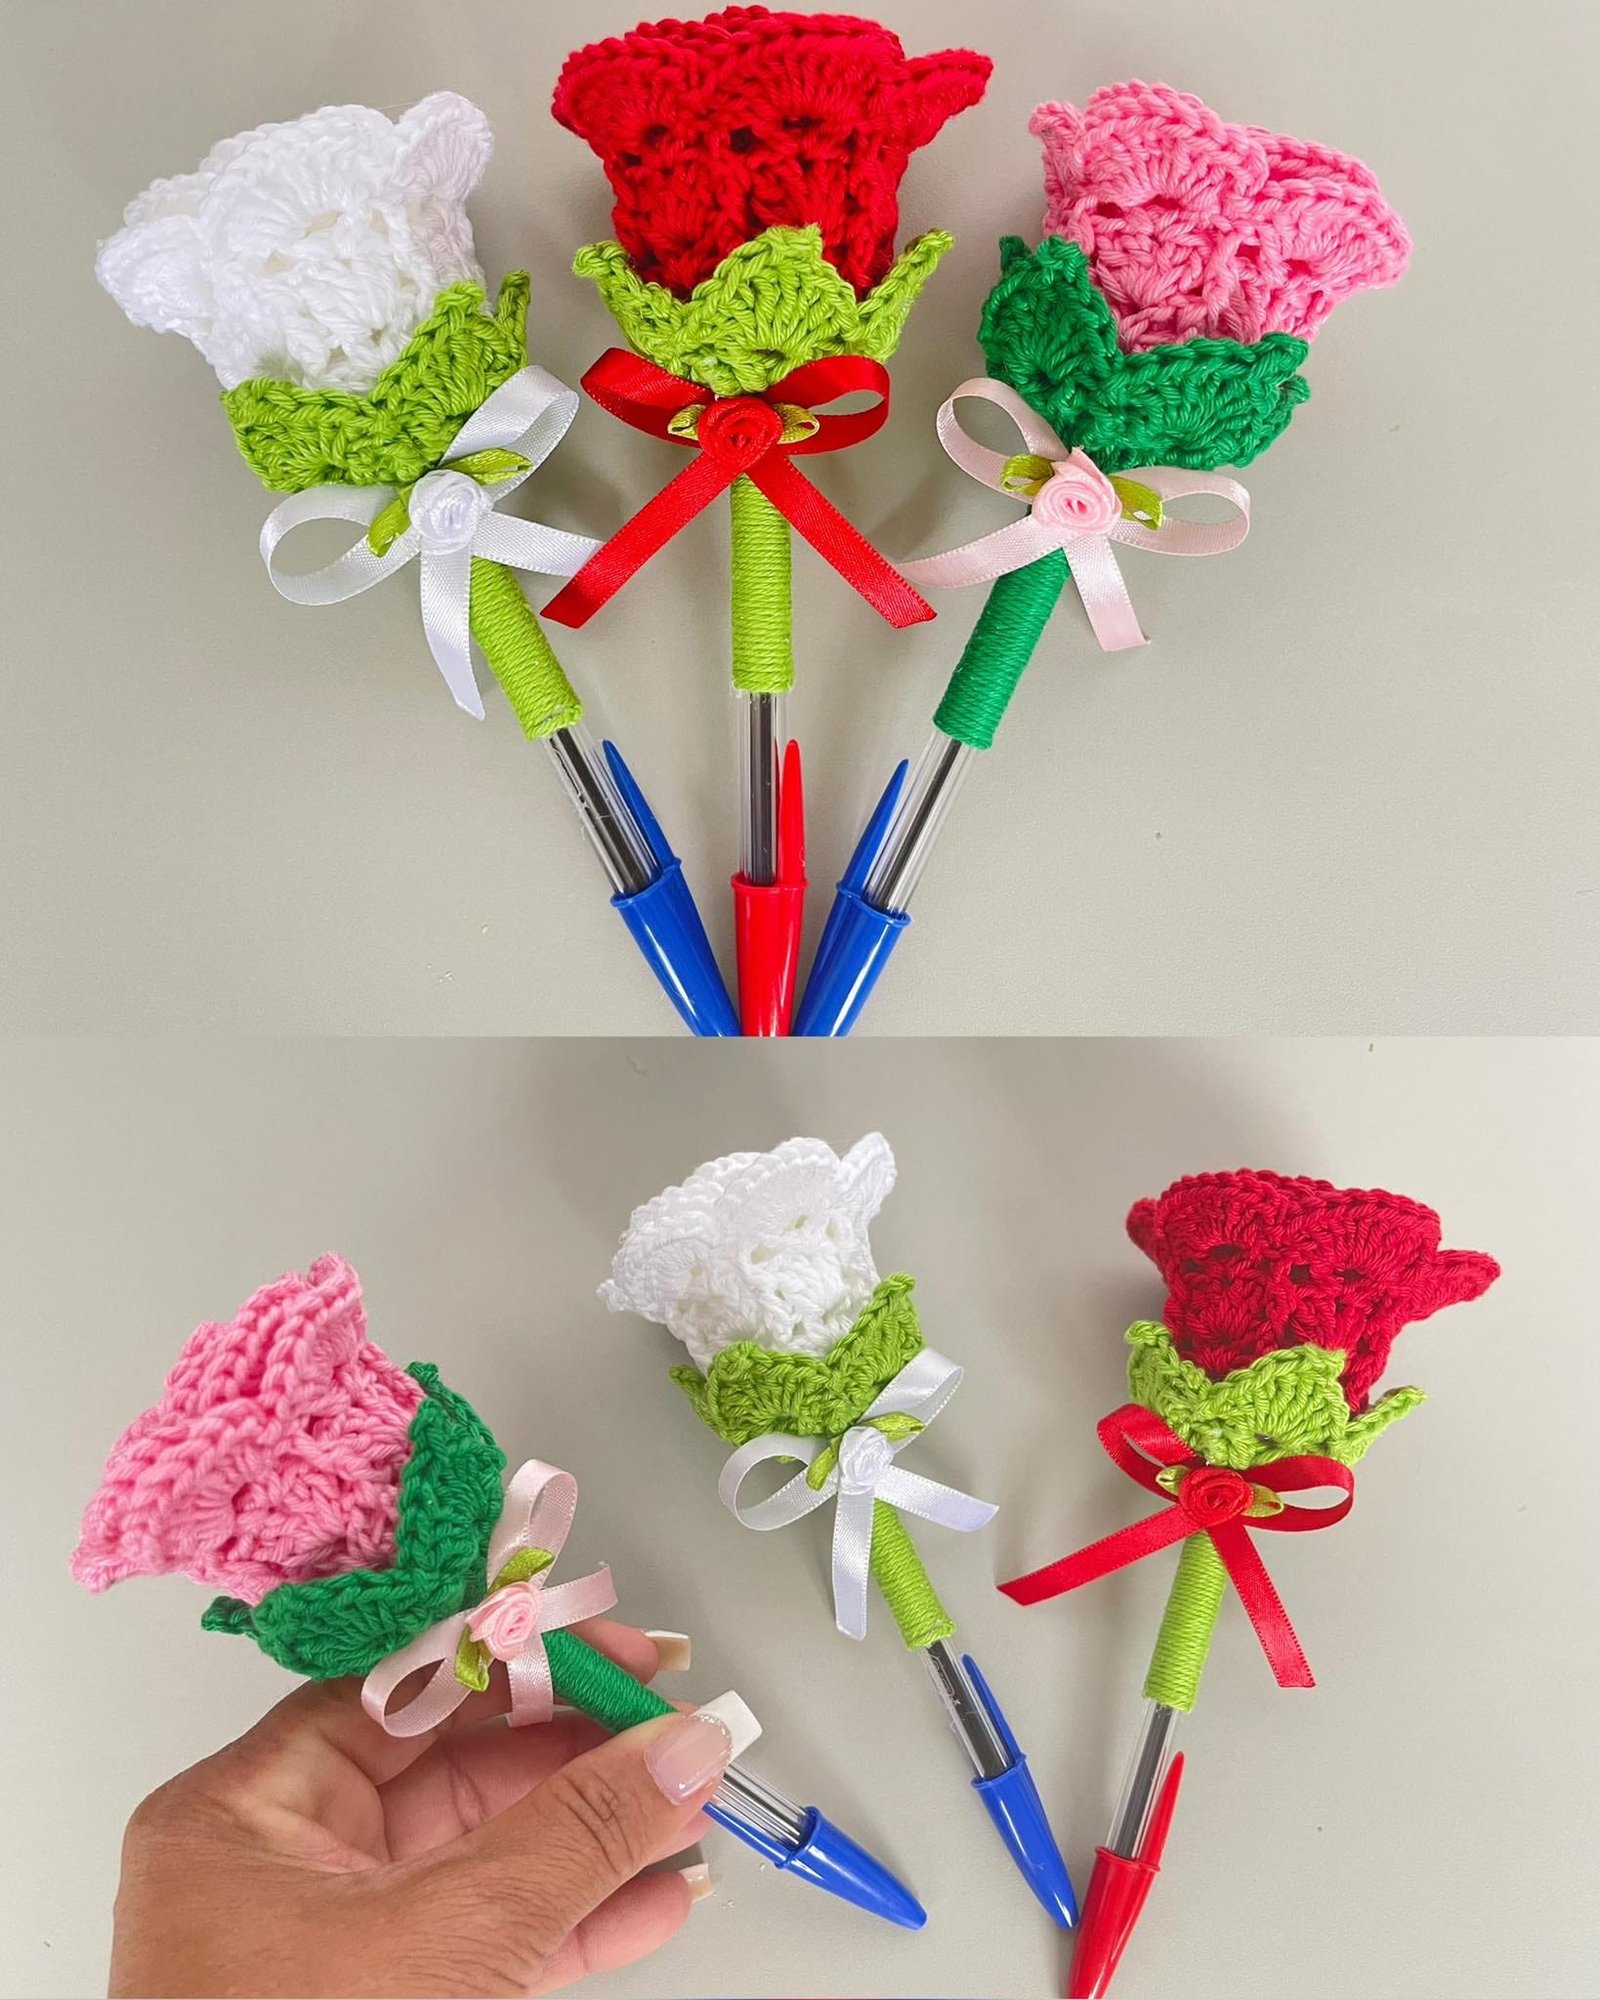
You can create sets of pens with seasonal flower designs, such as poinsettias for Christmas or tulips for spring. Matching the flower colors to holidays or events adds a thoughtful touch.
Consider making flower pens for teachers, nurses, or coworkers. Adding a gift tag or wrapping them in ribbon makes them look professionally made and heartfelt.
If you enjoy theme crafting, try making pens based on fictional characters or color schemes. A pink rose for Valentine’s Day or a daisy for a garden party can be great starting points.
This project is also a fun activity for craft fairs or crochet classes. It’s beginner-friendly but leaves room for creative expression and technical growth.
Add embellishments like glitter glue, pearl beads, or crocheted leaves to make each flower pen unique. These small details elevate the pen from simple craft to cherished keepsake.
Keep a few extra flower pens in your own home, especially on your desk or in a pencil holder. They brighten up the space and serve as a daily reminder of your creativity.
FAQ: Crochet Flower Pen Tutorial
What type of yarn should I use for flower pens?
Medium-weight acrylic or cotton yarn works best. It’s easy to handle and holds its shape well for small projects like flowers.
Can beginners follow this Crochet Flower Pen Tutorial?
Yes! This tutorial is designed for beginners. The flower pattern is simple and the steps are explained clearly for those new to crochet.
How long does it take to make one flower pen?
Depending on your skill level, each pen takes around 30 to 45 minutes to complete, including the flower and wrapping.
Is it necessary to glue the flower to the pen?
Glue helps secure the flower, but you can also crochet a sleeve to attach the flower without adhesives if you prefer a removable version.
Can I wash the flower pens?
Since most pens are not washable, it’s best to spot clean the flower with a damp cloth. Avoid submerging the pen in water.
Can I sell the flower pens I make?
Absolutely. Handmade crochet flower pens are popular at craft fairs, online shops, and markets. Just make sure your designs are original or adapted from free patterns.
Conclusion
The Crochet Flower Pen Tutorial provides a delightful way to combine creativity with practicality. From selecting your favorite yarn colors to wrapping the pen and designing a custom flower, this project invites personal expression at every step. It’s a great choice for gifts, decorations, or simply bringing joy to your workspace.
By following this step-by-step guide, even beginners can create beautiful and functional crochet pens. With the right materials, a bit of patience, and a spark of inspiration, your flower pen will be something you’re proud to share or gift.

