If you’ve been searching for the perfect cozy project to embrace the autumn season, the Crochet Fall Gnome Pattern might just be your new favorite. These adorable little characters bring charm, warmth, and a touch of seasonal magic to any home decor. Whether you’re crafting for your own fall setup or creating handmade gifts, this pattern is not only enjoyable but also beginner-friendly and highly customizable.
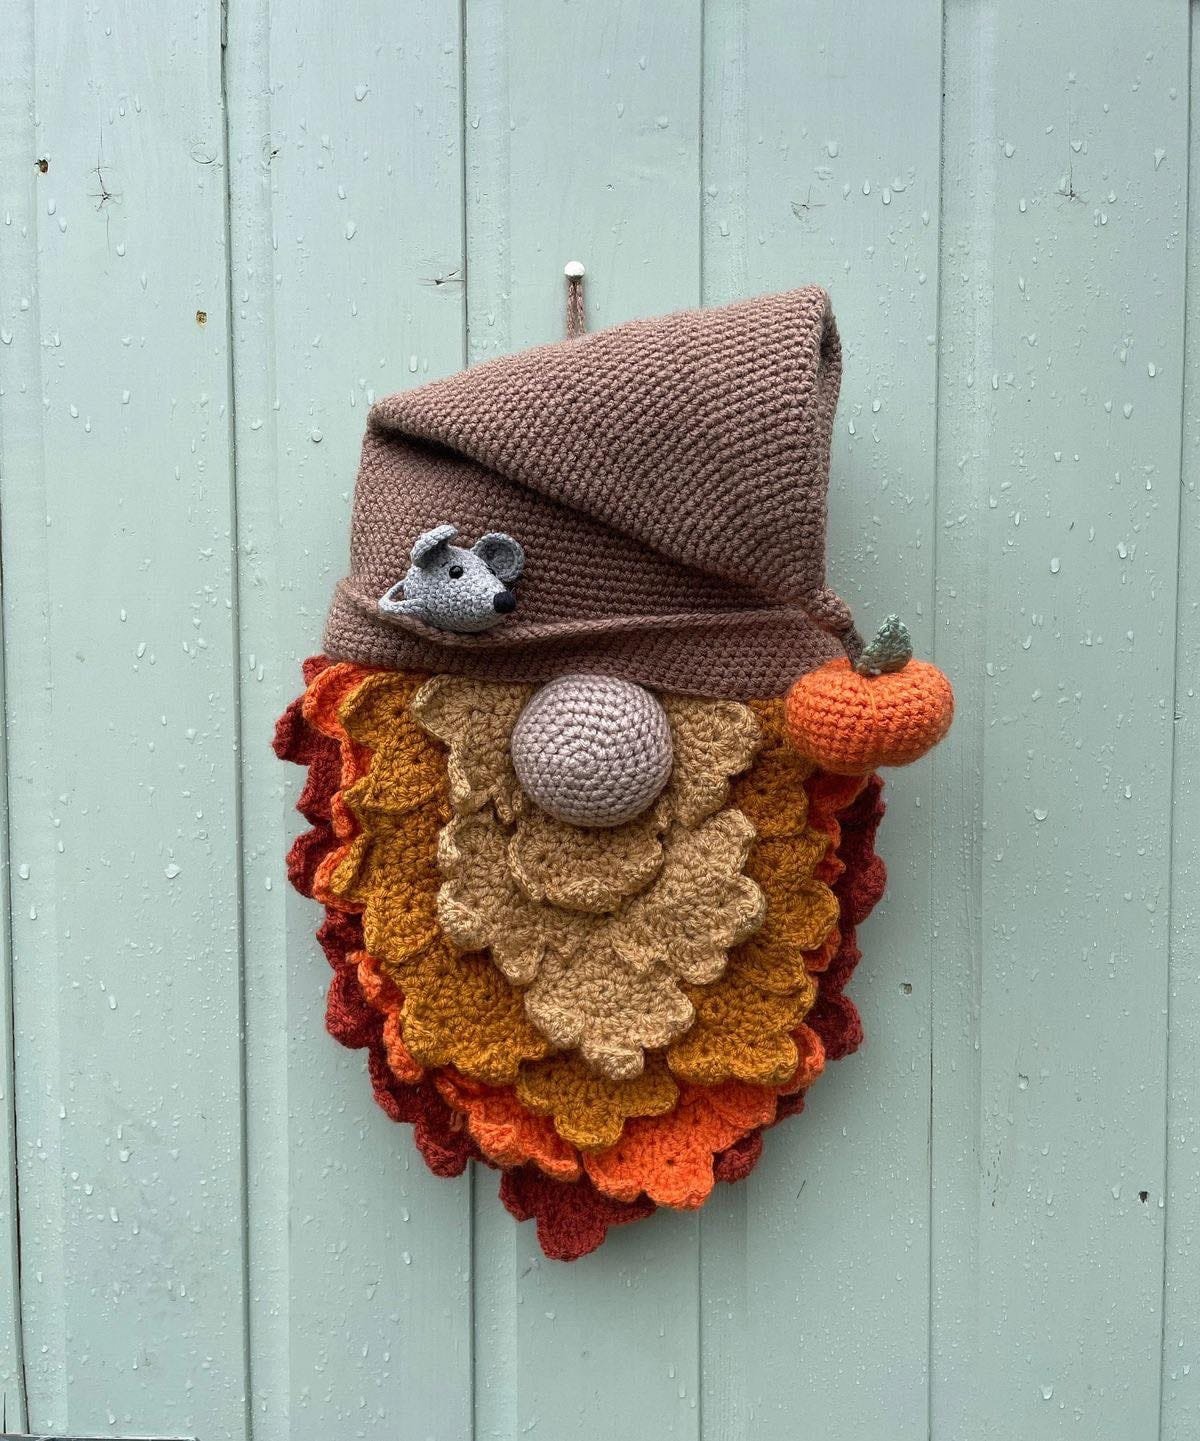
Using the Crochet Fall Gnome Pattern, you’ll be able to create unique gnomes dressed in autumnal hues, complete with bushy beards, pointy hats, and decorative details like pumpkins or leaves. The beauty of this pattern lies in its versatility—swap colors, add accessories, or even turn them into ornaments or door decor. Plus, they’re quick to make and perfect for using up yarn scraps!
In this article, we’ll walk through the essential parts of working with a Crochet Fall Gnome Pattern, including materials, step-by-step guidance, customization ideas, and tips for getting that perfect fall aesthetic. Whether you’re a seasoned crocheter or just picking up your first hook, you’ll find inspiration and clarity to help bring your crochet gnome to life.
Materials and Tools Needed for a Crochet Fall Gnome Pattern
Before diving into the creation process, let’s go over the tools and materials you’ll need. The good news is that most items are probably already in your crochet stash.
You’ll typically need worsted-weight yarn in fall colors—think burnt orange, mustard yellow, earthy brown, and deep reds. These shades evoke the cozy feeling of autumn and make your Crochet Fall Gnome Pattern truly seasonal.
A crochet hook size commonly used for this project is 4mm (G), but always check your tension. If your gnome turns out too loose or floppy, try sizing down.
Polyester stuffing or fiberfill is essential to give your gnome body and shape. Don’t overstuff; you want it to hold form but remain soft and squishy.
A yarn needle will come in handy for sewing all the parts together. The gnome’s beard, hat, nose, and arms are usually created separately and then attached.
Safety eyes or black yarn for stitching eyes add personality to your gnome. Googly eyes can also be used if you want a playful touch.
Optional decorations like small crocheted pumpkins, felt leaves, or buttons can take your Crochet Fall Gnome Pattern to the next level. Get creative and let your gnome tell a story.
How to Crochet the Basic Body of the Fall Gnome
Let’s start with the core of the Crochet Fall Gnome Pattern—the body. This is usually a cylindrical shape, created using single crochet in the round.
Begin with a magic ring and crochet six single crochets into it. This creates the base of the gnome. Pull tight and continue to work in spirals.
Each round involves increasing your stitches evenly to form a flat bottom. By round five or six, you’ll have a solid foundation to begin building upward.
After the base, you’ll continue crocheting without increases to form the height of the gnome’s body. This is the easiest part, and you can even experiment with color changes to simulate clothing.
You’ll want to stuff the body as you go, especially once it reaches about 4–5 inches tall. This prevents gaps and helps shape the gnome.
Once the desired height is reached, finish off and sew the top closed if your hat will be added on top. Some patterns leave it open to attach a pointed hat directly.
This simple cylindrical base is the blank canvas that gives structure to your Crochet Fall Gnome Pattern and opens up all kinds of creative possibilities.
Designing the Hat and Beard for That Fall Flair
No gnome is complete without its classic tall hat and fluffy beard. These two elements give your gnome that whimsical, recognizable charm.
The hat is usually worked in rounds, starting from the tip and increasing outwards. This gives it that long, pointy shape that’s so iconic in gnome design.
Fall colors really shine here—try stripes, solid shades, or even speckles. Adding surface crochet in gold or rust tones can mimic falling leaves.
For the beard, many crafters use loop stitches or attach strands of yarn to simulate hair. You can keep it neat or let it look wild—both are adorable!
A wooden bead or small crocheted ball makes a perfect nose. Place it where the hat meets the beard, just peeking out for that classic gnome look.
Secure the hat to the gnome’s head by sewing or hot glue, depending on how permanent you want it to be. Bend the tip for added personality.
Combining a stylish hat and a flowing beard truly defines the Crochet Fall Gnome Pattern, giving it its rustic, seasonal personality.
Creative Ideas to Customize Your Crochet Fall Gnome Pattern
One of the best things about working with a Crochet Fall Gnome Pattern is how endlessly customizable it is. You can truly let your imagination run wild.
Try making a pumpkin-themed gnome by adding a mini crocheted pumpkin to its hands or hat. It’s a festive touch that screams autumn.
You can also design a scarecrow gnome—use hay-colored yarn for the beard and patchwork colors on the hat. It becomes a fun farm-style variation.
Instead of a standard beard, consider using loop yarn or curly yarn for a whimsical twist. Faux fur yarn can give it a fluffy, cozy effect.
Crochet tiny accessories like acorns, leaves, or sunflowers and sew them onto your gnome’s body or hat. These little touches create a narrative.
Play with sizing. Make mini gnomes for garlands or oversized ones as pillows. Adjusting yarn weight and hook size is all it takes.
Use embroidery to add initials or messages to the hat. Whether for gifting or personal keepsakes, your Crochet Fall Gnome Pattern can be as meaningful as it is cute.
Tips for Displaying or Gifting Your Fall Gnome
After finishing your crochet masterpiece, you’ll want to proudly show it off—or share the love with someone special.
Place your gnome on a fireplace mantel, surrounded by autumn leaves and pumpkins. It’ll instantly bring warmth to your fall decor.
Add your gnome to a wreath. Attach it firmly and surround it with felt leaves, berries, and pinecones. It makes a charming door decoration.
For a unique table centerpiece, position your Crochet Fall Gnome Pattern among candles and rustic wood pieces. It’s perfect for harvest dinners.
Turn your gnome into a hanging ornament by adding a loop at the top of its hat. Great for car mirrors, door handles, or fall trees.
Gifting these gnomes is a hit! Pair them with a handwritten tag or small bag of treats for a handmade seasonal gift that’s full of heart.
For crafters who sell, this pattern makes a great product. Use eco-friendly tags and autumn packaging for that extra professional flair.
Frequently Asked Questions About Crochet Fall Gnome Pattern
What skill level is needed for the Crochet Fall Gnome Pattern?
Most Crochet Fall Gnome Pattern designs are beginner to intermediate level. If you know how to single crochet and increase in the round, you’re ready to start.
How long does it take to make a fall gnome?
On average, one gnome takes 2–4 hours to complete depending on size and complexity. Mini gnomes may take less, while larger or detailed ones can take longer.
Can I use different types of yarn?
Yes! While worsted-weight yarn is most common, feel free to experiment. Bulky yarn creates large plush gnomes, and cotton yarn offers a neat finish.
How do I wash a crochet gnome?
Spot cleaning is recommended. If needed, gently hand wash and air dry to maintain shape and prevent damage to embellishments.
Can I sell gnomes made from this pattern?
Yes, as long as the pattern allows for it. Always give credit to the designer if required, but selling finished Crochet Fall Gnome Pattern creations is popular in craft markets.
Are these gnomes safe for kids?
Yes, with some caution. Avoid small parts like safety eyes for babies or toddlers. Instead, embroider eyes to make them safer.
Conclusion
The Crochet Fall Gnome Pattern is more than just a fun project—it’s a celebration of creativity, color, and the cozy joy of fall. With just a few basic materials and a touch of imagination, you can craft your very own gnome that brings charm and warmth to any space.
We’ve walked through the essentials: materials, crafting the body, designing accessories, and even how to display or gift your finished gnome. Now it’s your turn to pick up your hook and bring your own autumn friend to life.

