If you love crochet and also have a soft spot for cute mascots, then the Crochet Duolingo Free Pattern is the perfect project for you. Inspired by the famous green bird that motivates millions to learn languages—especially English—this crochet design combines fun crafting with a touch of educational charm. Whether you want to make it as a gift, a personal keepsake, or just to brighten up your workspace, this project will quickly become one of your favorites.
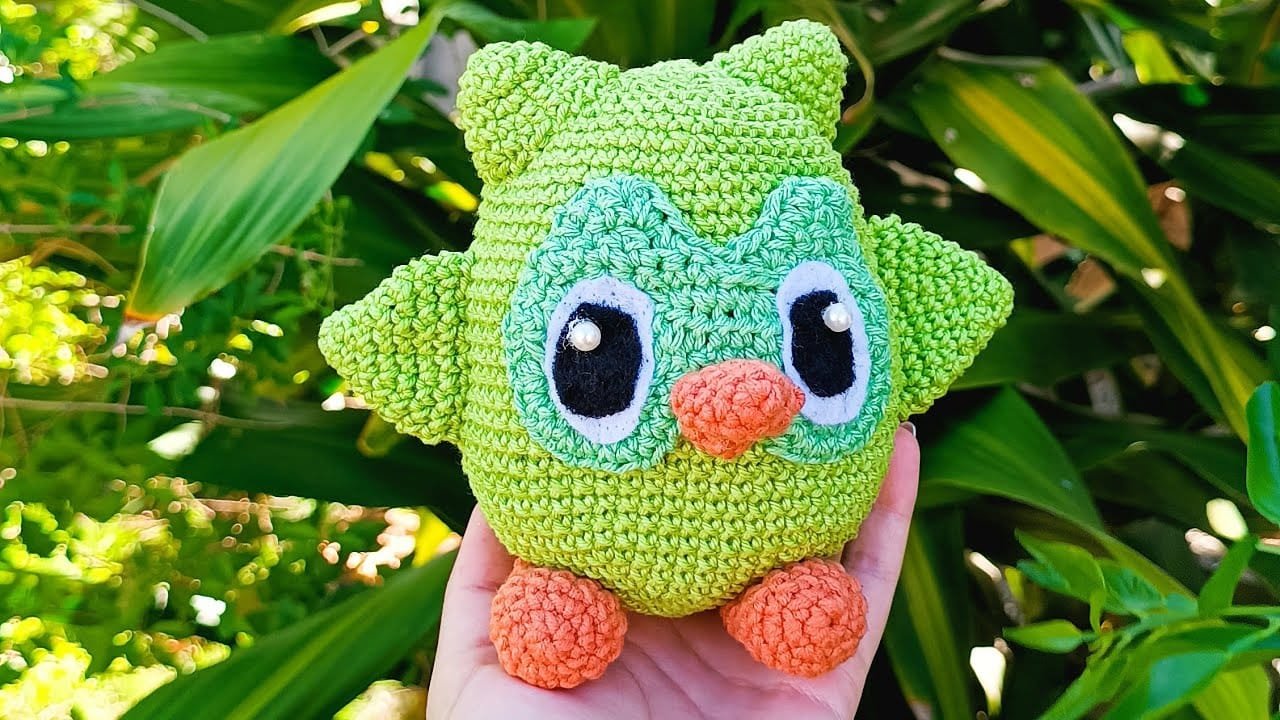
The Crochet Duolingo Free Pattern captures every charming detail of the owl-like bird: the big expressive eyes, cheerful wings, and that unmistakable green color. Even if you are still learning English yourself, working on this crochet can be a fun way to keep the Duolingo spirit alive while practicing your craft skills. You’ll find it’s a relatively simple pattern, great for both beginners and experienced crocheters who want a quick yet adorable project.
In this article, we’ll explore not only how to make the Crochet Duolingo Free Pattern but also tips for customizing it, what materials work best, and ways to display or gift your creation. From choosing the right yarn to adding personal touches, this guide will help you create your very own little English-teaching bird in yarn form.
Choosing the Right Materials for the Crochet Duolingo Free Pattern
When starting your Crochet Duolingo Free Pattern, the materials you select will greatly affect the final result. Using the right yarn and hook size ensures your project looks neat and holds its shape well. Soft acrylic or cotton yarn is ideal, as it’s easy to work with and provides a smooth finish.
Color accuracy is important because the Duolingo bird is instantly recognizable by its bright green hue. Choose a vibrant green yarn for the body and smaller amounts of white, black, and orange for the eyes and beak. This will help your project stay true to the original design while adding to its charm.
You’ll also need a suitable crochet hook—commonly a 3.0mm to 3.5mm hook works well for amigurumi projects like this. Smaller hooks help create tighter stitches, ensuring the stuffing stays inside and the shape holds well over time.
For stuffing, use high-quality polyester fiberfill. This keeps the bird soft yet firm, allowing it to stand or sit without collapsing. Avoid overstuffing, as this can distort the shape of your stitches.
Don’t forget small details like a yarn needle for sewing parts together and stitch markers to help you keep track of rounds. These tools make the process much easier, especially for beginners.
Lastly, remember that while the Crochet Duolingo Free Pattern is cute, durability matters if it will be handled often. Choose materials that withstand wear and tear so your little green bird remains in perfect condition.
Step-by-Step Guide to Making Your Crochet Duolingo Free Pattern
The first step in creating your Crochet Duolingo Free Pattern is starting with the body. This is usually worked in continuous rounds using the amigurumi technique, which means you won’t join rounds but keep spiraling upward. This method creates a smooth finish without visible seams.
Once the main body is complete, move on to shaping the wings. These should be slightly curved to give that playful, welcoming look the Duolingo bird is known for. Sew them securely to the sides, making sure they’re positioned symmetrically.
The feet are a small but important detail. Using orange yarn, crochet two tiny feet that allow your bird to stand or be positioned on a flat surface. This adds both realism and stability to the finished project.
The eyes are where much of the character comes through. Use white yarn for the base, add a black pupil, and optionally embroider a small white dot for extra sparkle. Attaching safety eyes is another option if you prefer a more polished look.
After all parts are crocheted, assemble them carefully. Start with the body, attach the wings, then the feet, and finally the eyes and beak. Sewing pieces together neatly will ensure a professional finish.
Take your time with finishing touches. Trim any excess yarn ends, smooth the stuffing, and gently shape the bird so it looks balanced and symmetrical. This step is where your project truly comes to life.
Creative Ways to Customize the Crochet Duolingo Free Pattern
One of the best parts of making a Crochet Duolingo Free Pattern is the chance to customize it. You can adjust colors, add accessories, or even make themed versions to match seasons or holidays.
If you’re learning English with Duolingo, consider giving your crochet bird a tiny book or a mini chalkboard accessory made from felt. These props make it even more charming and relatable to the learning theme.
Seasonal versions are also fun—give your bird a Santa hat for Christmas, bunny ears for Easter, or sunglasses for summer. This turns a single pattern into a versatile project that you can adapt throughout the year.
Another idea is to experiment with different yarn textures. While smooth acrylic is standard, a soft fuzzy yarn can give your Duolingo bird a plush-like feel, making it even more huggable.
If you’re making it as a gift, you can personalize it with the recipient’s favorite colors or even add their initials on a tiny felt badge sewn to the bird’s chest. These small personal touches make the gift extra meaningful.
For collectors, making a set of Duolingo birds in different expressions—happy, surprised, or determined—can turn your crochet hobby into a display-worthy series.
Displaying and Caring for Your Crochet Duolingo Free Pattern
Once your Crochet Duolingo Free Pattern is complete, it’s time to show it off. Displaying your creation can be as simple as placing it on a bookshelf, desk, or nightstand where it can bring a smile every day.
If you want to incorporate it into your study space, position it near your language-learning materials. It can serve as a fun reminder to keep up with your lessons.
For crafters who sell their creations, photographing your Duolingo bird in good lighting with clean backgrounds will make it look even more appealing to potential buyers.
When it comes to caring for your crochet bird, keep it away from direct sunlight to prevent colors from fading. If it gets dusty, a gentle hand wash or spot cleaning with mild soap and water will keep it fresh.
Avoid machine washing, as the agitation can distort the shape and loosen stitches. Instead, handle it gently to maintain its quality.
With proper care, your Crochet Duolingo Free Pattern can last for years as a cherished handmade item, serving both as a decorative piece and a symbol of your learning journey.
FAQ – Crochet Duolingo Free Pattern
1. Is the Crochet Duolingo Free Pattern suitable for beginners?
Yes, the pattern is beginner-friendly, especially if you’re familiar with basic amigurumi techniques. Clear instructions and simple shapes make it easy to follow.
2. How long does it take to complete the Crochet Duolingo Free Pattern?
Depending on your skill level, it can take anywhere from 4 to 8 hours to complete, spread over a couple of days.
3. Can I change the colors in the pattern?
Absolutely! While green is the iconic Duolingo color, you can customize it with any shades you like for a unique version.
4. What type of yarn works best for this project?
Soft acrylic or cotton yarn is recommended for a smooth finish and durability. Choose a vibrant green for the best resemblance.
5. Do I need special tools to make this pattern?
No, just a standard crochet hook, yarn needle, stitch markers, and fiberfill stuffing are enough to complete it.
6. Can I sell items made from the Crochet Duolingo Free Pattern?
Yes, as long as you follow any guidelines from the pattern creator and note that it’s fan art inspired by Duolingo.
Conclusion
The Crochet Duolingo Free Pattern is a delightful project that brings together creativity, crafting, and the joy of learning. From choosing the right materials to adding personal touches, this handmade bird is more than just a toy—it’s a motivational companion for your language journey. Whether for yourself or as a thoughtful gift, it’s sure to spark smiles and admiration.
If you’ve tried making this pattern, I’d love to hear your honest opinion and any suggestions you have for improving the process. Your feedback can inspire even more creative ideas for fellow crochet enthusiasts.

