Creating a crochet book cover pattern is one of the most satisfying and stylish ways to protect your favorite books while showcasing your creativity. From students looking to decorate their notebooks to avid readers hoping to preserve a beloved paperback, the beauty of a handmade book cover lies in its uniqueness and personal touch. If you’ve been looking for a practical yet artistic crochet project, this might just be what you need.
A crochet book cover pattern can be designed to fit a variety of book sizes, making it a versatile gift or personal craft. Whether you’re crocheting a cover for a novel, a planner, or even a Bible, this project allows you to choose your favorite yarn colors and stitches to make something truly special. Not only do they look adorable on a bookshelf or coffee table, but they also protect your book from wear, dirt, and damage.
In this article, you’ll learn how to create your own crochet book cover pattern step by step. We’ll cover materials, popular stitches, customization options, and provide helpful tips for beginners. Let’s dive in and explore everything you need to know to bring your book cover idea to life.
Materials You Need for a Crochet Book Cover Pattern
Before diving into the pattern, it’s important to gather all the necessary materials. Choosing the right supplies ensures that your final product is both functional and visually appealing.
First, you’ll need yarn. Cotton yarn is a top choice because it’s soft yet sturdy. Acrylic yarn is also a good option, especially for beginners, as it’s affordable and comes in many colors. Make sure to pick a yarn weight suitable for your project – medium (worsted weight) yarn is a popular and practical choice.
Next is the crochet hook. The size of your hook will depend on your yarn’s weight. Most worsted-weight yarns work well with a 4.5mm to 5.5mm hook. Always check the yarn label for recommendations and adjust if necessary based on your tension.
You will also need scissors, measuring tape, and a yarn needle for weaving in ends. Optional tools include buttons, elastic bands, or fabric lining if you want to add extra features to your cover.
Measuring your book is a crucial step. Measure the height, width (both front and back), and the spine. Add a little extra for seam allowance and stitch stretch.
Finally, decide if you’d like to add pockets, pen holders, or other features. Planning your design ahead of time will help guide your pattern and ensure a satisfying result.
Step-by-Step Guide to Crafting Your Book Cover
Now that you have your supplies ready, it’s time to create your crochet book cover pattern. This step-by-step method is simple, beginner-friendly, and can be customized to fit almost any book.
Start by making a foundation chain that matches the width of your open book, including the spine. Add a few extra chains for a bit of wiggle room. Always lay the chain flat next to the book to double-check sizing before continuing.
Work single crochet (sc) or half double crochet (hdc) stitches across the chain. These stitches create a solid fabric, which is ideal for a book cover. Continue working rows until the height of your cover matches the height of your book.
Once the main rectangle is complete, create two flap pieces that will hold the book inside. These flaps should be about 2.5 to 3 inches wide and the same height as your book. You can crochet them separately or work them as extensions from the main panel.
Use a yarn needle to sew the flaps to the main piece. Make sure the stitches are secure but flexible enough to allow the book to slide in easily. This is where careful measuring pays off.
If desired, add buttons or ties to keep your book closed. These features not only add style but help keep your book protected when placed in a bag or carried around.
Test the fit by sliding your book inside and making any adjustments. Once everything fits snugly, weave in all the yarn ends and admire your handiwork!
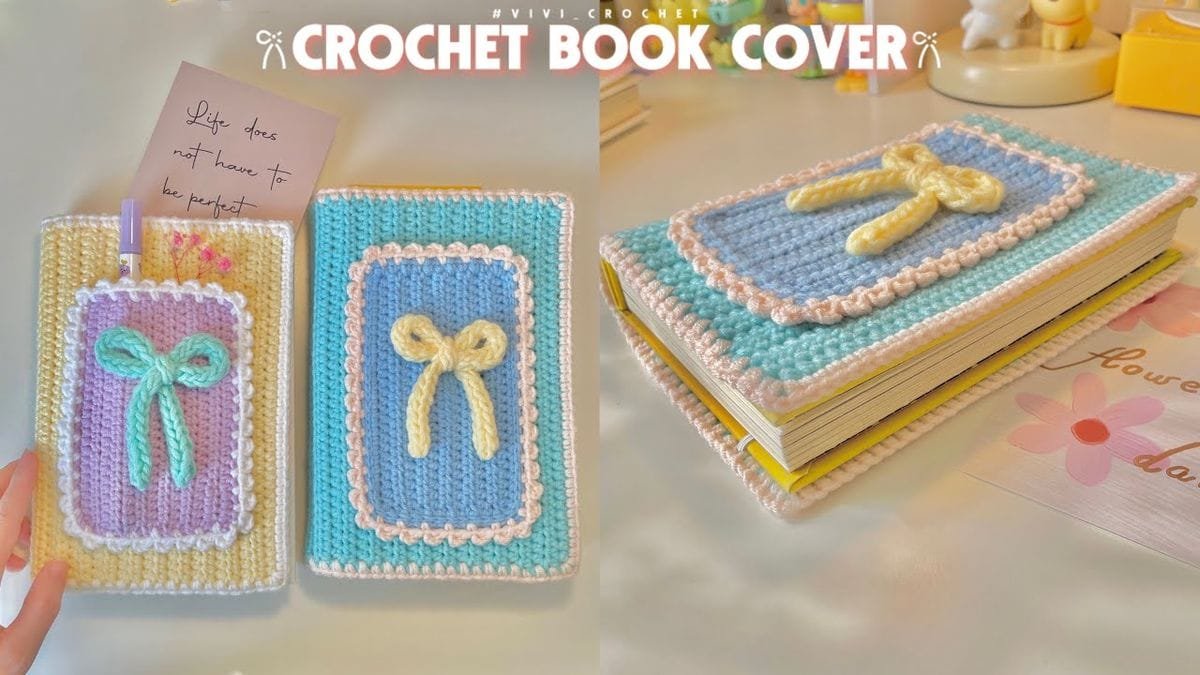
Customization Ideas for Your Crochet Book Cover
One of the best things about making your own crochet book cover pattern is the ability to customize it. There are countless ways to add personality to your design, from color choices to stitch patterns.
Using variegated yarn can create a multicolor effect without changing skeins. This is perfect for those who want a vibrant, artistic cover without too much effort.
Consider using different stitch patterns. A basic cover can be elevated by switching to shell stitch, moss stitch, or waffle stitch for added texture and interest. Just be mindful that more complex stitches may affect sizing, so measure as you go.
Add a button closure or decorative ties. You could also sew on a fabric lining for a more polished finish, especially if you want a softer interior to protect delicate book covers.
For students or professionals, consider adding a pen holder loop or a small pocket for notes. These practical additions turn a simple book cover into a multifunctional tool.
If you’re giving the book cover as a gift, embroider initials or a small motif onto the front. Handmade gifts with personalized touches are always appreciated and show thoughtfulness.
Finally, create a matching bookmark using leftover yarn. It’s a great way to use scraps and adds a cohesive, coordinated look to your book accessory.
Tips for Beginners Trying a Crochet Book Cover Pattern
If this is your first time trying a crochet book cover pattern, don’t worry – this project is great for beginners and doesn’t require advanced techniques. Here are a few tips to help you succeed.
Start with simple stitches. Stick to single or half double crochet when you’re new. These stitches form a dense and stable fabric that will protect your book well.
Measure twice, crochet once. Taking the time to measure your book properly ensures the finished cover will fit like a glove. Use a notebook of similar size for practice if you’re unsure.
Be mindful of gauge and tension. Everyone crochets differently, so your gauge may be looser or tighter than a pattern suggests. Always make a small test swatch before starting the full project.
Don’t be afraid to undo your work. Mistakes happen, especially when learning. The beauty of crochet is that you can easily unravel and start again without wasting materials.
Use stitch markers if you struggle to keep track of row beginnings or ends. This is especially helpful when working larger covers or flap pieces.
And finally, enjoy the process. Crochet is relaxing and rewarding. Even if your first book cover isn’t perfect, each project builds your skills and brings you one step closer to mastery.
Frequently Asked Questions (FAQ)
What is the best yarn for a crochet book cover pattern?
Cotton or acrylic yarn works best due to their durability and easy care. Cotton provides a smooth, professional finish, while acrylic offers more flexibility and color options.
How long does it take to crochet a book cover?
For beginners, it might take 4–6 hours depending on the complexity of the pattern and size of the book. Experienced crocheters can complete one in 2–3 hours.
Can I wash a crochet book cover?
Yes! If you use machine-washable yarn like cotton or acrylic, most book covers can be gently washed by hand or on a delicate cycle. Always let them air dry flat.
Do I need to block my crochet book cover?
Blocking is optional but recommended, especially if your stitches are uneven or if the cover doesn’t lay flat. Light steam blocking with a damp towel can help shape the fabric.
Can I make a cover for any book size?
Absolutely. Just measure your book’s height, width, and spine, then adjust your foundation chain and row count accordingly. Custom sizing is one of the benefits of crocheting your own.
What are good beginner stitches to use?
Single crochet and half double crochet are ideal. They create tight, solid fabrics that are perfect for protecting your books from dust and bending.
How do I make the cover stay closed?
You can add button closures, elastic bands, or crocheted ties to secure your book. These additions also enhance the aesthetic of the final product.
Can I sell crochet book covers I make?
Yes, handmade crochet book covers are popular at craft fairs and online. Just ensure your pattern is original or free for commercial use if you’re following someone else’s instructions.
What if I want to add a pocket or pen holder?
You can easily crochet a small rectangle and sew it onto the inside or outside of the cover. Measure carefully and attach with sturdy stitches for best results.
Is this project suitable for kids or teens learning to crochet?
Yes, it’s a fun and creative project for younger crocheters. They can customize the colors and practice basic stitches while creating something useful for school or journaling.
Conclusion
The crochet book cover pattern is a perfect blend of creativity, functionality, and personalization. Whether you’re new to crochet or a seasoned pro, this project offers endless ways to express your style while protecting your favorite reads.

