The Classic Granny Square Tutorial is one of the most beloved learning paths for anyone entering the world of crochet. These squares have been used for generations to create blankets, bags, clothing, home décor, and countless handmade treasures.
Their beauty lies in simplicity: repetitive stitches, vibrant colors, and a structure that is easy to customize and expand. Whether you are a beginner or an advanced crocheter, learning how to make a classic granny square is a foundational skill you will use repeatedly throughout your crafting journey.
When following a Classic Granny Square Tutorial, you learn the core techniques of crochet such as chaining, double crochet stitches, joining rounds, and finishing with clean edges.
These skills naturally build your confidence and allow you to progress to more complex patterns. Many crocheters fall in love with granny squares because they offer a relaxing rhythm — once you know the basic steps, your hands move almost automatically.
The repetitive nature makes it an excellent project to enjoy while watching TV, listening to music, or relaxing in nature.
The popularity of the Classic Granny Square Tutorial also comes from creative flexibility. You can choose bold colors, soft tones, solid patterns, or multicolored combinations. Each square becomes a small canvas where your imagination shines. Whether you prefer traditional vintage colors or modern minimalist palettes, granny squares adapt to every style. They are portable, quick to make, and incredibly satisfying — no wonder they’ve remained a timeless crochet classic loved by all ages.
Understanding the Basics of the Classic Granny Square
The first step in mastering the Classic Granny Square Tutorial is understanding the essential stitches involved. These include the slip knot, chain stitch, slip stitch, and double crochet stitch. These foundational techniques make up the structure of the pattern and help shape the square evenly as you work each round.
Many crocheters begin by creating a magic ring or a small chain loop to form the center of the square. This creates a neat and flexible base, allowing the stitches to expand outward. The center ring is important because it determines how the rest of the square develops and how symmetrical the final piece appears.
Color changes are a hallmark of granny squares. Switching yarn colors between rounds creates a layered, vibrant effect. You can follow traditional color placement or create your own unique combinations. The color choices add personality and visual depth to your square.
Each round of a classic granny square typically consists of clusters of double crochet stitches separated by chain spaces. These spaces allow the square to grow evenly without curling or warping. The clustering technique also gives the granny square its well-known “holey” appearance.
Corners are formed by working extra chains and clusters in specific points. This ensures the square shape stays consistent as it expands. Mastering corner placement is one of the key skills in this tutorial.
Finally, the granny square grows in size round by round. You can make it small for coasters and motifs or keep adding rounds to create blankets, shawls, and large projects. The growth is infinite and customizable.
Materials Needed for a Classic Granny Square
To follow the Classic Granny Square Tutorial, you only need a few basic supplies. The first essential item is yarn. Most crocheters start with medium-weight yarn because it is easy to handle and creates well-defined stitches. Acrylic or cotton yarns are excellent choices for beginners and offer durability.
A crochet hook is the next important tool. Hook sizes vary depending on the yarn weight you choose. A 4mm to 5mm hook works well for medium-weight yarns. Choosing the right hook ensures comfortable tension and smooth stitch flow.
Scissors are necessary for cutting yarn during color changes or when finishing your square. Sharp, small scissors are ideal for clean cuts without fraying the fibers. Keeping them nearby will speed up your workflow.
A yarn needle helps weave in ends after completing your square. Clean finishing is essential for achieving a professional appearance. Weaving in ends prevents unraveling and makes your work more durable.
Optional tools include stitch markers. These can help you keep track of rounds, mark corners, or maintain symmetry while learning. Although not mandatory, they are especially helpful for beginners.
Lastly, having good lighting and a comfortable workspace enhances your crocheting experience. Being able to clearly see your stitches ensures accuracy and reduces hand strain.
Step-by-Step: Following the Classic Granny Square Tutorial
The Classic Granny Square Tutorial traditionally begins with a slip knot and a foundation chain. Most patterns start with four chains joined into a ring, although some crafters prefer the magic circle technique for a tighter center. Either method will work beautifully depending on your preference.
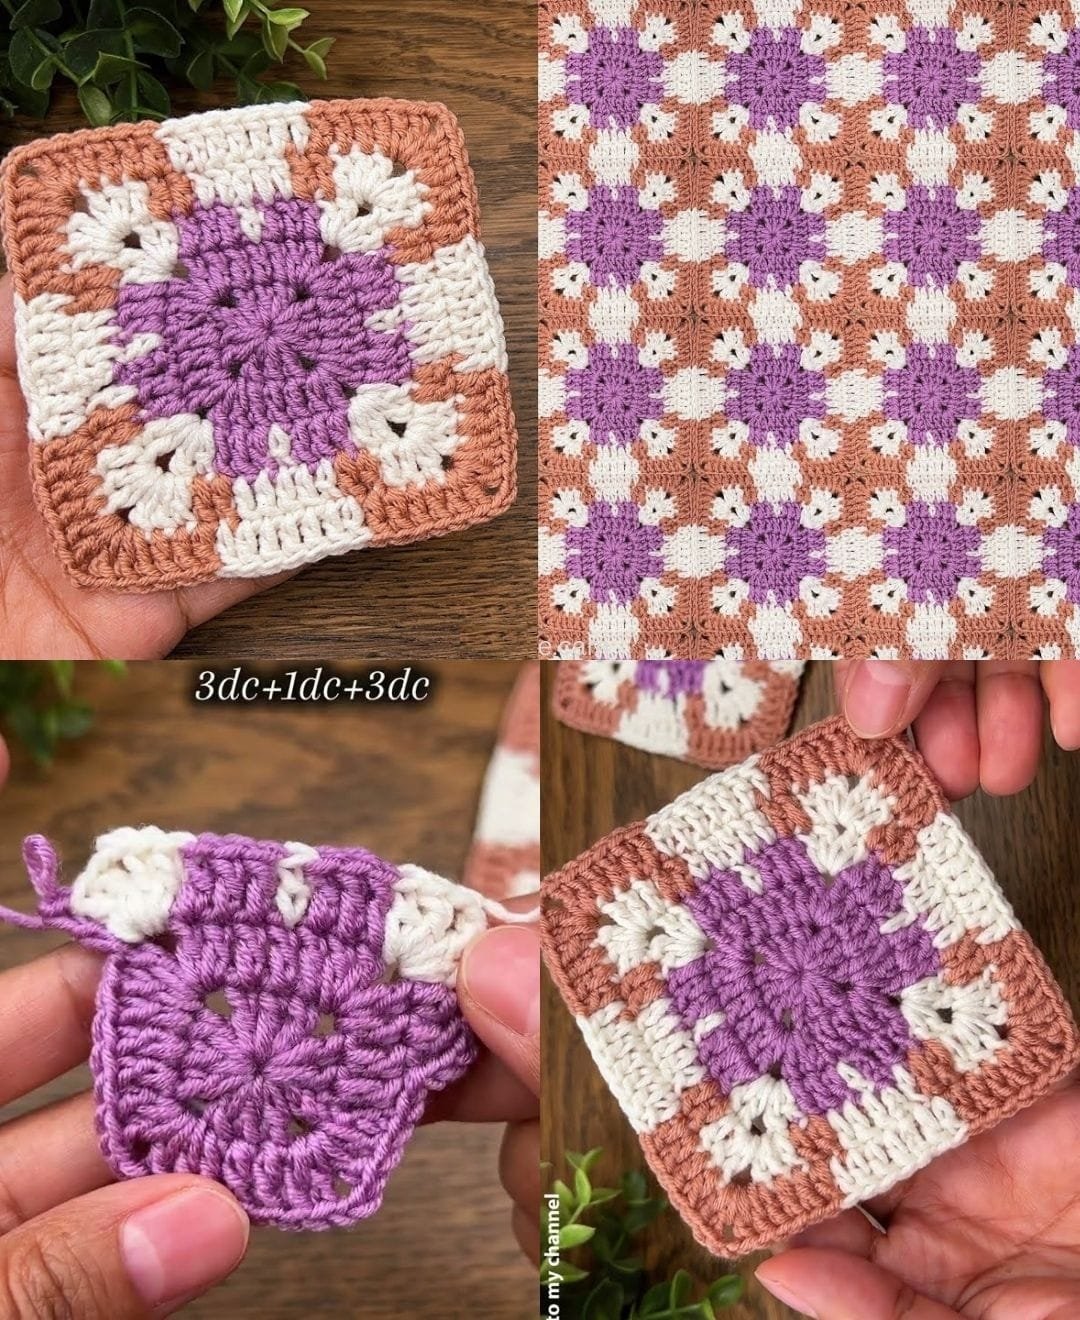
Once you have your center ring, the next step is to crochet your first round of clusters. This usually consists of three double crochet stitches, followed by a chain space, repeated four times. These clusters form the foundation of the square and establish its iconic look.
The second round introduces corner building. In each corner space, you typically crochet two clusters separated by chains. This creates the angles that shape the square. Working carefully in each corner ensures your square stays even and flat.
As you continue adding rounds, the sides increase in length while corners maintain their structure. Each new round includes more cluster groups along the sides, giving the square its expanding shape. The process becomes rhythmic, and many crocheters find it meditative.
Color changes are often added between rounds. To change colors, simply finish the round, fasten off, and join the new color with a slip stitch in a corner space. This technique creates crisp, clean transitions and highlights each round beautifully.
The final step is fastening off and weaving in all yarn ends. This simple finishing touch gives your square a clean look, ready to be assembled into larger projects such as blankets, bags, scarves, or clothing.
Creative Ways to Use Classic Granny Squares
One of the greatest joys of mastering the Classic Granny Square Tutorial is exploring the endless possibilities for using your finished squares. The most traditional project is a granny square blanket. Whether made with uniform colors or vibrant multicolored pieces, these blankets are warm, nostalgic, and visually stunning.
You can also create decorative pillow covers. Joining several squares forms beautiful geometric patterns that bring charm and coziness to living rooms, bedrooms, or reading nooks. They are quick to assemble and easy to customize to match your home décor.
Fashion accessories are another popular use. Granny squares can be turned into bags, totes, cardigans, shawls, vests, and even hats. Their modular nature makes them perfect for mix-and-match designs and unique garments full of personality.
Home décor items such as table runners, placemats, coasters, and wall hangings also benefit from the classic granny square style. These small projects allow you to experiment with colors and patterns without committing to a large project.
Baby items are especially cherished when made from granny squares. Baby blankets, stroller covers, soft toys, and nursery décor pieces all look charming in granny square motifs. They make wonderful handmade gifts full of sentimental value.
Seasonal items like Christmas stockings, holiday garlands, or themed décor add festive cheer using simple granny squares. With just a few color changes, you can create designs for any season or celebration.
FAQ – Classic Granny Square Tutorial
1. Is the classic granny square good for beginners?
Yes, it is one of the most beginner-friendly crochet patterns due to its repetitive and easy-to-follow structure.
2. How long does it take to make one granny square?
Depending on your skill level, a granny square can take anywhere from 10 to 30 minutes.
3. Can I use different yarn weights?
Absolutely. The granny square works with any yarn weight as long as you use a compatible hook size.
4. How do I keep the square from twisting?
Maintain consistent tension and be sure to place your corner stitches correctly to avoid twisting or warping.
5. What projects can I make with granny squares?
Blankets, bags, clothing, pillows, accessories, home décor, and countless creative items.
Conclusion
The Classic Granny Square Tutorial is a timeless and essential guide for anyone who loves crochet. By learning the basic stitches, practicing the structured rounds, and exploring color combinations, you unlock endless creative possibilities.
VIDEO TUTORIAL
Whether your goal is to make cozy blankets, stylish accessories, or meaningful handmade gifts, granny squares offer an accessible and rewarding foundation.

