Looking for a beginner-friendly and adorable project? This Baby Crochet Shoes Free Pattern is just what you need. Whether you’re crafting a gift for a baby shower, preparing for a new family arrival, or simply diving into a relaxing creative hobby, baby crochet shoes are a heartwarming and satisfying item to make. These tiny masterpieces combine charm and functionality, giving babies a warm and soft footwear option while letting you enjoy the joy of handmade craftsmanship.
From simple and classic styles to more decorative and playful designs, Baby Crochet Shoes can be made in countless ways to suit every taste. The beauty of these patterns is that they can be customized to match any outfit, personality, or occasion. Plus, since they are small in size, they’re ideal for quick projects and using leftover yarn from other creations.
In this guide, we’ll explore everything you need to know to create your own Baby Crochet Shoes Free Pattern from scratch. We’ll walk through pattern basics, tools and yarn suggestions, tips for achieving a perfect fit, and inspiring ideas for personal touches. Whether you’re an experienced crocheter or a first-timer, this article will help you bring adorable little baby booties to life with ease and style.
Understanding the Basics of Baby Crochet Shoes
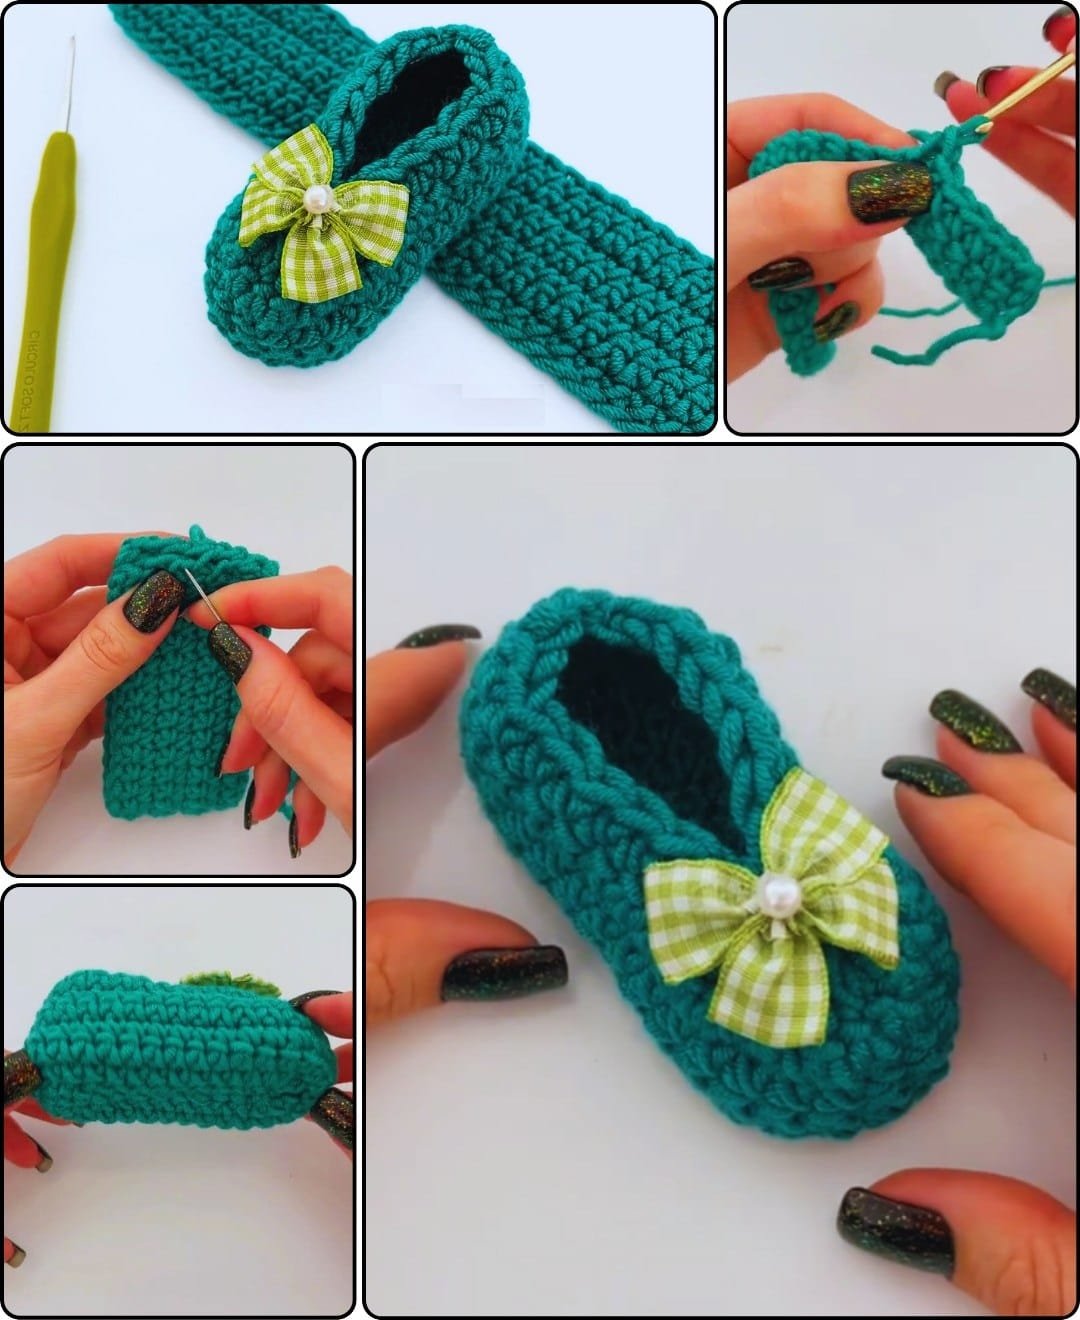
When it comes to Baby Crochet Shoes, understanding the fundamentals is key to success. These shoes typically consist of three parts: the sole, the body, and the finishing touches like buttons or laces. Each part plays an important role in the shoe’s comfort and overall appearance.
Beginners will be pleased to learn that many baby crochet shoes patterns only require basic stitches such as the chain stitch, single crochet, and slip stitch. This makes them a perfect starting point for those new to the craft. Even if you’re still learning how to hold the hook properly, baby shoes offer a manageable learning curve.
Choosing the right yarn is also essential. Soft, breathable yarns such as cotton or bamboo blends are ideal. These materials are gentle on a baby’s delicate skin and offer good flexibility. Avoid anything scratchy or synthetic, as babies tend to be sensitive to textures.
The size of the hook you use can also make a difference. Usually, smaller hooks ranging from 2.5mm to 3.5mm are recommended for tighter, neater stitches. This ensures the shoes retain their shape and do not become too loose with wear.
Finally, it’s important to remember that baby crochet shoes are not just functional—they’re also decorative. Adding embellishments such as bows, tiny flowers, or animal faces can make them even more special and unique. These little details are often what turn a handmade shoe into a treasured keepsake.
With a clear understanding of the basics, you’re ready to explore tools, patterns, and techniques that will help bring your Baby Crochet Shoes Free Pattern to life.
Tools and Materials You’ll Need
Before you start creating your Baby Crochet Shoes, it’s essential to gather the right tools and materials. Having everything ready will make the process smoother and more enjoyable.
Start with the yarn. As mentioned earlier, opt for soft yarns that are breathable and hypoallergenic. Cotton yarn is a top choice for baby shoes due to its softness and durability.
Next, choose the correct crochet hook. The recommended size often depends on the yarn you’re using, but for baby shoes, hooks between 2.5mm to 3.5mm are typically best. Always check the yarn label for suggested hook sizes.
A yarn needle is a must-have for weaving in ends and sewing parts together. It helps give your shoes a clean, finished appearance.
Stitch markers can be especially helpful if you’re working in the round or need to keep track of specific points in your pattern. They help prevent mistakes and ensure symmetry in your work.
You’ll also need scissors for cutting yarn and trimming loose ends. A sharp pair of small craft scissors works best for precision.
Optional materials include buttons, ribbons, or snap closures. These can be used to fasten the shoes or simply decorate them for added charm. Just be sure to securely sew any small parts, as they can pose a choking hazard if not properly attached.
With these tools in hand, you’re well on your way to completing your first pair of Baby Crochet Shoes with confidence and care.
Step-by-Step Guide to a Baby Crochet Shoes Free Pattern
Now let’s dive into a basic Baby Crochet Shoes Free Pattern to get you started. This pattern is beginner-friendly and uses simple stitches to create a cute and functional pair of baby booties.
Step 1: Create the sole
Start by chaining 10-12 stitches depending on the size you want. Then work single crochets down one side of the chain, around the end, and back up the other side. Increase at the rounded ends to create an oval shape.
Step 2: Build the shoe body
Once the sole is complete, work around it in rounds using half double crochet or single crochet stitches. Gradually decrease near the toe area to shape the front of the shoe.
Step 3: Add a strap or closure
Crochet a simple strap across the top and fasten it to the other side with a button or tie. You can also crochet a simple cuff to make a slipper-style shoe.
Step 4: Customize the design
Use contrasting yarn to add a border or small embellishments. You might add a little flower or even a crocheted bow to give it extra personality.
Step 5: Make the second shoe
Repeat the steps carefully to ensure both shoes are identical. It helps to count stitches and follow your pattern closely for consistency.
Step 6: Weave in ends and inspect
Use your yarn needle to weave in all loose ends neatly. Check for any gaps, loose threads, or asymmetry and make minor adjustments if needed.
By following these steps, you’ll complete a delightful pair of Baby Crochet Shoes that are perfect for gifting or keeping.
Tips for Perfecting Your Crochet Baby Shoes
Even though Baby Crochet Shoes are relatively simple, a few extra tips can elevate your final result and help you avoid common mistakes.
Tip 1: Gauge matters
Before starting your full project, create a small swatch to check your tension. If your gauge is off, your shoes may end up too large or too tight.
Tip 2: Use stitch markers
They help maintain balance, especially when crocheting in the round. Mark the beginning of each round and points where increases or decreases occur.
Tip 3: Count your stitches
Consistency is crucial. Keep a close eye on your stitch count to ensure symmetry between the left and right shoe.
Tip 4: Choose colors wisely
Soft pastels and neutral tones are classic choices, but don’t be afraid to play with bolder combinations for a unique look.
Tip 5: Block your shoes
Lightly mist and shape your finished shoes, then let them dry to set the shape. This can help give them a professional appearance.
Tip 6: Practice makes perfect
Don’t be discouraged if your first pair isn’t flawless. Each attempt improves your skills, and soon you’ll be designing your own versions of Baby Crochet Shoes with ease.
Frequently Asked Questions (FAQ)
What size should I make the baby crochet shoes?
Baby shoe sizes vary by age. For newborns, 3 to 3.5 inches is common, while older babies may need 4 inches or more. Always refer to a baby size chart for accuracy.
What is the best yarn for baby crochet shoes?
The best yarn is soft, non-irritating, and breathable. Cotton and bamboo blends are top choices. Avoid scratchy or synthetic yarns.
Can I machine wash crochet baby shoes?
It depends on the yarn. Cotton shoes are usually machine washable, but it’s safest to hand wash and lay flat to dry to preserve shape and quality.
Do I need to follow a pattern exactly?
Not necessarily. Once you’re comfortable, feel free to modify colors, add embellishments, or experiment with shapes. However, beginners should follow a basic pattern closely.
Are crochet baby shoes safe for babies to wear?
Yes, as long as they are securely made and no small parts (like buttons) can come loose. Always check for strong stitching and tight fastening.
How long does it take to make a pair of baby crochet shoes?
For most beginners, a pair can be completed in 2–4 hours. With experience, you may finish even faster.
Conclusion
Creating your own Baby Crochet Shoes Free Pattern is not only a fun and rewarding project but also a meaningful gift that showcases your creativity. From understanding the basics to crafting with care and adding personal flair, this guide has walked you through every step to help you succeed.
With just a few materials and a little time, you can produce beautiful, functional shoes that babies (and parents!) will love. Whether for your child, a friend’s baby, or even as a handmade shop product, these crochet shoes are sure to be a hit.
We hope this guide has helped you feel inspired and confident in starting your next crochet adventure. If you’ve followed along or already made a pair, leave your honest opinion and share your thoughts or suggestions — your feedback helps improve and grow our crafting community!

