The Basic Granny Blanket Pattern is one of the most beloved crochet projects for both beginners and experienced crafters. Known for its simplicity, versatility, and timeless charm, this classic pattern is a wonderful choice if you want to create something cozy, colorful, and personal. Whether you are making it for your home, as a gift, or simply as a relaxing hobby, the Basic Granny Blanket Pattern offers endless creative possibilities.
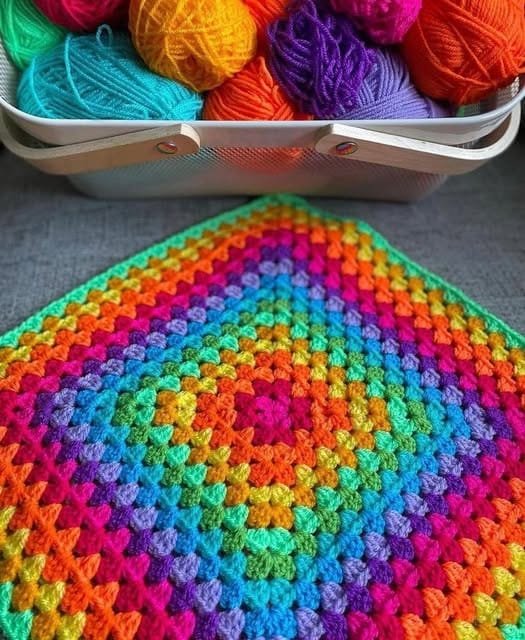
One of the greatest advantages of working with this pattern is that it allows you to experiment with different yarn colors, textures, and sizes. You can create a small baby blanket, a medium throw for your sofa, or even a large bedspread. This adaptability is why the Basic Granny Blanket Pattern has remained a favorite for generations. It’s a project that grows with you, adapting to your skill level and style preferences.
If you are just starting out in crochet, this pattern can be your gateway to mastering fundamental stitches and techniques. For advanced crafters, it becomes a canvas for intricate color combinations and creative border designs. In this guide, we will explore the basics of the Basic Granny Blanket Pattern, tips for choosing the right materials, variations you can try, and ways to give your blanket a professional finish.
Understanding the Basic Granny Blanket Pattern
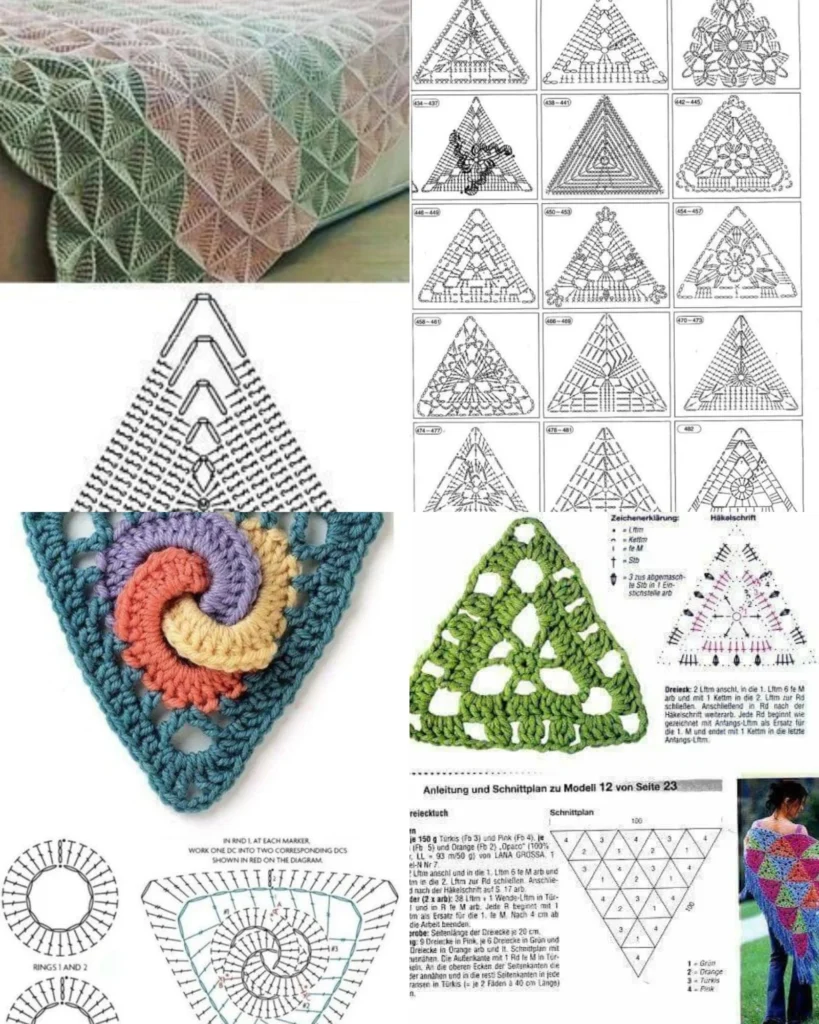
The Basic Granny Blanket Pattern is built using a simple stitch repetition that creates a square motif. This square can be expanded indefinitely, which means your blanket can be as small or as large as you wish. The most common stitch combination includes chains and double crochets, arranged in groups that form the signature “granny” clusters.
Each round of the pattern is typically worked in a different color or shade, which adds visual interest and character to the blanket. You can choose a bold, vibrant palette for a playful look or soft, neutral tones for a more minimalist design. The beauty of the Basic Granny Blanket Pattern lies in its flexibility—there is no single “right” way to make it.
The construction process usually starts with a small loop, followed by several rounds that gradually expand the square. As you become familiar with the stitch pattern, the work becomes meditative, making it an excellent project for relaxing evenings.
Even though this pattern is beginner-friendly, it’s also endlessly customizable. More advanced crocheters can integrate different stitch textures, decorative borders, or even mix and match various yarn weights. The Basic Granny Blanket Pattern truly offers something for everyone.
When working on this type of blanket, maintaining an even tension is key to achieving a neat, uniform finish. Uneven tension can lead to wavy edges or an uneven shape. Taking your time and practicing consistency will pay off in the final result.
Lastly, remember that blocking your finished blanket—lightly stretching and shaping it while damp—can help it lay flat and give it a polished look. This final step is often overlooked but makes a significant difference in the blanket’s appearance.
Choosing the Right Materials
The success of your Basic Granny Blanket Pattern project depends heavily on selecting the right yarn and hook size. Your choices will determine the texture, warmth, and overall look of the finished blanket.
For a soft and cozy feel, acrylic or blended yarns are excellent options. They are affordable, come in a wide variety of colors, and are easy to care for. Cotton yarns, on the other hand, provide a lighter texture and are perfect for summer blankets. If you want something truly luxurious, wool or alpaca blends can add warmth and a touch of elegance.
The hook size you choose should match the yarn weight. Most yarn labels include recommended hook sizes, which you can use as a guide. However, don’t be afraid to adjust your hook size to achieve the drape and tension you prefer. A larger hook will produce a looser, softer fabric, while a smaller hook will create a denser, sturdier blanket.
Color selection plays a big role in the personality of your blanket. You might choose a single color for a classic, understated look, or multiple shades for a vibrant, playful style. Many crocheters enjoy using leftover yarn from other projects to create a patchwork effect.
If you plan to make a large blanket, consider the weight of the finished piece. Heavier yarns will add warmth, but they may also make the blanket bulky. Lightweight yarns are easier to manage and drape beautifully over furniture.
It’s also worth investing in a comfortable ergonomic crochet hook if you plan on working on larger projects. This will help prevent hand fatigue and make the crocheting process more enjoyable.
Finally, keep in mind that the quality of your yarn affects the durability of your blanket. Higher-quality yarns are less likely to pill or lose their shape over time, ensuring your Basic Granny Blanket Pattern remains beautiful for years to come.
Step-by-Step Tips for Crocheting
Once you have your materials ready, it’s time to start working on your Basic Granny Blanket Pattern. While there are many variations, the general method remains straightforward.
Start with a slip knot and chain four to six stitches, then join them into a loop with a slip stitch. This small loop will be the center of your blanket. From here, you’ll work the first round, usually consisting of chain stitches and double crochet clusters.
In each subsequent round, you will add more clusters, separated by chain spaces. The corners are where you increase your work, usually by adding extra chains or clusters, so the blanket continues to expand evenly into a square shape.
A common mistake beginners make is not keeping track of stitch counts at the corners. This can cause the blanket to warp or become uneven. Counting carefully in the first few rounds helps establish the correct shape and makes later rounds easier.
Changing colors between rounds is a fun way to add personality. To do this neatly, finish a round with the current color, cut the yarn, and join the new color in any corner space. This technique keeps the color changes clean and organized.
It’s important to weave in your yarn ends as you go, rather than leaving them all for the end. This will save time and keep your work tidy. A yarn needle is perfect for securing these ends discreetly into the stitches.
Finally, don’t rush the process. The Basic Granny Blanket Pattern is meant to be enjoyable and relaxing. Focus on consistent stitches, and allow yourself to appreciate the gradual progress.
Finishing and Customizing Your Blanket
Once your blanket has reached the desired size, it’s time to think about finishing touches. The right edging or border can take your Basic Granny Blanket Pattern from simple to stunning.
One popular option is a scalloped edge, which adds a delicate, decorative touch. This is achieved by working a series of stitches of varying heights along the edge to create soft curves. Another choice is a picot edge, which uses small loops for a neat, lacy finish.
If you prefer a clean, modern look, you can opt for a simple single crochet border in one solid color. This frames the blanket and helps stabilize the edges, especially if you’ve used multiple colors throughout the piece.
Blocking your blanket is another key finishing step. Lay it flat on a clean surface, gently stretch it to the desired shape, and lightly mist it with water. Allow it to dry completely before moving it. Blocking ensures your blanket lies flat and shows off your stitch work beautifully.
Adding personalized touches like embroidery, appliqués, or even attaching tassels or pom-poms to the corners can make your blanket truly one of a kind. These little details reflect your style and make the blanket even more special.
You can also consider lining the blanket with fabric for extra warmth or to give it a different texture on the reverse side. This is a more advanced customization but can be worth the effort for a unique look.
Lastly, remember to label your handmade creation if it’s a gift. A small tag with your name or a special message adds sentimental value and turns your Basic Granny Blanket Pattern into a treasured keepsake.
FAQ – Basic Granny Blanket Pattern
1. Is the Basic Granny Blanket Pattern suitable for beginners?
Yes, it’s one of the most beginner-friendly crochet patterns. The stitches are repetitive and easy to learn, making it a great project to practice basic crochet skills.
2. How long does it take to make a granny blanket?
The time varies depending on the blanket size, yarn weight, and how much time you spend crocheting each day. A small blanket may take a week, while a large one can take several weeks or months.
3. What is the best yarn for a granny blanket?
Acrylic yarn is popular for its durability and easy care. However, cotton is ideal for warmer climates, and wool blends are great for extra warmth.
4. Can I make a rectangular granny blanket instead of a square?
Yes, with slight modifications to the starting chain and stitch placement, you can adapt the pattern into a rectangle.
5. How do I keep the blanket edges straight?
Make sure to maintain consistent tension and accurate stitch counts, especially at the corners. Adding a border at the end can also help even out the edges.
6. Do I need to block my granny blanket?
While not strictly necessary, blocking gives your blanket a neater appearance and helps it lie flat.
Conclusion
The Basic Granny Blanket Pattern is a timeless and versatile crochet project that allows you to create something beautiful, functional, and deeply personal. From choosing the right materials to adding your own finishing touches, every step offers an opportunity to express your creativity. Whether you’re a beginner or an expert, this pattern can be adapted to match your skills, style, and vision.
Now that you’ve learned how to make your own Basic Granny Blanket Pattern, I’d love to hear your thoughts. Share your honest opinion and any suggestions you have—I’m always eager to know how others bring their unique style to this classic crochet design.