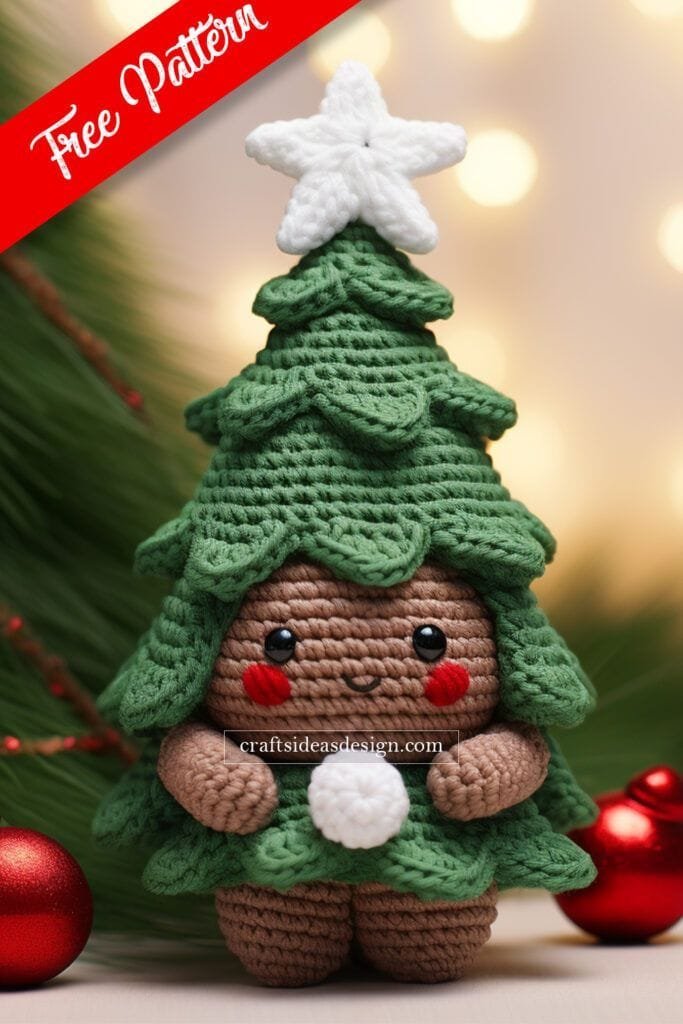
If you’re looking to add a touch of handmade charm to your holiday decor, then this cute amigurumi Christmas tree tutorial is exactly what you need.
Amigurumi is the Japanese art of crocheting small, stuffed toys, and creating a tiny Christmas tree with this technique is a perfect way to bring festive spirit into your home.
Whether you’re new to crochet or a seasoned pro, this tutorial will guide you step by step in making your very own adorable amigurumi Christmas tree.
Not only is this project a fun way to spend time during the holiday season, but it’s also a wonderful gift idea for loved ones.
Imagine gifting a handmade mini Christmas tree that can be displayed on a shelf, desk, or even as part of a Christmas village display. This cute amigurumi Christmas tree will surely bring smiles to everyone who sees it!
In this guide, we’ll cover everything you need to know to make your very own amigurumi Christmas tree. From the materials to the stitches, we’ve got you covered. So, grab your crochet hooks, and let’s get started on this festive crochet adventure!
1. Materials Needed for the Cute Amigurumi Christmas Tree
Before you start crocheting your cute amigurumi Christmas tree, it’s important to gather the necessary materials. Having everything ready will ensure that the process goes smoothly and that your tree looks perfect when finished.
First, you’ll need yarn. A good choice is a medium-weight yarn (like worsted weight) in green for the tree and other colors for decorations. You can also use glittery or metallic yarn for a festive touch, especially if you want a more sparkly tree.
Next, choose a crochet hook. For medium-weight yarn, a 3.5mm or 4mm hook will work perfectly. If you prefer a tighter stitch, use the smaller hook size.
You’ll also need some stuffing. Polyester fiberfill works well for amigurumi projects as it’s lightweight and helps your tree hold its shape.
For the tree’s base, a small amount of brown yarn will help create the trunk, but you can use a different color if you want to personalize your tree. You can also use small beads or buttons for decorations, like ornaments, as well as a bit of yellow or gold yarn for a star topper.
Finally, gather a yarn needle to sew pieces together, some stitch markers to track your rounds, and scissors to trim the yarn. With these materials ready, you’re all set to start your cute amigurumi Christmas tree.
2. Step-by-Step Guide to Crocheting the Base of the Tree
The first step in creating your cute amigurumi Christmas tree is crocheting the base. The base will be the foundation for the entire tree, so it’s important to follow the instructions carefully.
Start by making a magic ring with your green yarn. This allows you to crochet in the round without leaving a hole in the center. Then, work several single crochet stitches into the ring. A common starting point is six single crochets, but you may need to adjust based on your desired tree size.
Next, you’ll need to increase in each stitch for the next few rounds. This means that instead of just working one stitch into each stitch of the previous round, you’ll be working two single crochets into each stitch. This creates a round, expanding shape. Continue working in the round, gradually increasing until you have a wide enough base for your tree.
Once your base is the right size, continue to crochet in straight rounds (without increasing) to start building the tree’s height. This part of the tree will be taller than wide, so keep crocheting in the round until you reach the desired height.
Once you’ve finished the base and body of the tree, stuff it lightly with the polyester fiberfill to give it some structure. You don’t need to overstuff, just enough to make it firm.
When you’re happy with the size and shape of the tree, leave a long tail of yarn for sewing the pieces together and continue to the next steps of decorating and finishing.
3. Adding Decorations to Your Cute Amigurumi Christmas Tree
One of the best parts of making your cute amigurumi Christmas tree is the decorations. The possibilities are endless when it comes to adding personal touches, and this is where you can get creative.
Start with the tree topper. A classic option is a star. To make a star, crochet five small points, joining them together at the base to form a star shape. You can also make a small ball if you want a simple round topper.
For the ornaments, use small pieces of yarn in different colors. You can either crochet tiny circles and sew them onto the tree, or you can use buttons or beads for a more polished look. If you prefer a more natural look, use small crochet flowers or even tiny pinecones made from yarn for a rustic feel.
To make the garland, simply chain a long length of yarn and attach it by sewing it around the tree in a spiraling pattern. If you want a little extra flair, you can use small pompoms or beads along the garland to give it extra texture.
For the tree trunk, crochet a small rectangle or a tight round shape using brown yarn. Attach it securely to the bottom of the tree. If you want to make it look more realistic, you can add some texture by crocheting a few rows of alternating colors for a bark-like effect.
Once all the decorations are in place, take a step back and admire your cute amigurumi Christmas tree. The personal touches make it truly unique and special!
4. Finalizing and Assembling Your Cute Amigurumi Christmas Tree
The final step in creating your cute amigurumi Christmas tree is to assemble the various pieces and give it a polished look. By now, you should have all the components ready, including the tree body, topper, decorations, and trunk.
Start by attaching the tree topper to the top of the tree. Use a yarn needle and secure it tightly so that it doesn’t fall off. If you’re using a star, make sure it’s centered and sits upright.
Next, position and sew the decorations onto the tree. If you used buttons or beads for ornaments, sew them on securely so they don’t come loose. If you used crocheted pieces, make sure they are evenly spaced and attached firmly.
For the tree trunk, sew it onto the base of the tree. Position it in the center and make sure it is straight. You may want to add a little extra stuffing to the trunk if you want it to stand up sturdily.
Once everything is securely in place, check over your tree for any loose ends of yarn and trim them neatly. Take a moment to admire your work! You’ve just created a beautiful and festive cute amigurumi Christmas tree that will brighten up your holiday season.
FAQ
Q1: What type of yarn should I use for an amigurumi Christmas tree?
Medium-weight yarn, such as worsted weight, is ideal for amigurumi projects. It’s thick enough to give the tree a sturdy structure but not too bulky. Green yarn is a must for the tree, but you can get creative with other colors for decorations.
Q2: Can I make a larger or smaller tree?
Yes! To make a larger tree, simply increase the number of stitches in each round. For a smaller tree, use a thinner yarn and a smaller hook. You can adjust the size based on your preferences.
Q3: How do I make the tree stand up?
Ensure the base of the tree is large enough and well-stuffed to provide stability. If necessary, add additional weight to the bottom using a small amount of sand or rice inside the trunk.
Q4: Can I add more decorations to the tree?
Absolutely! Feel free to add more ornaments, garland, or even tiny presents under the tree. The more personalized, the better.
Q5: What can I use for a tree topper?
You can crochet a star, use a button or bead, or even make a little crocheted angel. Anything that suits your style will work!
Q6: How do I attach the decorations securely?
Sew all decorations tightly using a yarn needle to ensure they stay in place. If you’re using beads or buttons, make sure they are sewn on with several passes of yarn for extra security.
Join our VIP broadcast list and gain access to exclusive patterns, all for free. As a VIP member, you’ll receive the best patterns daily, delivered directly to your device. ✨📱 It’s a unique opportunity to stay up-to-date with the latest trends and designs, curated just for you. Don’t miss out on enhancing your projects and discovering new inspirations with the best patterns every day! 🎨🔝
Conclusion
In this tutorial, we’ve covered the entire process of creating a cute amigurumi Christmas tree from start to finish. From gathering materials to adding the perfect decorations, you now have all the knowledge you need to make this adorable project. Whether you’re new to amigurumi or an experienced crocheter, this festive tree is a fun way to celebrate the holiday season.
We hope you enjoyed this project! We’d love to hear about your experience. Feel free to share your thoughts, ask any questions, or suggest ideas for future tutorials. Happy crocheting and have a wonderful holiday season!

